I admit it: I'm a total geek. I love electronics, programming, 3D printing, 3D art, and vintage Apple hardware. I'm always juggling half a dozen projects. I also enjoy documenting it all: my successes, my failures, my experiences... and everything geeky along the way.
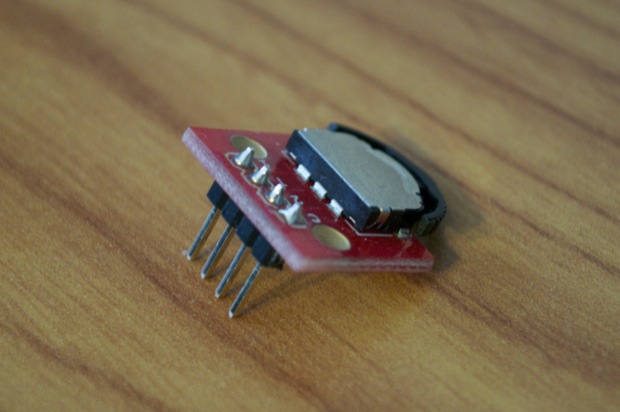
I picked up a cool little SMD 3-way nav switch breakout board from SparkFun in the hopes that I’d be able to incorporate it into my E-Paper Clock design. For the LCD Clock I made, I used 3 buttons. I thought that I’d be able to save some board real estate b yusing a 3-way switch.
The 3-way nav switch has an up, a down, and a center select function. I could use the up and down to advance the hours/minutes, and use the center select as a means to accept changes and move to the next field.
I played around with it for a little bit just to figure out exactly how I could detect the 3 selections.
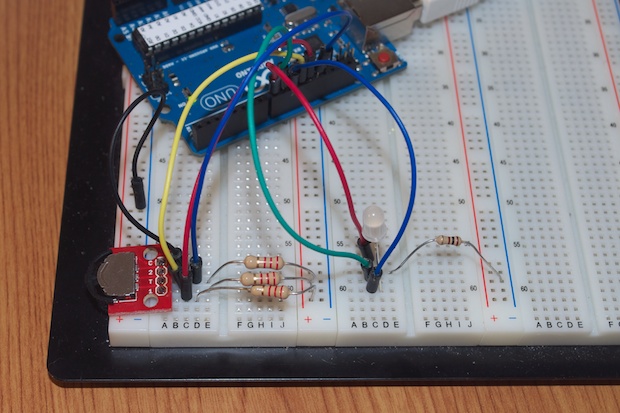
I connected the 3 outputs from the switch to my Arduino on pins 3, 4 and 5. I then connected an RGB LED to pins 11,12, and 13.
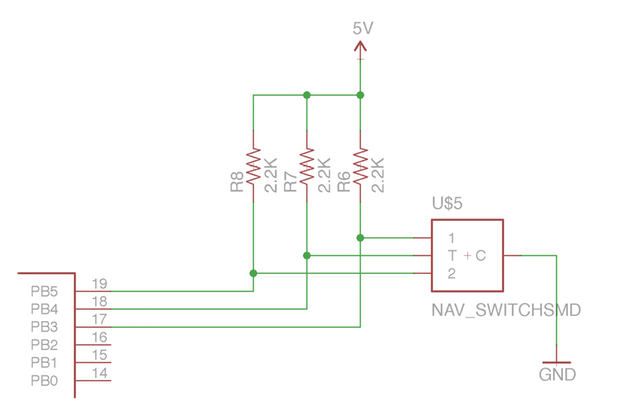
This is what it would look like in Eagle:
I then wrote the following sketch to detect a switch press (up, down, or center) and light up a different color of an RGB LED.
#define buttonPositionTwo 11 //position 2 on button (IN)
#define buttonPositionOne 12 //position 1 on button (DOWN)
#define buttonPositionTee 13 //position T on button (UP)

#define red 7
#define green 6
#define blue 5

void setup () {

  pinMode(buttonPositionOne,INPUT);
  pinMode(buttonPositionTwo,INPUT);
  pinMode(buttonPositionTee,INPUT);

  pinMode(red,OUTPUT);
  pinMode(green,OUTPUT);
  pinMode(blue,OUTPUT);

}

void loop () {

  digitalWrite(red, LOW);
  digitalWrite(green, LOW);
  digitalWrite(blue, LOW);

  if (digitalRead(buttonPositionOne) == LOW) {

    digitalWrite(red, HIGH);
  }

  if (digitalRead(buttonPositionTwo) == LOW) {

    digitalWrite(green, HIGH);
  }


  if (digitalRead(buttonPositionTee) == LOW) {
    digitalWrite(blue, HIGH);
  }
}
Here it is in action: UP - blue, CENTER - red, DOWN - green:
It looks like it’s going to work out pretty well!
The breakout board is $6.95. I know that’s pretty expensive considering the switch itself is only $1.50. Why the breakout board is $5.45 is a mystery. Unfortunately, there’s no way to prototype without it.
I’d like to start using some of the Sick of Beige enclosures from Seeed Studio. If I incorporate the 3-way nav switch into my design, I won’t have to drill/laser cut holes into the acrylic for buttons. I can mount the 3-way nav switch so that it’s accessible from the side of the PCB.