I admit it: I'm a total geek. I love electronics, programming, 3D printing, 3D art, and vintage Apple hardware. I'm always juggling half a dozen projects. I also enjoy documenting it all: my successes, my failures, my experiences... and everything geeky along the way.
Bootloading ATmegas with my Bare Bones Arduino Board | Kevin Rye.net - Main
If you shop around for ATmega328s, the average price you’ll find them from a reputable source is around $5-$6 bucks. SparkFun sells them preloaded with a bootloader for $5.50. ($4.30 without the bootloader) Adafruit charges $5.95. If you want to go with one of the “big guys”, you can get an ATmega328 from DigiKey for $3.16. Of course, no bootloader. You might save a couple bucks up front, but you’ll lose that money on a programmer to burn the bootloader. How many chips will you have to burn before you’ve paid for the programmer? At least 15, since your average programmer is ~$15.
Another option is to just use the Arduino as a programmer. It’s easy.
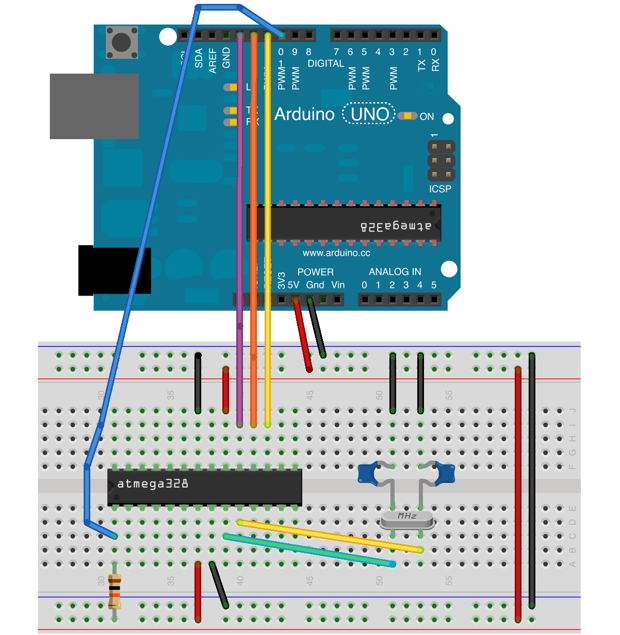
You just have to breadboard your target ATmega328 and connect your Arduino to it like this:
You then upload the “ArduinoISP” example sketch to your Arduino board, change the “Programmer” setting to “Arduino as ISP”, add a 10 uF cap across RESET and GND, and select “Burn Bootloader” from the “Tools” menu. It sounds like a lot, but you can do in all of 5 minutes.
Although it only takes a couple of minutes, I still find it to be a big pain having to set up each time. Especially when your breadboard is already in use. Instead of having to go through the hassle every time I ordered an ATmega, I figured I’d just cough up the extra dollar or two and buy them with the bootloader pre-installed.
That was until the other day when I found myself suddenly in need of 5 more ATmegas. I hopped on SparkFun.com and added 5 ATmegas to my cart. Another $5 bucks in shipping put my order over $30 dollars. I wasn’t feeling that at all. $30 bucks for a couple of AVRs? There has to be a cheaper option!
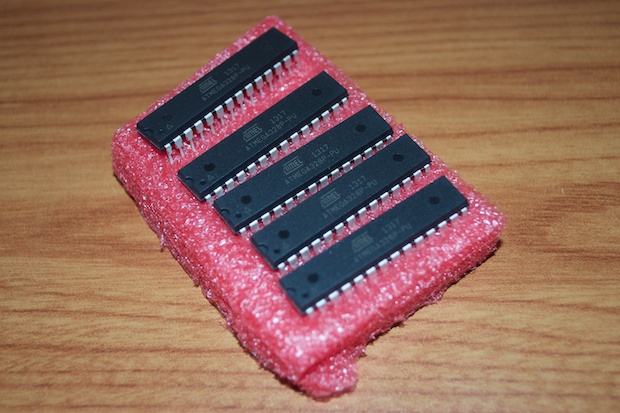
I hopped on eBay and found that you can get them from China for $2 a pop. I ordered a 5 pack for $10.50 with free shipping. You can’t beat that! I just crossed my fingers and hoped that they weren’t fakes.
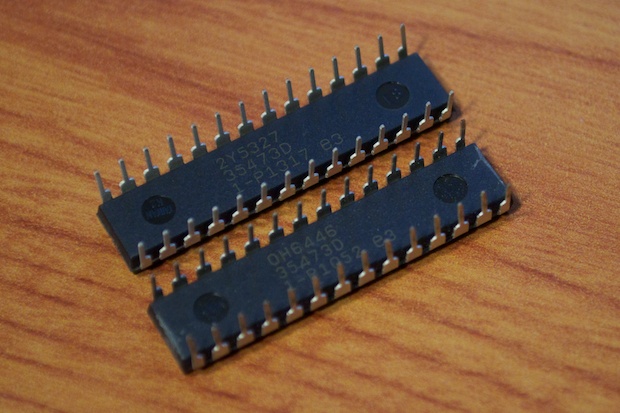
I got the chips in today and was relieved to see that they appear to be authentic. Most fakes don’t go to the trouble of printing the text on the bottom.
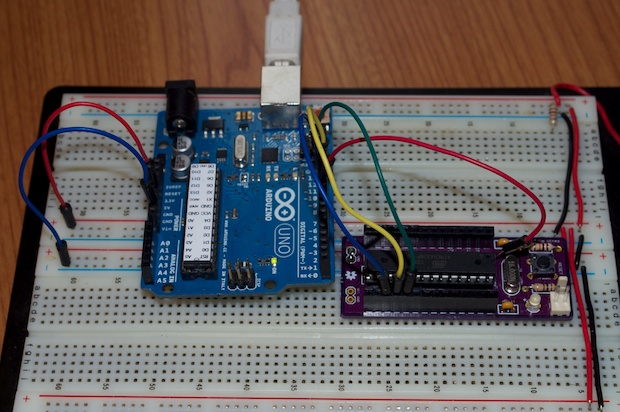
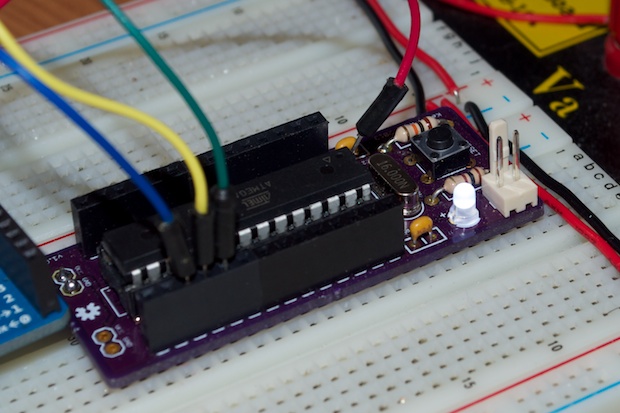
Rather than breadboarding them with caps and crystals, I opted to speed up the process by using one of my Bare Bones Arduino boards.
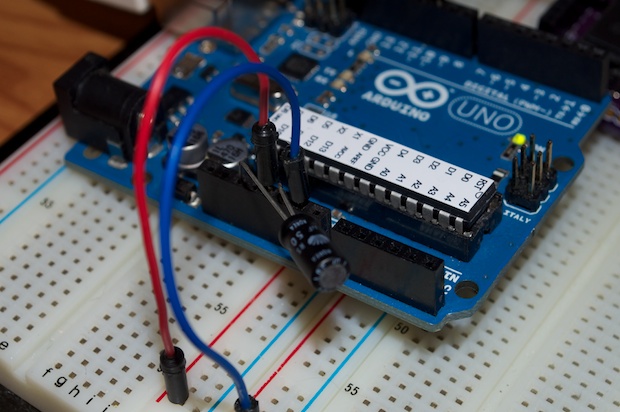
I connected my Arduino Uno to my Bare Bones Arduino.
Pin 10 on the Arduino has to go to the RESET pin on the target ATmega. I never thought that I’d have to use the RESET pin on my BBA, so I didn’t bother breaking it out to the header. Oops. Solution? Just jam the wire under the pin.
I then uploaded the “ArduinoISP” sketch. Once that was complete, I connected a 10 uF cap between RESET and GND.
I then selected “Burn Bootloader” from the “Tools” menu. It took about a minute and completed without errors. As a test, I loaded the chip with the Blink sketch. It works.
I then burned the remaining 4 chips. They all tested OK. It felt good saving $20 bucks for what amounted to 10 minutes of work.