I admit it: I'm a total geek. I love electronics, programming, 3D printing, 3D art, and vintage Apple hardware. I'm always juggling half a dozen projects. I also enjoy documenting it all: my successes, my failures, my experiences... and everything geeky along the way.
I’ve been kicking the SoundBox around for a while now just trying to find the best way to pull it off on the cheap. What started out as something that should have been thrown together with spare parts, has slowly turned into a full-fledged project. Originally, I thought it would be a simple thing made for a few bucks. It was supposed to be a small box, you press the button, it farts. That’s it.
Easier said than done.
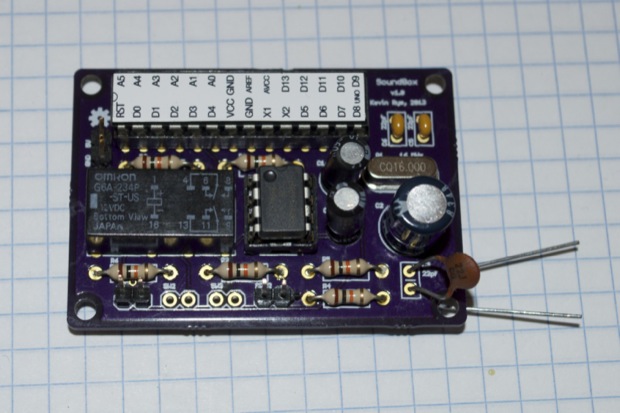
I figured I’d throw together a quick PCB and have it fabbed. I could then use the other 2 boards for future audio projects. I though I was smart and that I’d use a relay to shut the circuit down after it played the fart noise. That way it wouldn’t kill the battery while it sat idle on my desk. Unfortunately, I screwed the whole board up. I don’t know what I was thinking, but it didn’t work.
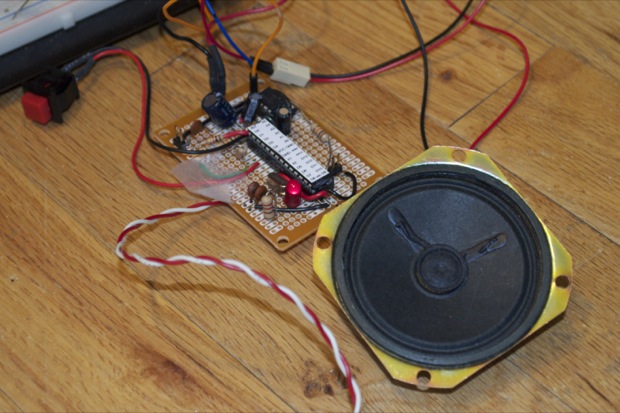
At that point, I decided to throw together a circuit on a protoboard. That was supposed to be the end of it, but it sounded terrible. I made it with stuff that was lying around (as it was supposed to be), so it basically cost me nothing. OK, $5 for the ATmega. I used an LM386 to make it louder, but it wasn’t nearly as loud as I wanted it to be. There’s no way you’d hear it enough once it was all sealed up in a box. That, and it’s just a little bigger than it should be.
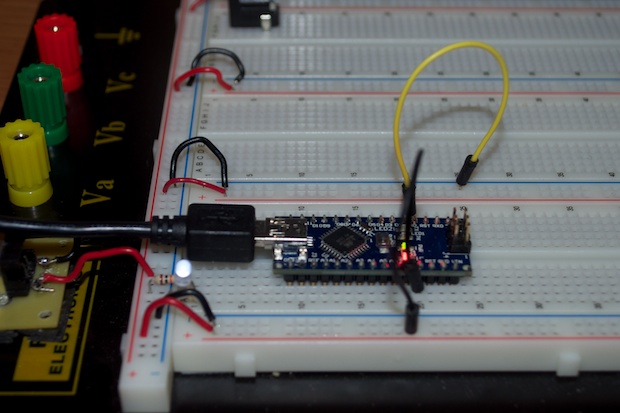
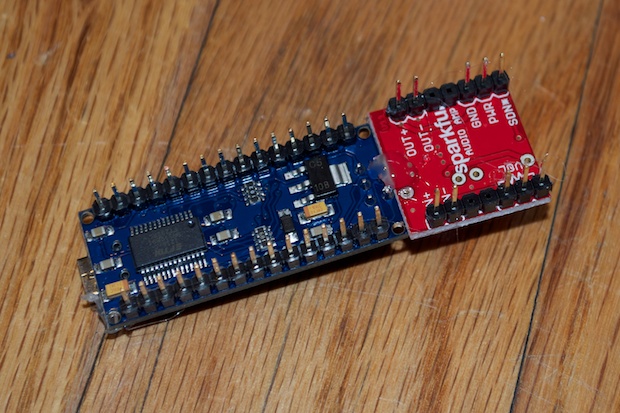
Now it’s not about the SoundBox any more. I’ve already invested enough time on this that I can’t just drop it now. I figured to hell with making a board, I could just use an Arduino Nano for it. How much could they possibly cost? They’re tiny. I didn’t realize that they were $20 a pop. When you think about it, that’s actually a really good price for what you get, but $20 for a box that makes a fart noise? That seemed like a total waste of tech and money. I hopped on eBay to see if I could get one on the cheap. Low and behold, I found clones for $10 bucks. I guess that’ll do!
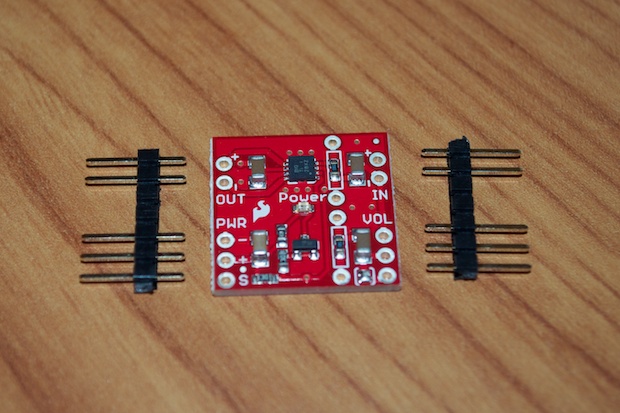
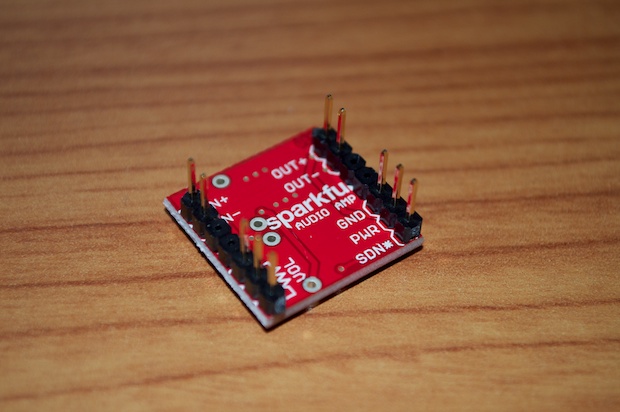
As far as making it loud, I picked up the TPA2005D1 mono amp breakout board from SparkFun. This guy is supposed to be wicked loud, and it’s only $8 bucks. I’m sure it’ll come in handy in the future anyway.
I soldered the headers on so that I could prototype with it on my breadboard first. In the future, I’ll also be able to reuse it if I need to and I won’t have to unsolder anything.
I hooked everything up and gave it a go.
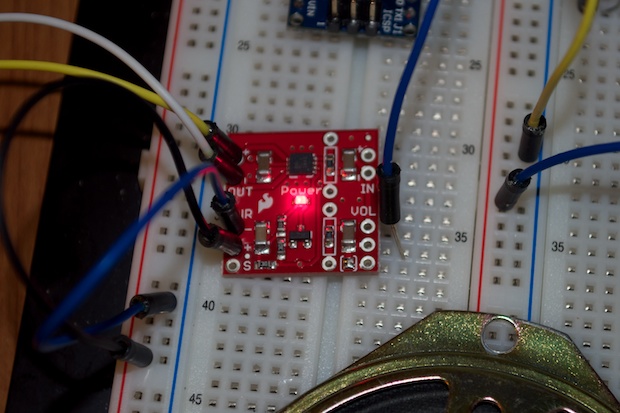
I like how the mono amp has an LED on it so you know it’s on. I vow from this day forward to put an LED status light on everything!
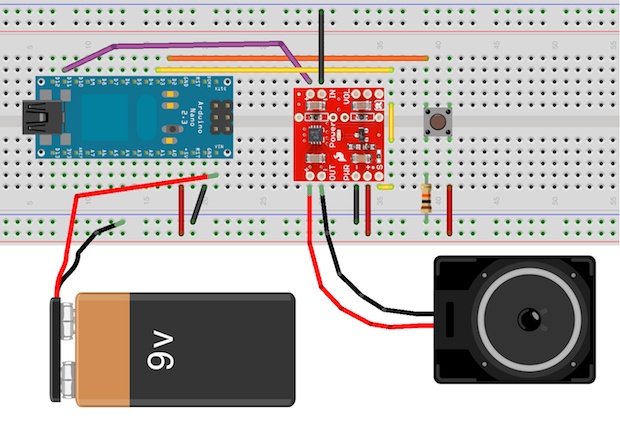
Basically, this is what I came up with:
Again, to save power, I opted to have the Arduino go into sleep mode once it’s finished playing the sound. The original intent was for me to have this thing sit on my desk at work to surprise the unsuspecting person who walked over and pressed the button. You never know when someone’s going to press it, so I didn’t want to have an on/off switch. I wanted it to turn on when you pressed the button, fart, and then shut off.
The mono amp also has the ability to shut itself off when given the signal to do so. So it seemed perfect. I can play the sound, signal the amp to shut off, and then go to sleep. That should do it.
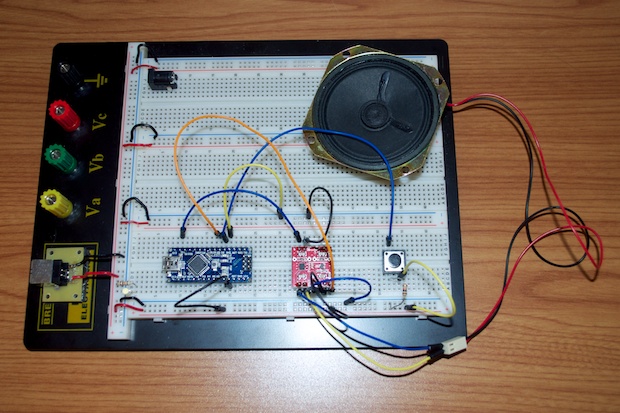
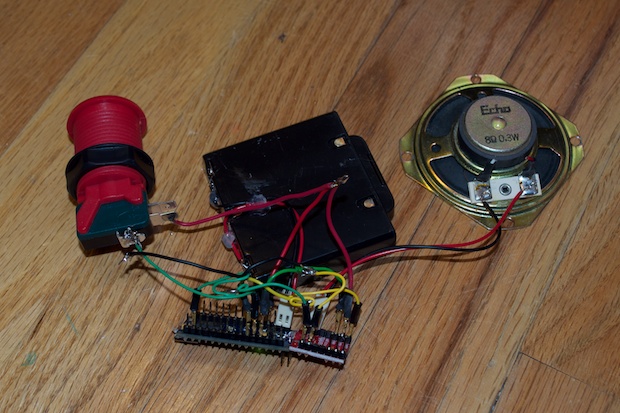
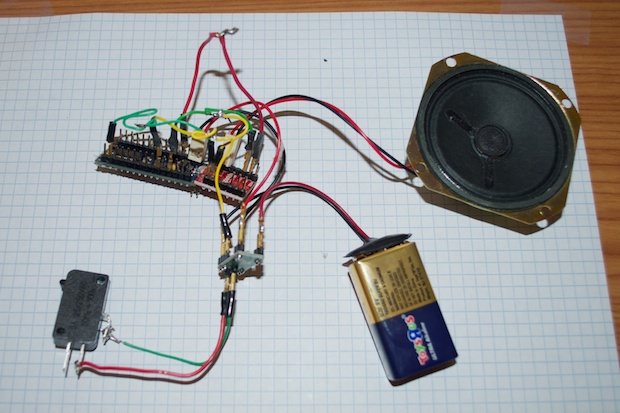
I hot glued the two boards end-to-end.
I then wired everything up.
Works like a charm. You’ll see when the button is pressed, the mono amp turns on, plays the sound, and then shuts off. The Ardunino then goes to sleep after 1 second.
If it were only that easy. That 4xAA battery pack is huge. It’ll never fit in the enclosure I have for it. I tried a 9V, but the battery was dead in 2 days while it was “asleep”. That’s not going to work. It’s still drawing too much power when asleep. It’s a crappy knockoff and the power management stinks. I can’t even program it over USB as-is. I have to have the Arduino connected to my Mac with the USB cable, and have the Vin powered by 5V too.
Originally, it worked for a few hours, but then something happened and it just doesn’t work anymore unless I have Vin powered and the USB cable plugged in. Crappy knockoffs. So I can’t power it off 3.3V, I have to power it off Vin, which is a minimum of 6V. The mono amp can run at a minimum of 2.5, so 3.3V would have been ideal, but I’m stuck at 6V. 4xAAs will be dead in no time. At least a 9V might last a little longer if I can get it to power off. When I say “off”, I mean “off-off”!
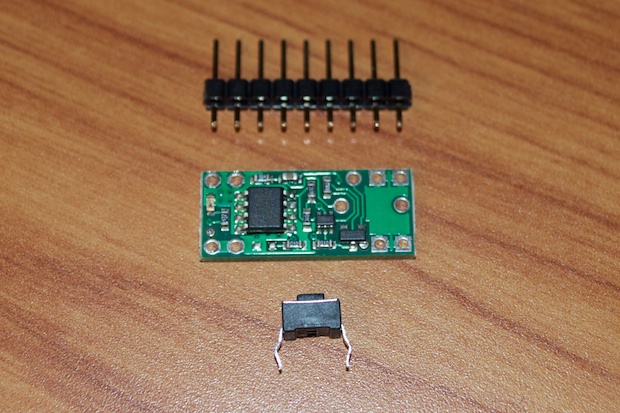
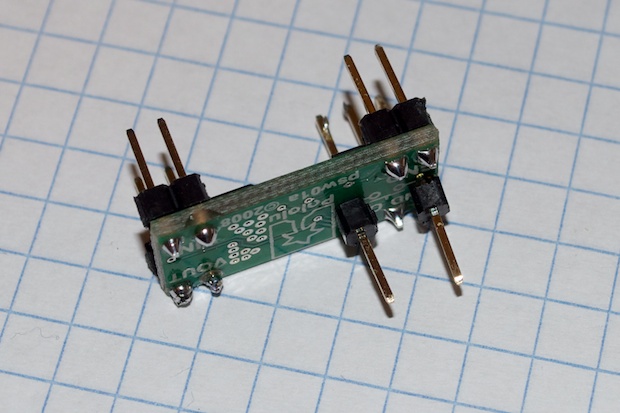
Enter the Pololu switch. This little bad boy can be powered from 4.5 - 20 Volts. What’s so great about it? You can turn it on with the push of a button. It’ll then apply power to your circuit. The clincher is that once given a digital signal to shut off, it’ll “open” the switch and shut off your circuit.
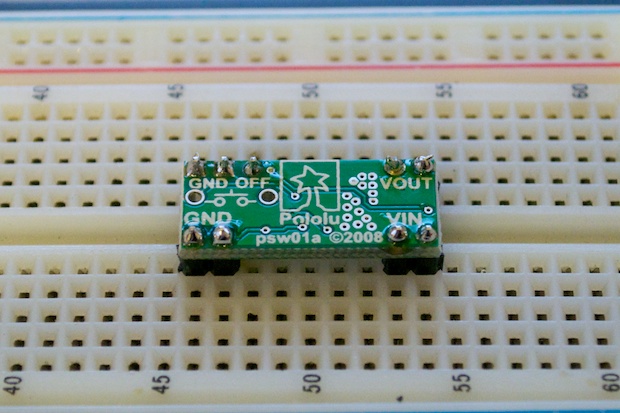
And it’s tiny! It’s the size of an 18-pin DIP. To solder the headers on, I popped it into my breadboard to keep it level. (So yes, you can prototype with it too!)
I guess you’re supposed to solder on that tiny little switch they give you, but I want to use my arcade button. So I soldered on some header pins in the opposite direction. (So that my wires don’t get in the way of each other.)
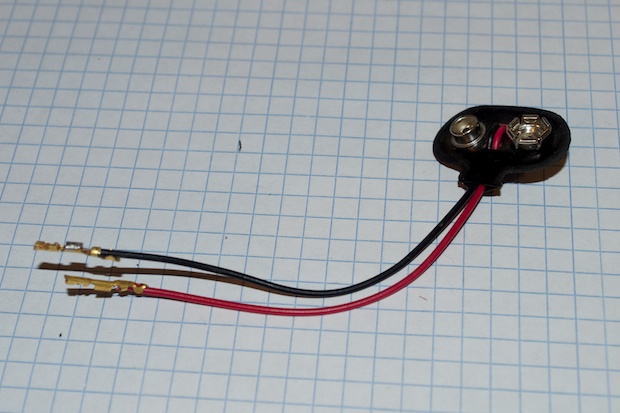
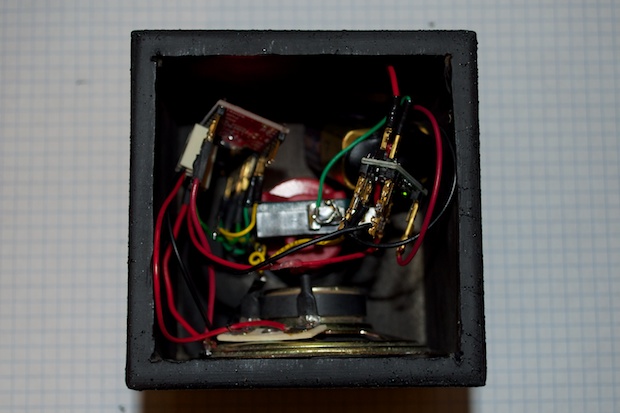
I wired some female connectors to a 9V battery clip...
…and connected everything together. Nothing is permanent. It’s all put together with my home-made jumper cables. If I need one of the parts in the future, it’ll be dead easy to pull it all apart.
It works as advertised.
With the electronics out of the way, it was time to make the enclosure.
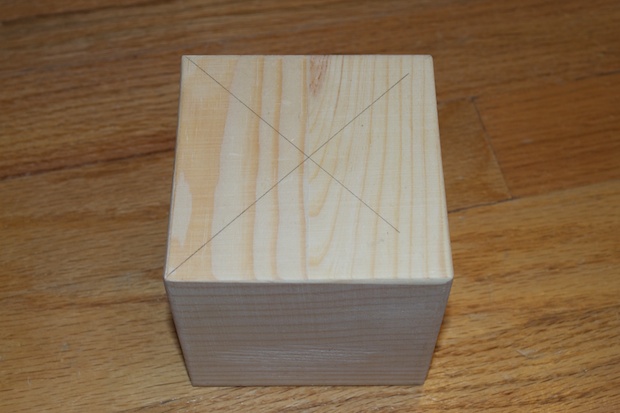
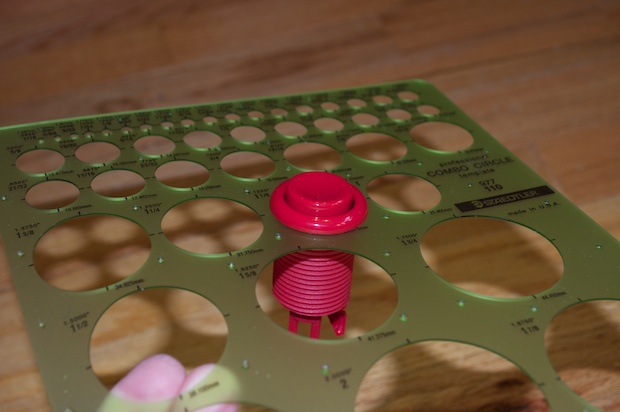
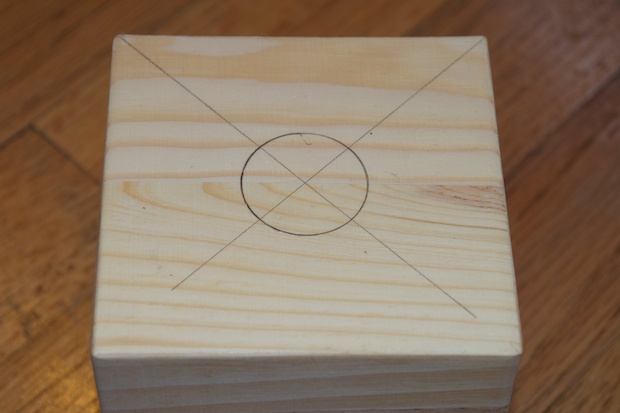
I started with a 3” hollow wooden cube that I found at the craft store. I marked off the center.
I found the perfect hole size for the arcade button...
…and marked it off. I then dremeled it out, along with a cutout on the bottom to insert the guts.
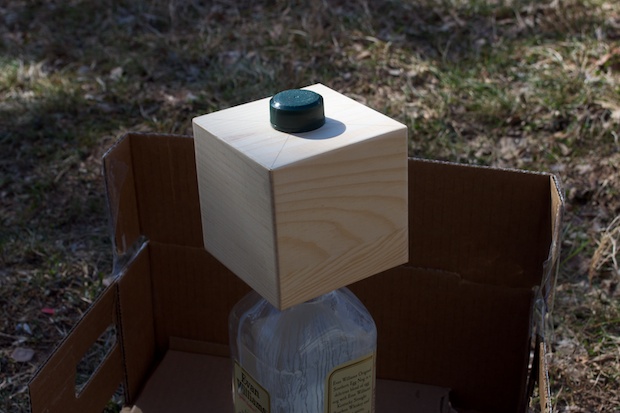
The hole for the arcade button was the perfect size to fit over an old bottle. I was even able to screw the cap on. That way I’d be able to hold the cube by the bottle and spray all the surfaces easily.
I first started with a matte black paint. Once that was dry, I sprayed it with a textured paint to give it a cool-looking black-crackle finish. I then inserted the guts.
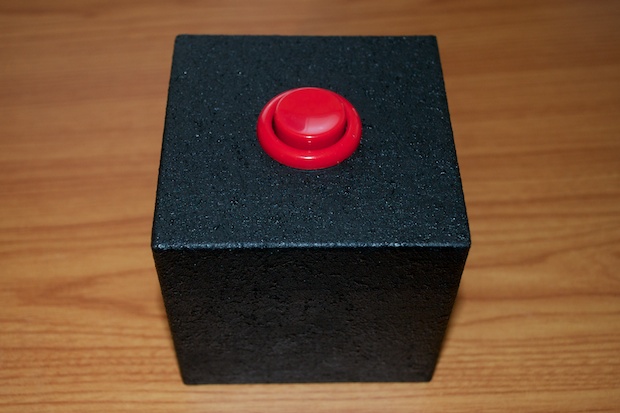
It looks pretty sweet. You so want to press that button don’t you?
As far as a bottom for it, I don’t think I’m going to bother. To be honest, I’ve already spent $30 bucks on electronics. This was supposed to be a quick-and-easy $5 project! So I’m basically putting this together as an exercise. I got to prototype and play with a few cool breakout boards. So it was fun, but there’s no way I can justify leaving $30 worth of stuff in a box just for it to fart. I’ll end up using all these components in other projects down the line. At least I can call this one “done” and move on. So how did it turn out? Well, it does what it does.
And it doesn’t just fart…I can make it play anything. The fart sounds were originally wav files. I really had to crunch them down a lot as well as convert them to 8KHz mono to get them to fit inside the 32K of RAM. With all that crunching, the loss in audio quality also results in a loss in amplitude. The sounds just aren’t as loud as MIDI. MIDI is really loud! The video doesn’t do it justice, but it’s loud!
As for that old prototype? I threw some MIDI on that too, and it is pretty loud, so it was the fart files all along. Go figure.
So that’s it. Done. This was a cool learning experience. I’m sure now I’ll have no trouble implementing audio in my future projects. I’m sure that box will come in handy one day too. Maybe I’ll drill a bunch of holes in it, fill them with RGB LEDs and make them go crazy! See this project to start to finish: The FartBox Staples Easy Button SoundBox PCB SoundBox Boards Are a Bust! Completed the SoundBox