The GPS Clock has been fully assembled and
sitting on my desk for months. I started this clock
two years ago. I just can't seem to get the code to where it needs to be. I just want to put this project to bed already!
I’m trying to get the clock to sync via GPS once a day. It’s just that there are too many wacky use-case-scenarios that need to be addressed. Since I’m 5 hours behind Greenwich, I have to subtract 5 hours from the time. If it’s already “tomorrow” in Greenwich, I have to subtract a day from the calendar. If I sync the clock on the last day of the month, I have to adjust the month too. As for December 31st, I have to compensate for the year. All those edge-cases have to be handled with and without daylight savings in mind too. Then there’s the leap year thing. It’s just too much!
The real nail in the coffin for this one was the 5-way joystick that I used to navigate the menus. The free version of EAGLE didn't allow me to make a PCB that was large enough to accommodate five push buttons in an up, down, left, right, and center configuration. I had to go with a joystick in order to cram all that functionality into a small space.
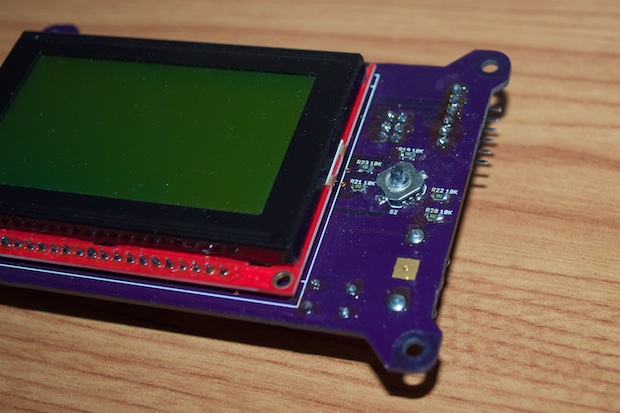
I shot myself in the foot though, because this switch does not have a joystick. I figured I'd just 3D-print a joystick for it. Easier said than done. I just can't seem to print one small enough. Even still, it's so small that whatever I print is too small to be attached by glue. It's so small that whatever I attempt to attach to it doesn't have enough torque to activate the switch without breaking off.
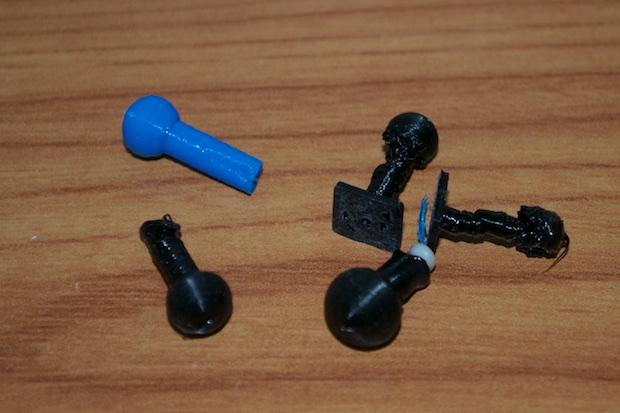
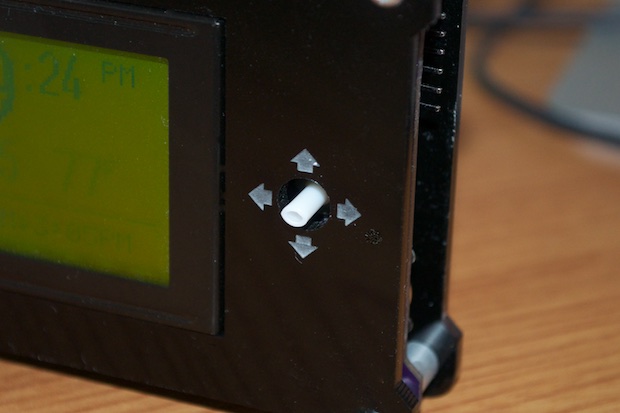
In order to push on with the code and test the menus, I cut up a pen refill, heated it up with a hot air rework station, and slid it over the switch and let it cool. It sort of works, but it looks horrible. It doesn't have the "finished piece" look that I was going for.
I've since upgraded to the
Hobbyist version of EAGLE that allows for larger board sizes. I started to redo the PCB with the 5 separate mini-pushbuttons. I almost finished it before I came to my senses. The PCBs would cost well over $60, and another $100 in components. Since the PCB is larger, I'd also have to redo the acrylic. That's another $20 bucks. All said and done, it's a $200 do-over.
I just can't bring myself to do it. There has to be a way to rework the clock with some pushbuttons so that I can use the PCB as-is. If I can't use the laser-cut acrylic, I'll 3D-print a new case for it.
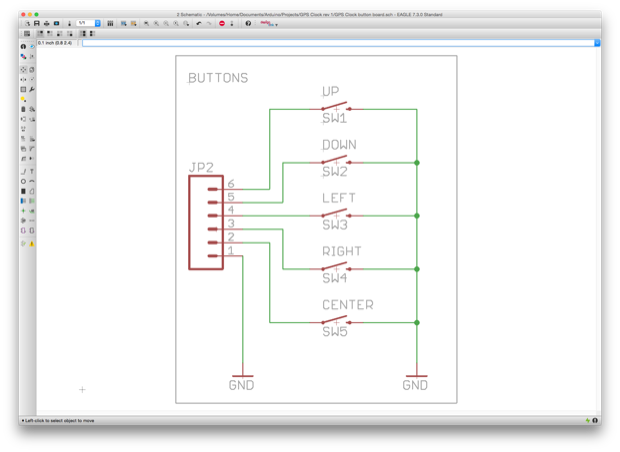
I jumped into EAGLE and played around with somewhat of a daughterboard with push buttons on it. Since the pullup resistors are already on the mainboard, all I need are 5 buttons on a mini PCB.
I'll break out the buttons to a header on the daughterboard, and run wires from a header to the pads of the 5-way switch, which I'll unsolder.
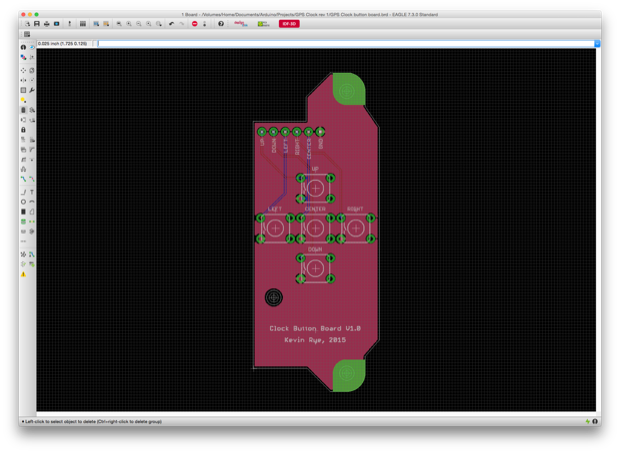
The daughterboard will be mounted on top of the mainboard with board stands screwed into the existing holes on the PCB.
Something like this:
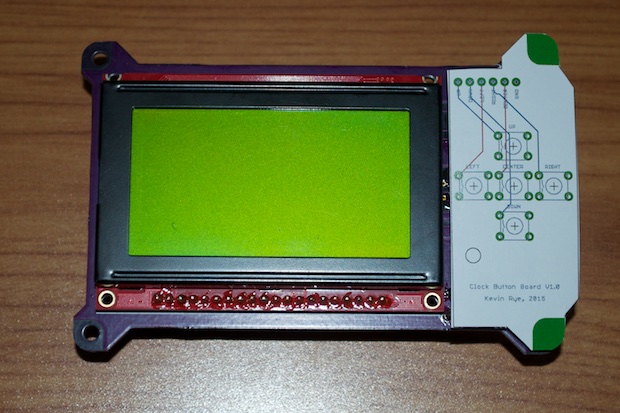
The tops of the push buttons should sit flush with the LCD.
Since I had to make the daughterboard pretty wide, I've lost my cool looking board outline. I'll then squeeze it into a 3D-printed case. It'll be a big departure from my original design, but at least it'll work, and I won't have wasted $200 worth of kit.
As far as the code, I’m going to do away with the auto GPS syncing. As I’ve said previously, GPS in this clock is overkill anyway since time is being kept via a really accurate DS3231 RTC. I’m going to update the menu to allow me to force a manual sync for the time, but also have controls to override the date and time so that they can be tweaked manually. I’ll be able to do a manual sync to first set things up, and tweak everything else as needed within the menu.
I’ve also never been happy with the choice of speaker that I used. I wanted something small that I could use for the alarm and chime-on-the hour feature. The speaker I chose is way too small. It’s hardly audible from the other side of the room. I need to use something bigger.
See this project from start to finish: GPS Clock Prototyping, Part I GPS Clock Prototyping, Part II Arduino Mega 2560 GPS Clock Prototyping, Part III GPS Clock Prototyping, Part IV GPS Clock Prototyping, Part V GPS Clock Assembly, Part I GPS Clock Assembly, Part II GPS Clock Assembly, Part III GPS Clock Assembly, Part IV GPS Clock Rework - Ditching the Joystick, Part I
GPS Clock Rework - Ditching the Joystick, Part II GPS Clock Rework - Ditching the Joystick, Part III
