I’ve been wanting to build a nixie clock for over 15 years, ever since I saw the TTL nixie clock my Dad build in the 70s.
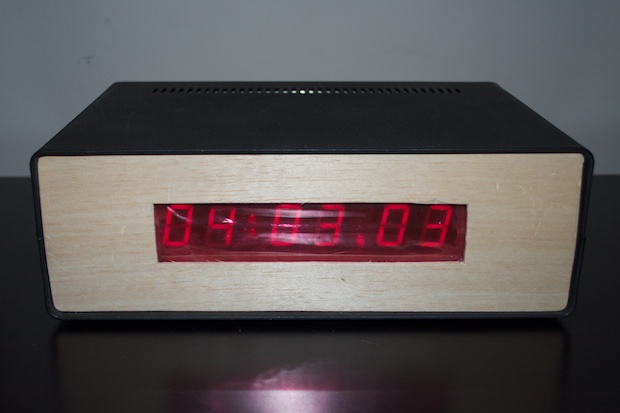
Being a young lad, I was very apprehensive in dealing with the high voltages required to fire nixies. I just never had the guts. Back in 2001, I figured I’d start out small and design a TTL clock using 7490s and 7-segment LEDs. The whole clock runs off 5V and there’s zero chance of being electrocuted.
The
prototype came out great, although the box left much to be desired.
However, the
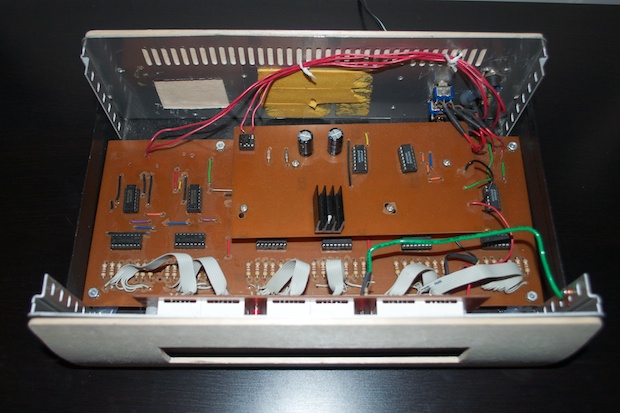
final version came out amazing! It’s a fraction of the size and uses a professionally made PCB instead of the home-brew copper-etched DIY one that the prototype had.
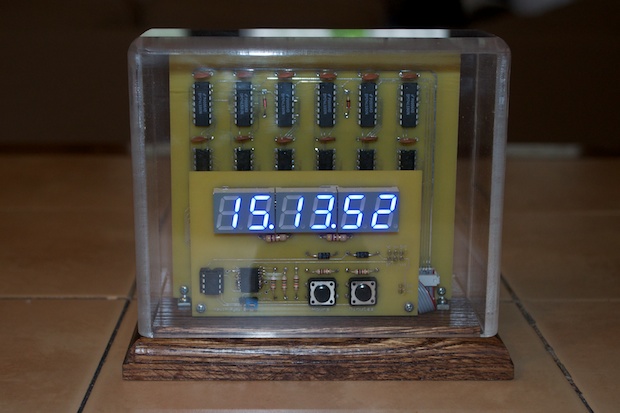
I was so proud of that first prototype, being the first real project that worked, that I decided to (almost 15 years later) fix it up and put it in a
proper housing.

It’s been a long time coming, but I think it’s finally time to bite the bullet and make a nixie clock. I’ve learned so much over the past few years working with the Arduino platform, that I’ll be able to apply what I’ve learned from all my other clock projects.
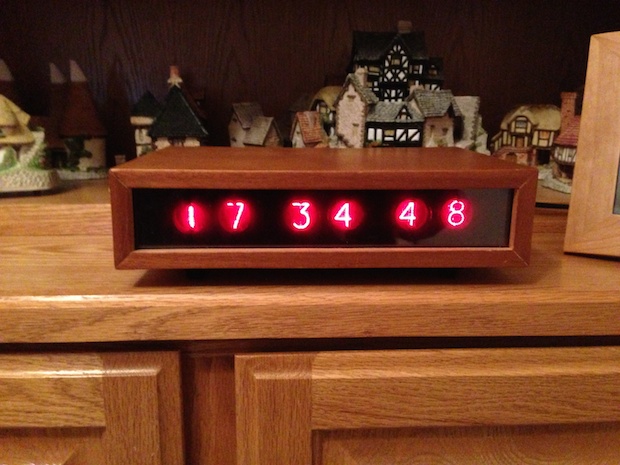
I bought an 8-piece lot of IN-12 nixies a good 10 years ago; maybe even longer. I can’t remember if I bought them before I made the 7490 clock with 7-segment LEDs, or if I bought them before that with the plan to use them in the clock. Needles to say, they’ve been sitting in a box forever. I think it’s time to put them to good use.
I dug the nixies out of my parts cabinet and took a look at them. I guess the plan back in the day was to use 6 in the clock with 2 left over as spares. Having a look at them now leads me to believe that these nixies are actually used.
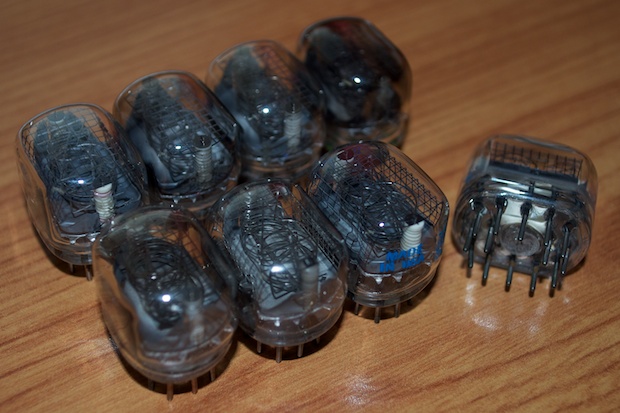
I must have gotten them really cheap. (15+ years ago, I don’t think I had the same budget I have now.) I guess beggars can’t be choosers. Some of these nixies look pretty new, while others have some obvious signs of burn-in.
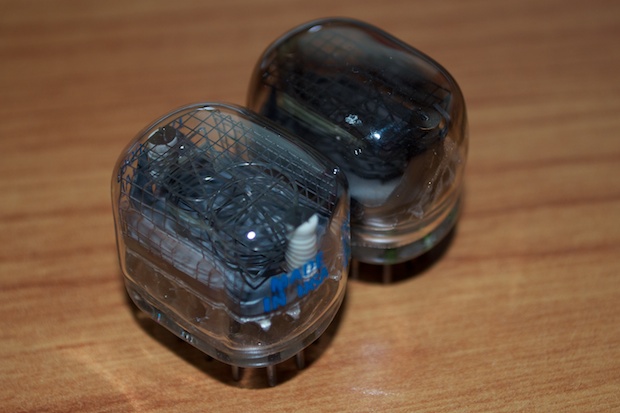
I wanted to test them to see if they even work, and if they are all of the same brightness. If they’ve all seen difference mileage, they might not look good together. It might just make better sense to ditch these and pick up a brand new set of 6 unused nixies.
It just so happened that I had a mini-nixie power supply that my Dad had leftover from a recent upgrade. He said it kept flaking out and wasn’t sure if it was toast or not. Rather than toss it, he gave it to me in the off change I’d make use of it.
I figured I’d try it and see if it worked.
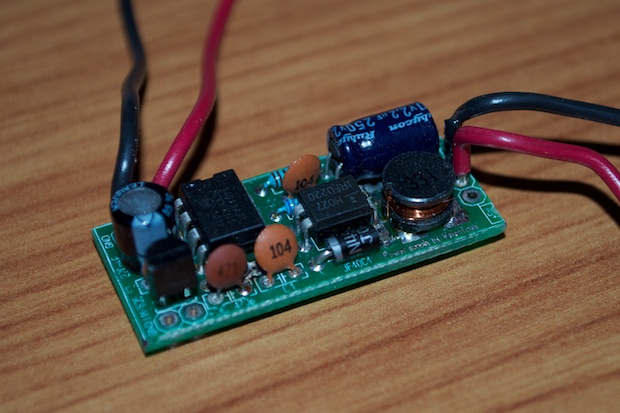
I connected it to a 9V adapter, but the voltage coming out of it was only 60 volts. Apparently this thing is toast. I hopped on eBay and ordered a better version.
While I waited for my new power supply to arrive, I got to work on a way to prototype with the nixies. They won’t fit in my breadboard, and I’m not too keen on the idea of having them just hanging off my breadboard with a bunch of wires soldered to the legs.
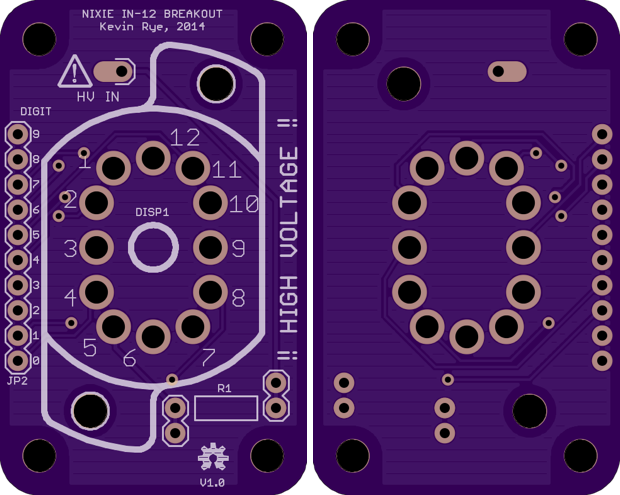
A breakout board is in order.
I hopped into Eagle, and put together a design.
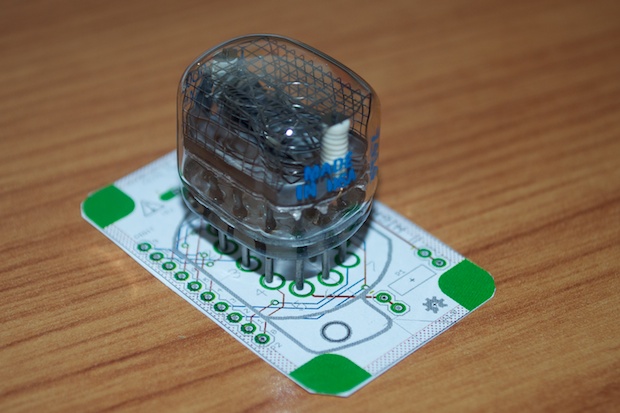
Three PCBs from OSH Park only cost $12.00 bucks.
I also ordered some socket pins off eBay. I can’t wait for everything to arrive so I can finally start working with these!
See this project from start to finish: Nixies!
Got My Nixies Powered! IN-12 Nixie Breakout Board, Part 1 Flashing a Nixie with an Arduino IN-12 Nixie Breakout Board, Part 2 Driving a Nixie with a 74141 BCD Decoder More Nixie Tube Experiments Nixie Clock 5V / 12V Power Supply Nixie Clock PCBs / EAGLE Upgrade Nixie Clock Main Board PCB Build Nixie Clock Final Build, Part I Nixie Clock Final Build, Part II Nixie Clock Final Build, Part III Clock Button Panels
