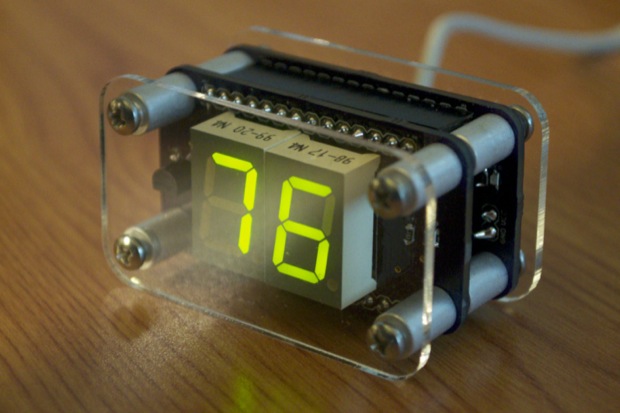
The
last prototype Arduino board I made for the 7490 clock rework didn’t turn out as well as I had hoped. The board did what it was supposed to do, but the implementation wasn’t that great. I thought the clock rework would have been a good excuse to use some of those
ATtiny’s I bought 6 months ago. I was eager to try something with them. However, the design really could have used a few extra digital pins. Once I had the PCB all hooked up, it was clear that I should have designed it differently.
The more I thought about it, the more it became clear that the
Bare Bones Arduino boards I designed months ago were the perfect solution. After all, it’s projects like these that inspired me to create the Barebones Arduino in the first place.

The best part about the 3rd revision of the
Bare Bones Arduino is that I designed it with shields in mind. It’s easy to throw together a simple shield that only has one or two functions. It beats creating an entire PCB from scratch for every project. For this clock rework, all I needed was a shield with a DS3231 RTC.
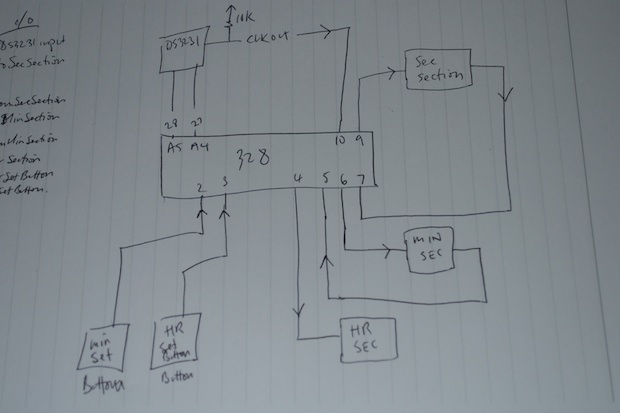
I got to work on a schematic. This time around, instead of feeding each clock section (seconds, minutes, hours) into the next stage, and trying to splice in a settings signal with diodes, I decided to let the ATmega328 direct the traffic.
The input and output signals from the seconds and minutes sections both feed into and out of the ATmega328. It’s perfect. The ATmega keeps track of when the seconds and minutes have rolled over, and tells the next section to increment. Since the seconds, minutes, and hours are no longer directly connected to each other, I can set the minutes without worrying about the hours rolling over while setting it. It’s such a better design. Also, since the DS3231 signal feeds into the ATmega now, I can even stop the clock while setting it. That might come in handy when trying to set the clock while trying to keep the seconds at :00.
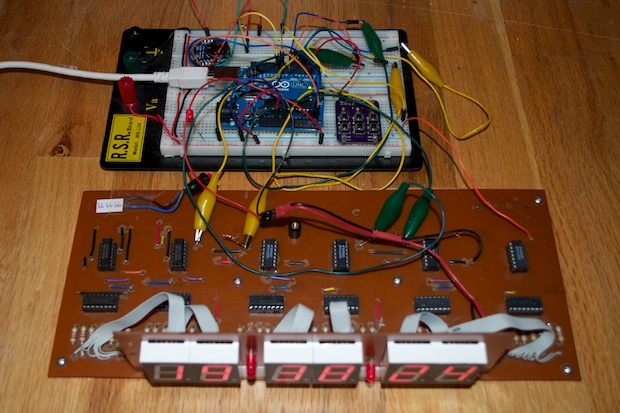
Happy with the new design, I prototyped it with my Arduino Uno; taking advantage of my
Mini Breadboard I/O board. (Told you they’d come in handy!) It’s been running for days and it’s still to the second. Gotta love those DS3231s!
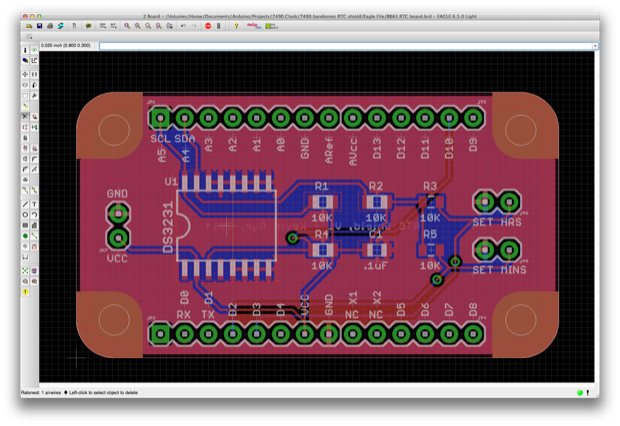
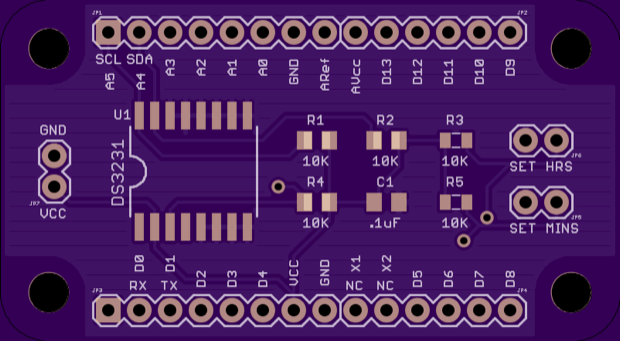
While I validated the design, I got to work on the PCB. I opened up the Eagle file for my
Bare Bones Arduino v3 Temperature Shield and hacked away at it.
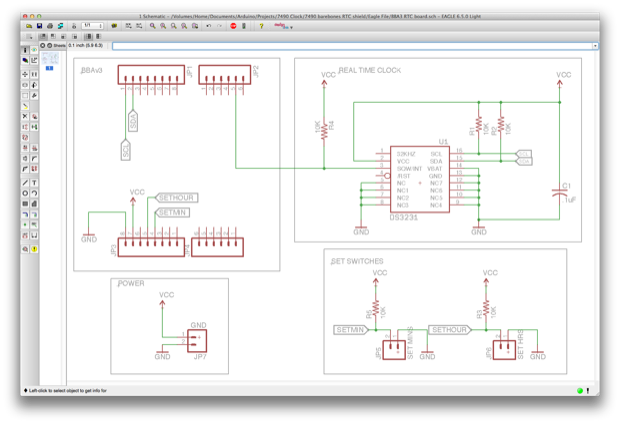
The shield basically has a DS3231 RTC, a power-in header, and 2 headers for the set buttons.
The PCBs from OSH Park cost a mere $3.70 each. Not bad at all.
I can’t wait for these PCBs to arrive. Finally, after almost 3 months of designing and prototyping, I just might finish this clock yet!
See this project from start to finish: Digital Clock 1.0 Upgrading My Old 7490 Clock, Part I Upgrading My Old 7490 Clock, Part II Upgrading My Old 7490 Clock, Part III Upgrading My Old 7490 Clock, Part IV
Upgrading My Old 7490 Clock, Part V
