I was really pleased with the
pillar box that I made for my sister last Christmas. I wanted to make one for myself, but bigger! The one that I made for her was almost 13" tall.
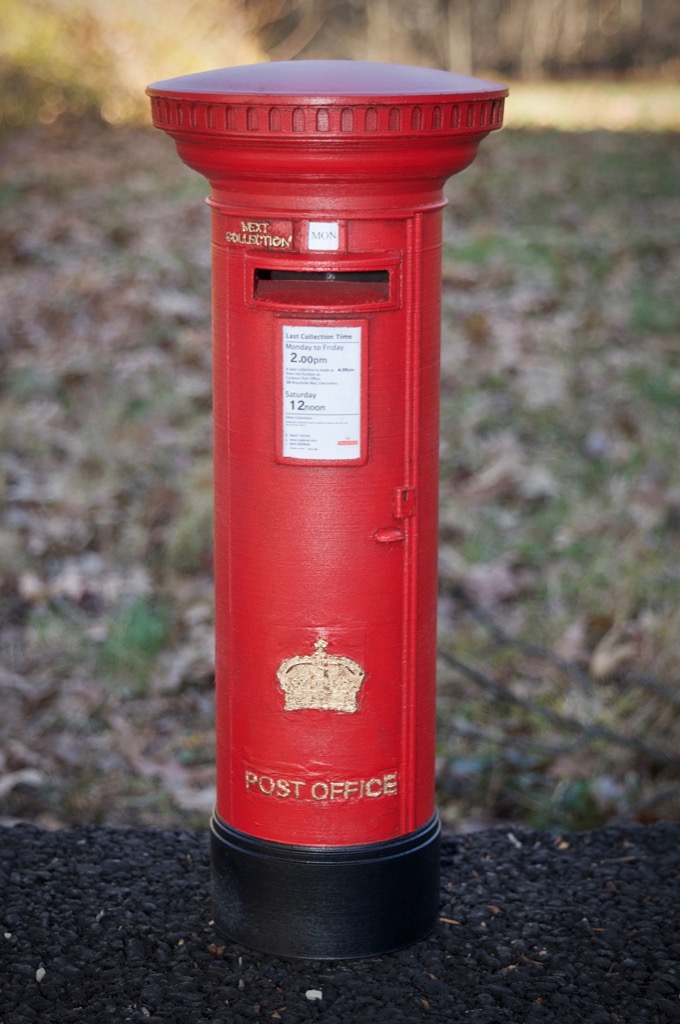
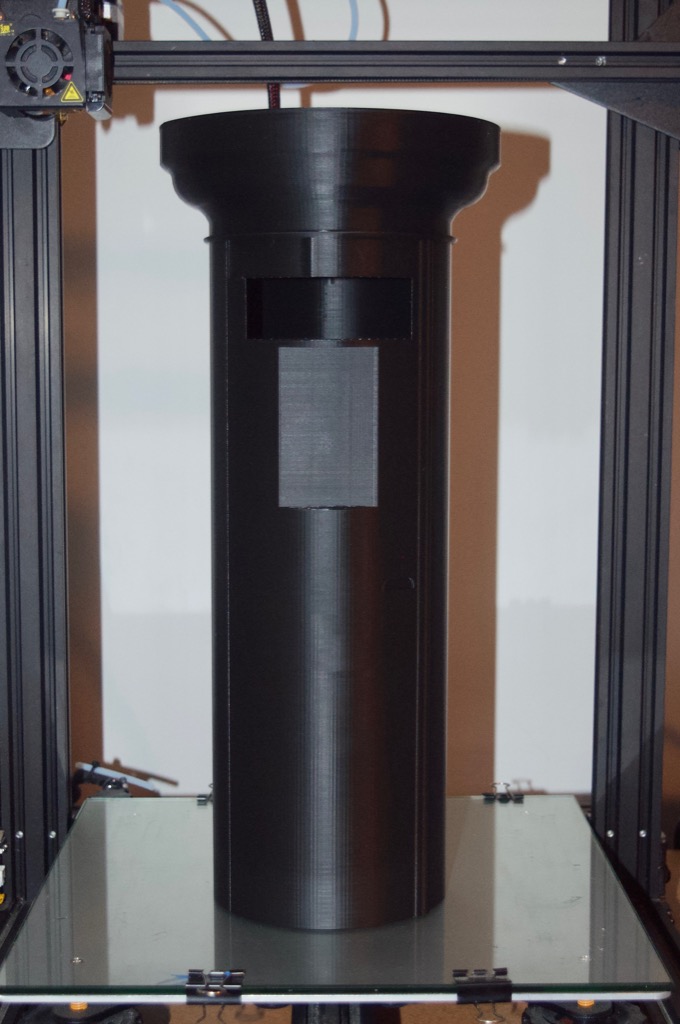
If I made one for myself using the full build volume of my CR-10S, I could make it 16" tall! It took 40 hours and 23 minutes to print.
That is massive!
It took another 16 hours and 48 minutes to print the cap.
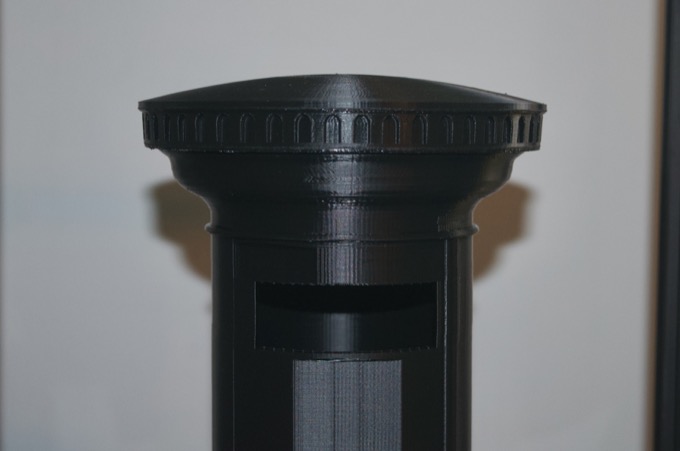
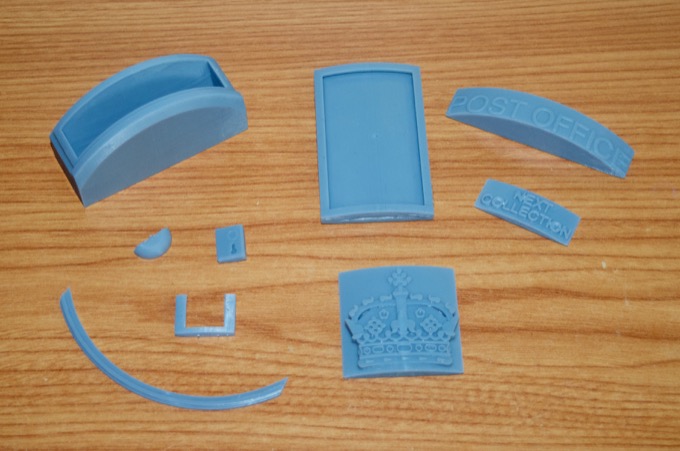
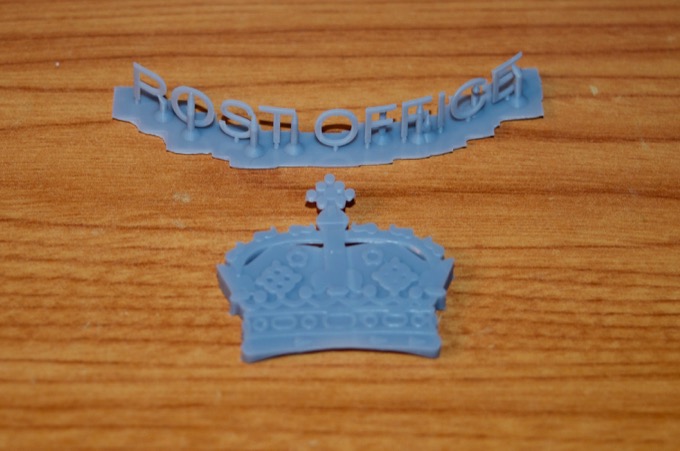
Now that I have a resin printer, I could print the little detail parts in resin. I think they will look so much better than the last one that I made. They have so much more detail printed in resin versus being printed in PLA.
I then got to work on cleaning up the imperfections and removing the layer lines.
I then started to glue in the resin pieces and continued with the post-processing work.
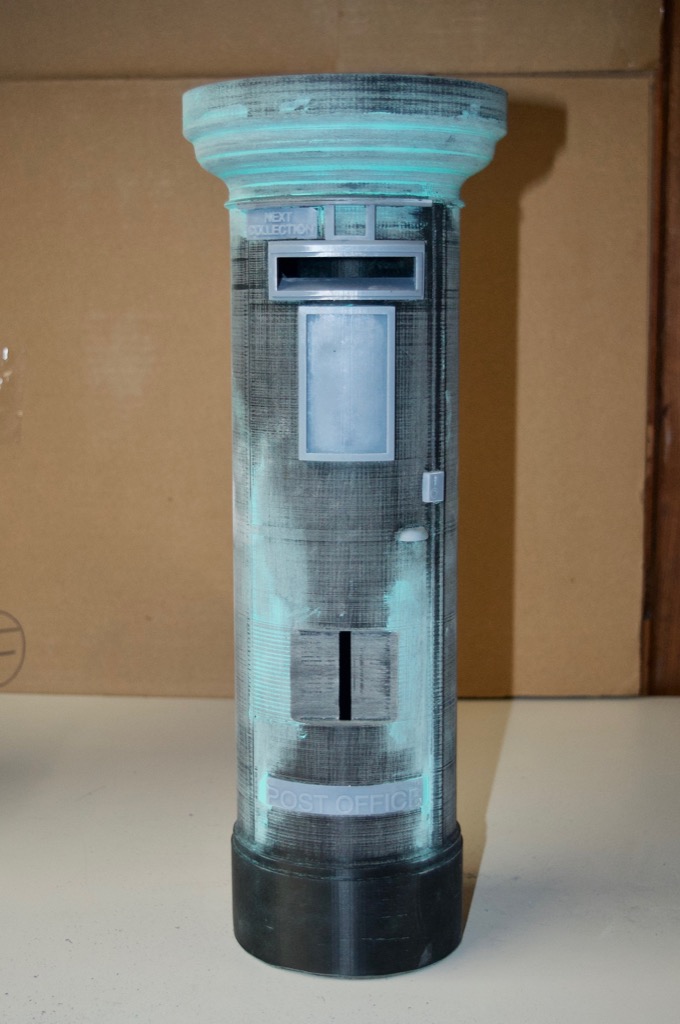
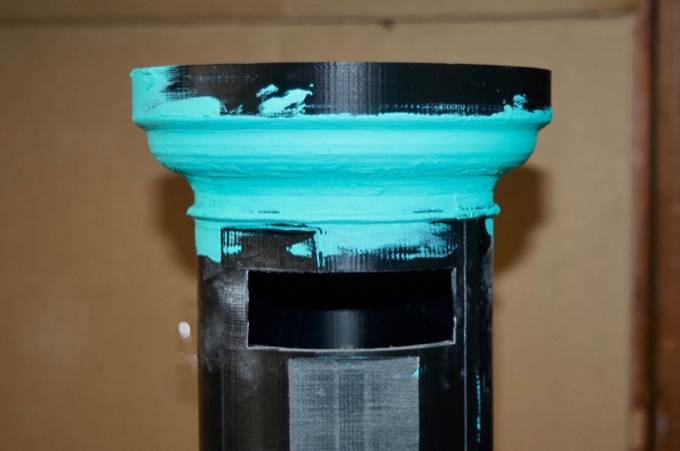
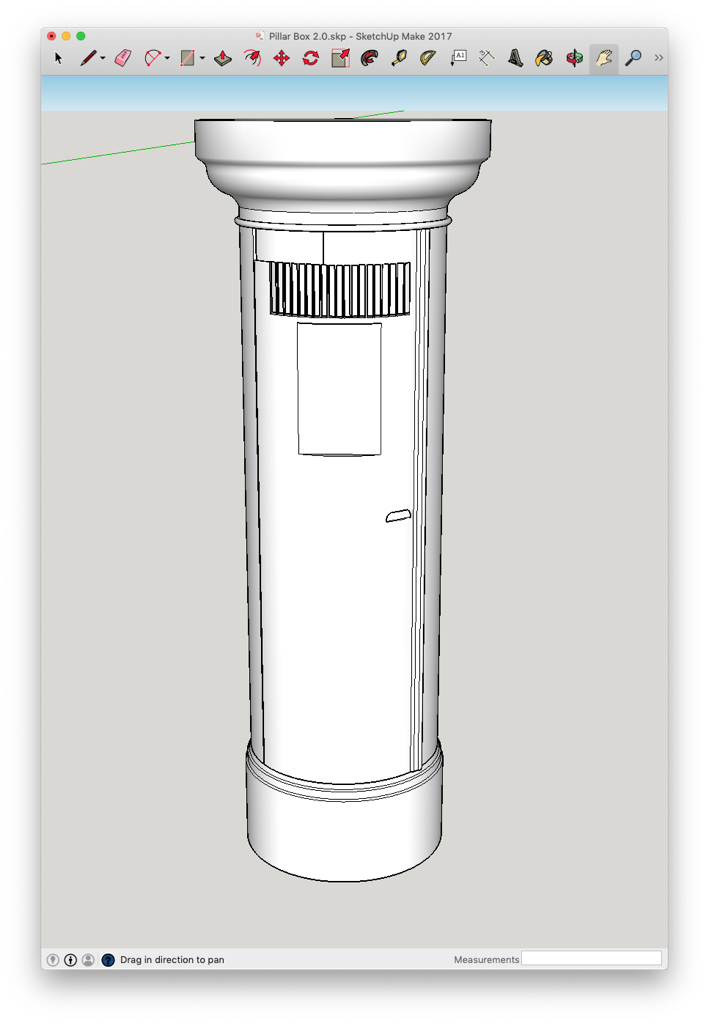
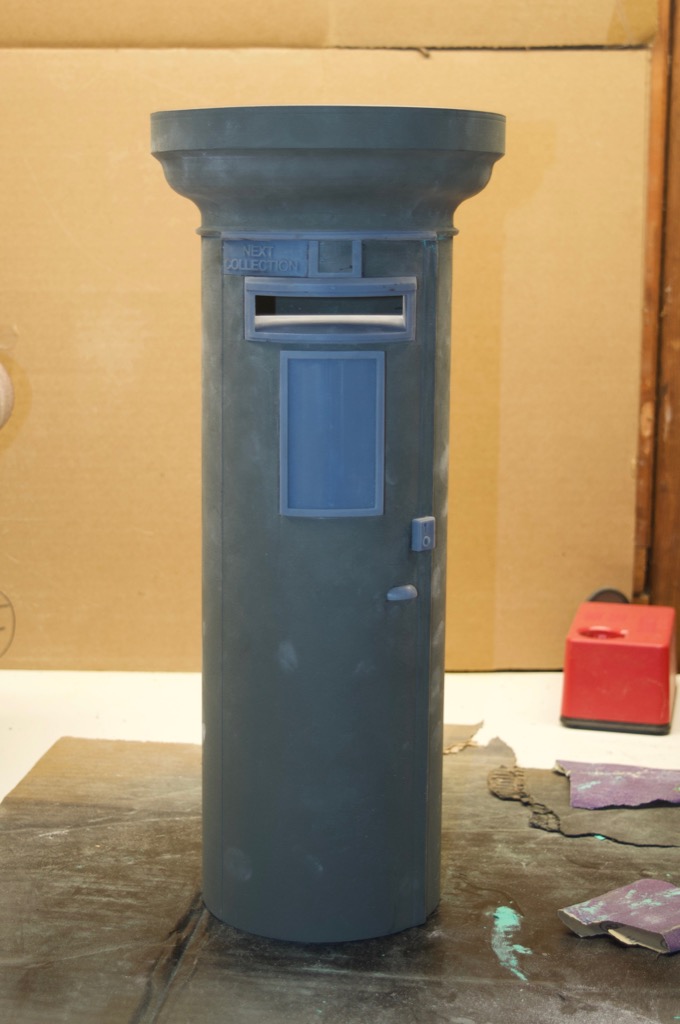
I then gave it a few coats of primer. However, I was not happy with the way that the POST OFFICE text came out. It will be almost impossible to hide the lines from where I glued in the resin piece. I also knew I would have the same trouble with the crown. I had the same trouble with the one that I made for my sister. If I thought this through a little more, I would have first edited the model to remove the spots where the resin pieces would snap in and just print them as-is and glue them on the front. I think that would have looked so much better. The reason the model was originally designed like that was because it was the only way to print them in PLA.

I redid the text and crown and printed them with a curve that would match the diameter of the pillar box.
I then attempted to fill the spots with putty and sand them smooth.
After multiple sanding sessions and several coats of primer, I could just not get it to where I wanted it to be. It would actually be quicker to just print another one than spend hours trying to repair it.
I removed those features from the model and started again.
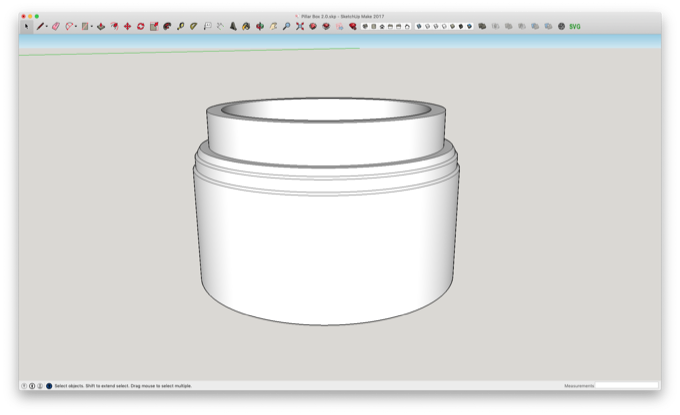
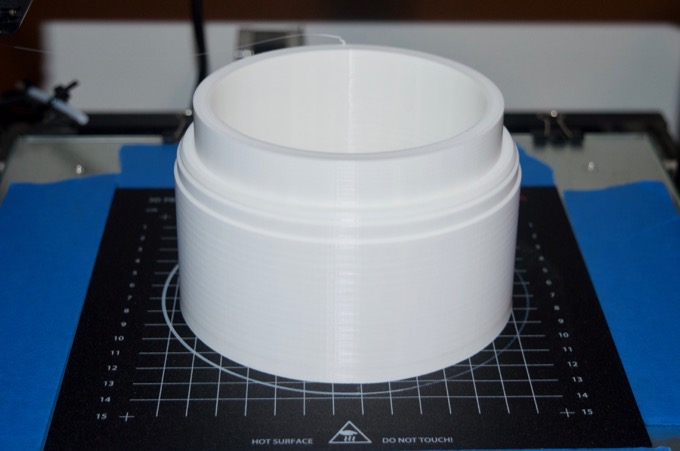
However, this time I thought I could make it even bigger by printing the base as a separate piece. I redesigned the model so that the base could be printed separately and then inserted into the pillar.
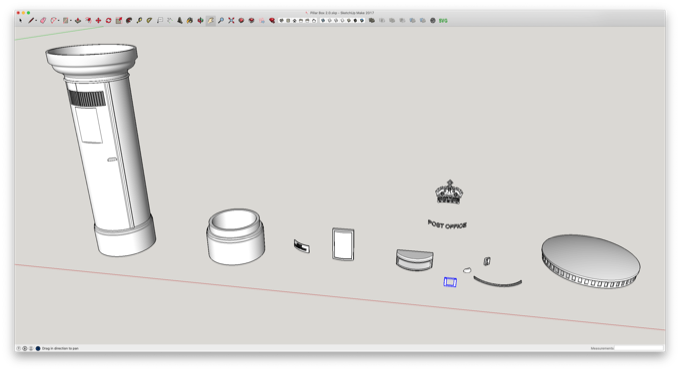
With the model redesigned, I exported all the SVGs and got to reprinting. Since it's way bigger than before, I have to reprint all the resin pieces too.
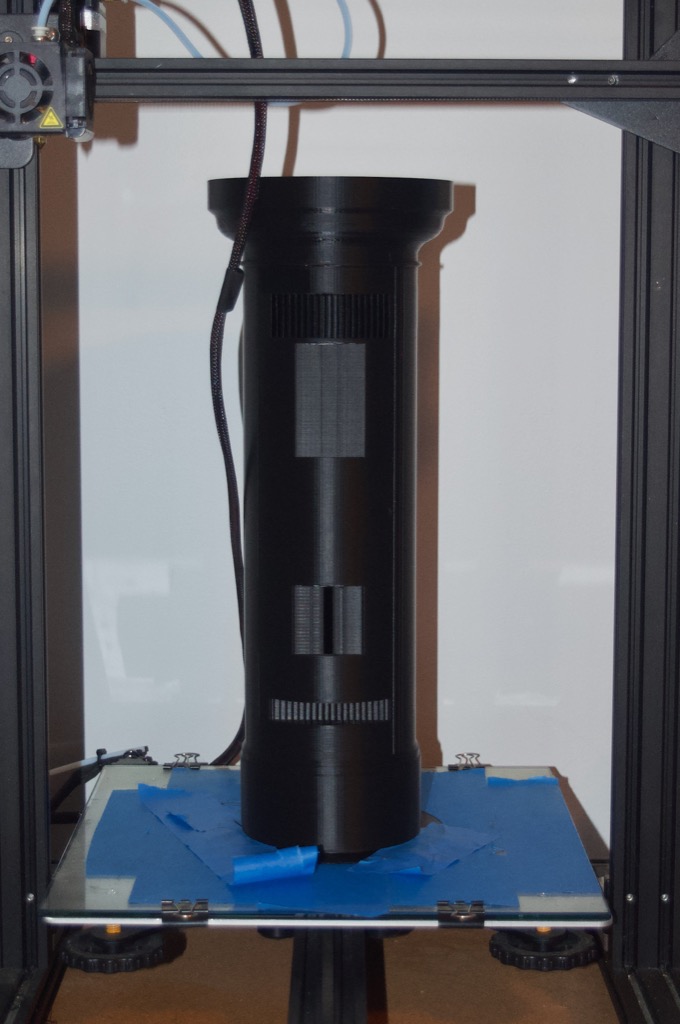
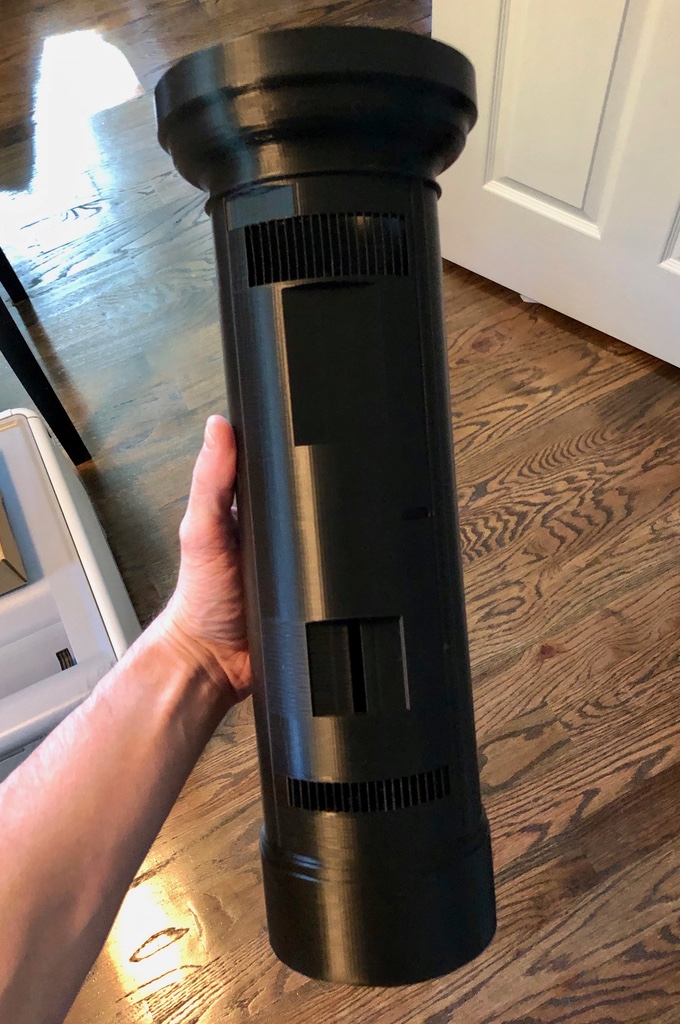
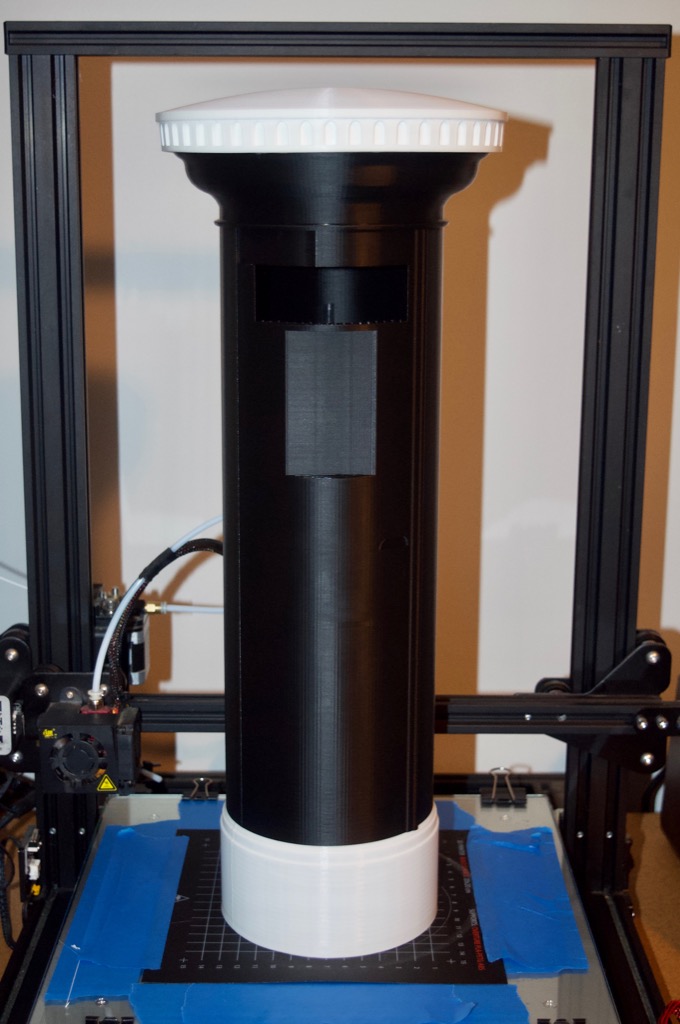
It took 65 hours to print the main piece. It is massive!
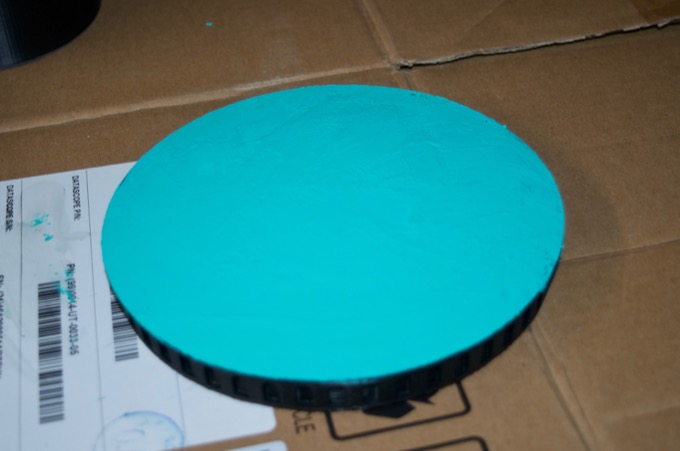
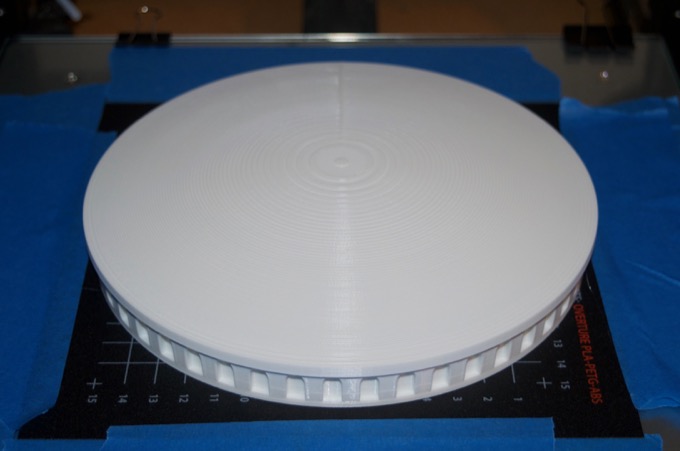
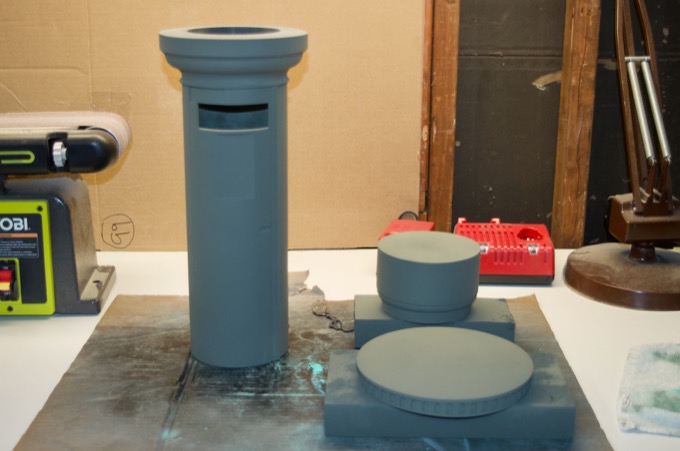
The base and the cap took about another 40 hours to print. The base came out pretty sweet.
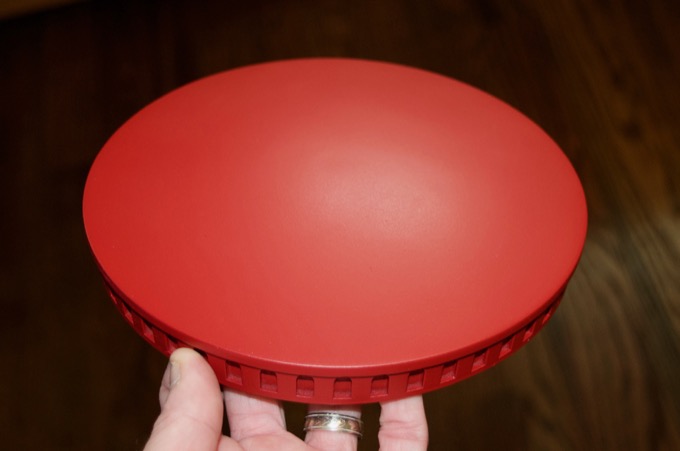
However the cap is going to need a lot of putty and sanding to remove that spiral pattern on top.
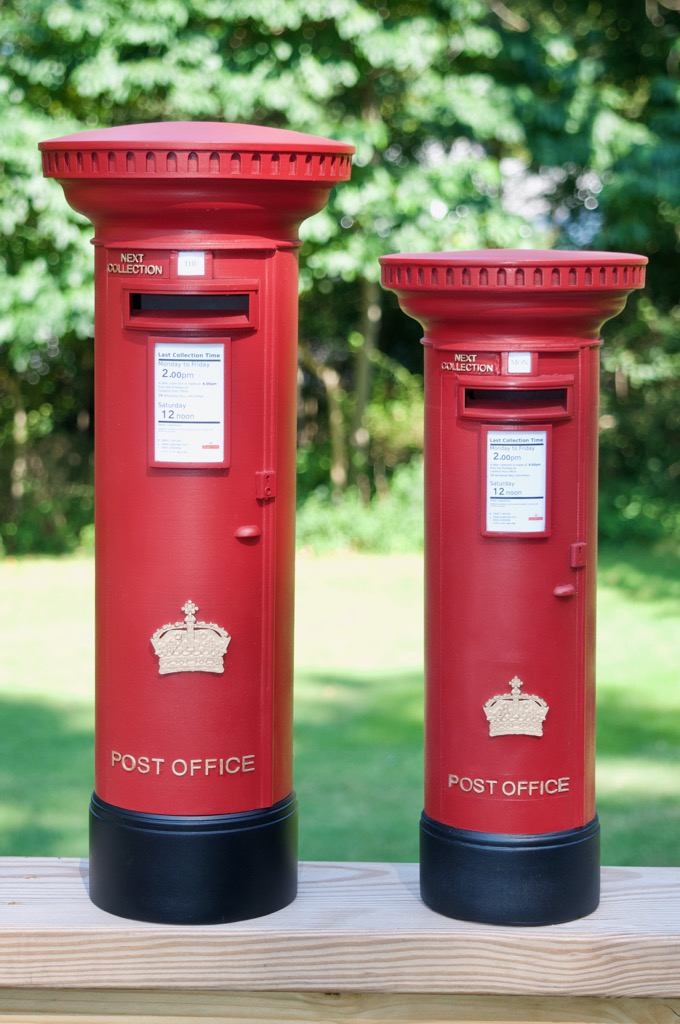
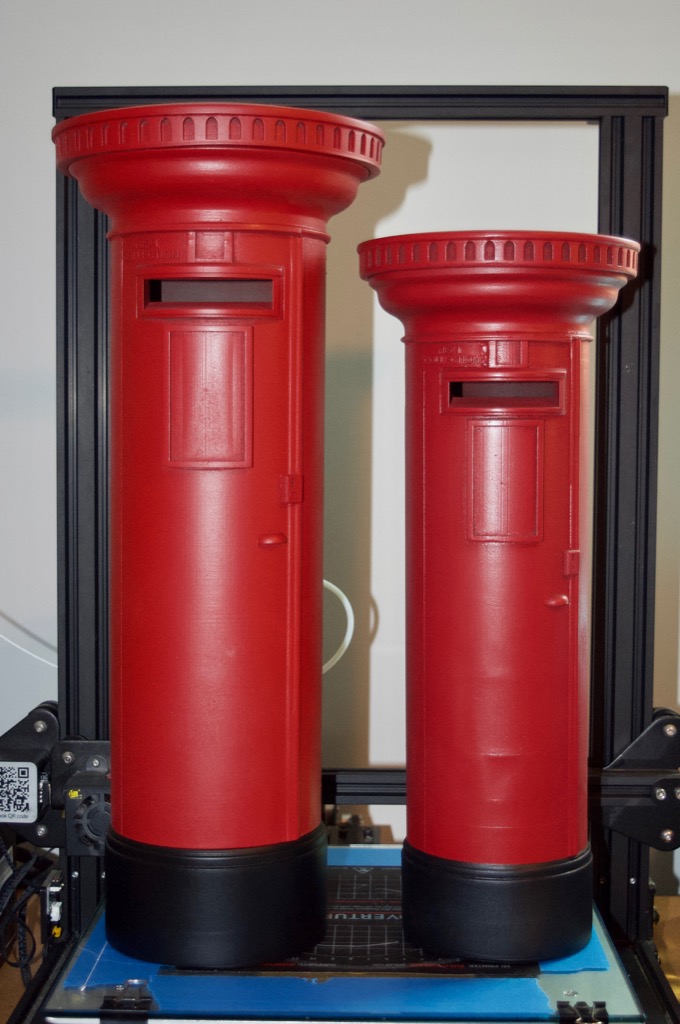
All together, it stands at just about 19" tall.
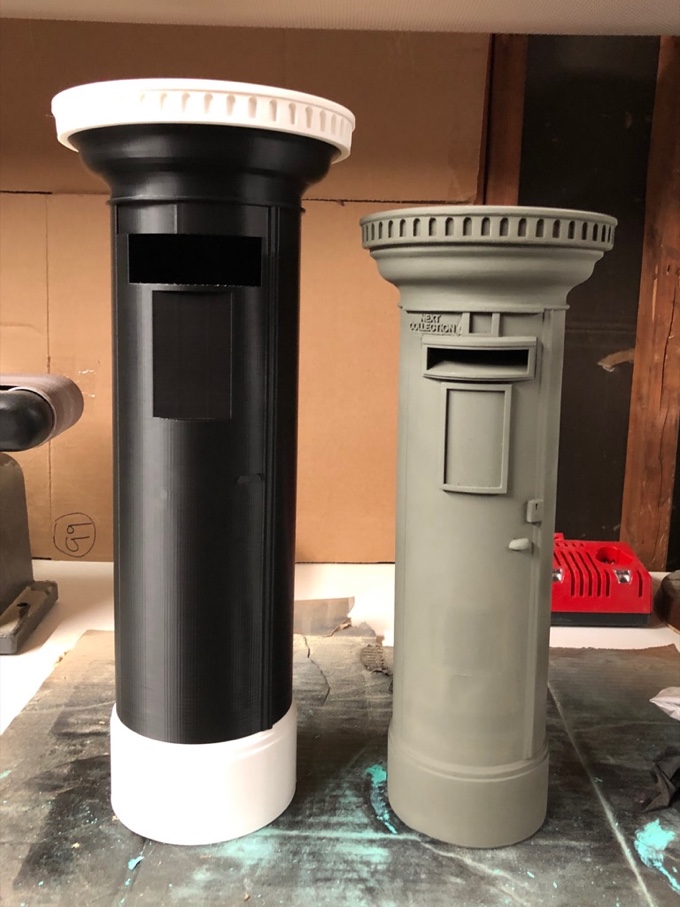
Here is a size comparison to the previous one that was printed. What a difference!
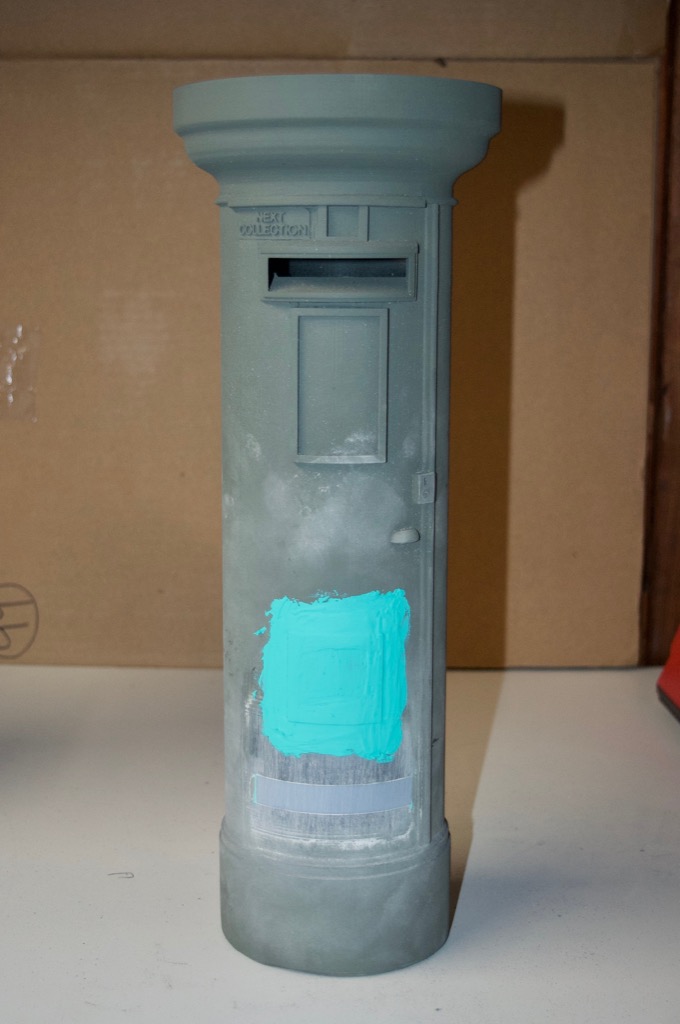
After a small amount of post-processing, I gave it a few coats of primer.
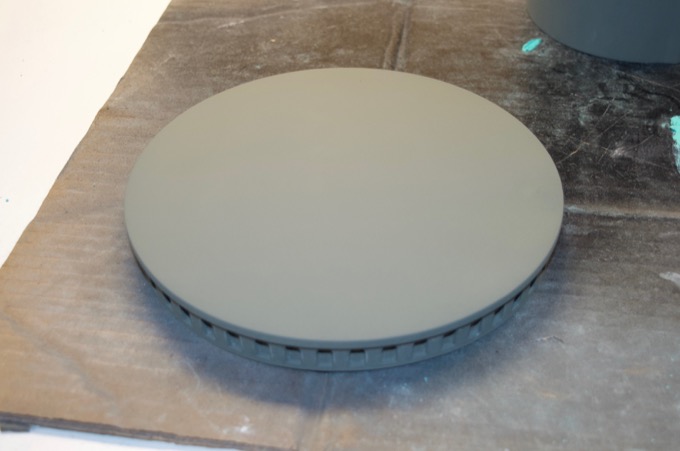
The cap looks amazing. I covered the whole top with 3M Acryl-Green putty and then sanded it smooth.
I then started to glue in the resin pieces.
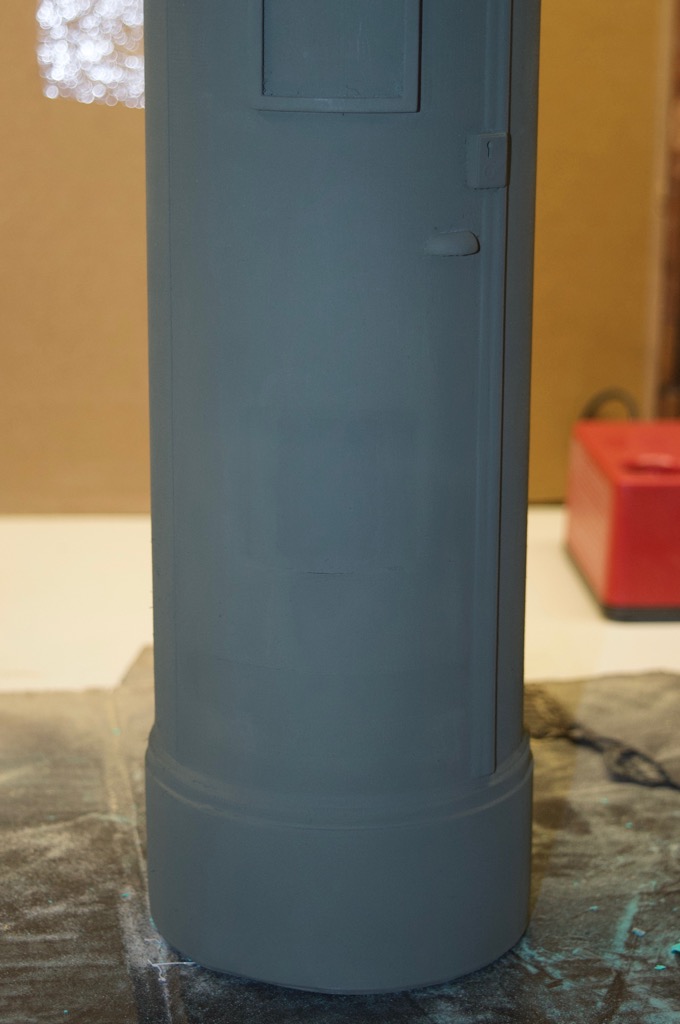
I then gave it some more primer. It looks awesome. I'm not even going to have to glue the base on. It's such a good fit that it just snaps together.

I then painted the parts red and black. The great thing about printing the base separately is that I did not have to mask anything off to paint the base.
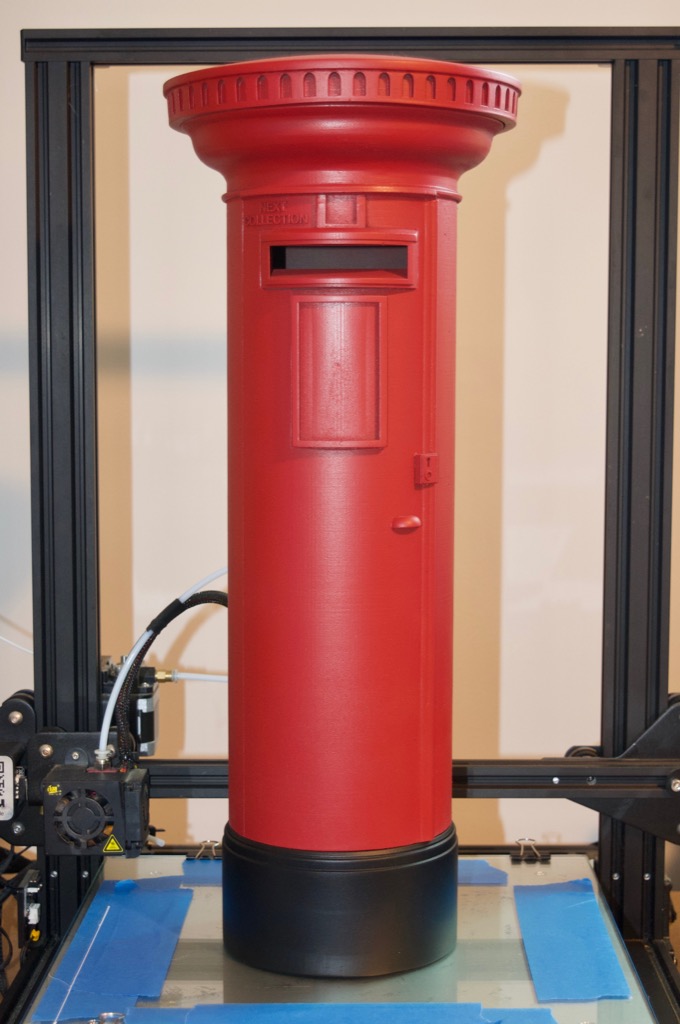
The finish on the cap looks amazing!
I was so happy with the results that I decided to go back and finish the other one. It won't be perfect, but there is no way that I am throwing it away. I'll try and glue the letters and the crown on in a way that they hide the less-than-stellar finish.
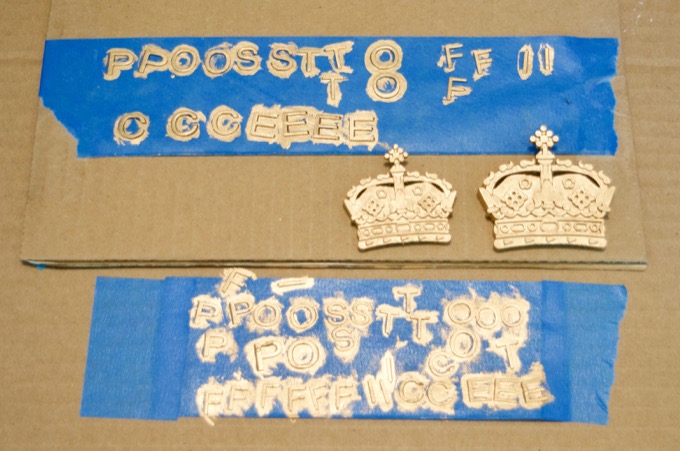
With the main paint job complete, it was time to work on the gold pieces. I stuck the letters and the crowns to some blue tape and then painted them gold.
I then glued all the pieces in place and added the other finishing touches. I think they came out amazing. I am really happy with the way that they turned out.