Robo3D R1 Spool Holder Extreme
Jul 16, 2016 Filed in:
3D Printing | 3D ModelingI convinced a friend at work that the Robo3D R1 was the way to go if you wanted a 3D printer for under $1000 that rivaled the likes of some of the more expensive printers out there. I’m a big fan of Robo3D. I lot of 3D printers that are out there look like something that was build out of a bunch of spare parts that were lying around. I like the Robo3D R1 because it actually looks like an appliance; a well made appliance. It has a nice professional finished look. It’s not all looks though…the printer is fantastic. With a generous build volume of 8 x 9 x 10, you can make prints larger than that of a $2500 MakerBot.
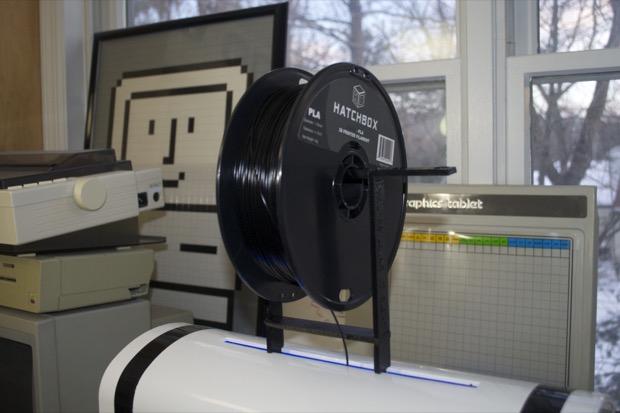
The one shortcoming of the Robo3D R1 is the spool holder. It’s not really in a good place, and the roll tends to slide back and forth on the handle. Sometimes the filament pops off the roll and you end up with somewhat of a slinky feeding up to the printer. If you jump on Thingiverse, you’ll see there’s no shortage of DIY spool holders for the Robo3D R1.
In fact, a new top-loading spool holder was one of the first thing that I printed on my Robo3D.
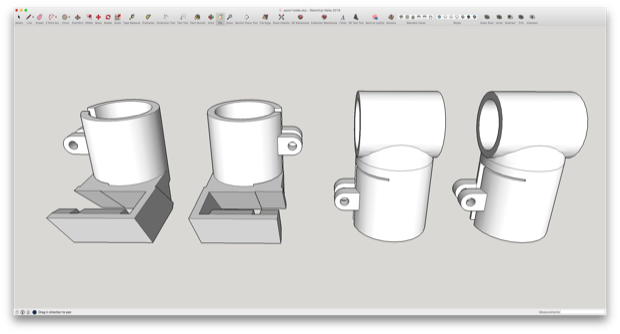
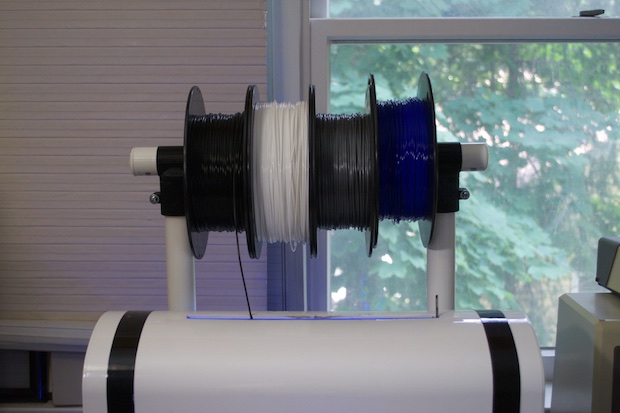
My friend took it to the max and decided to build a holder than can hold 4 rolls of filament. He jumped into SketchUp and modeled some brackets to hold some PVC tubes. He shared his design file with me so that I too could make one.
It took about 11 hours to print all 4 pieces because of the need for some support material.

While that was printing, I took a trip to Home Depot to pick up some PVC tubes and the necessary hardware to screw it all together. I cut it to size and waited for the prints to finish.
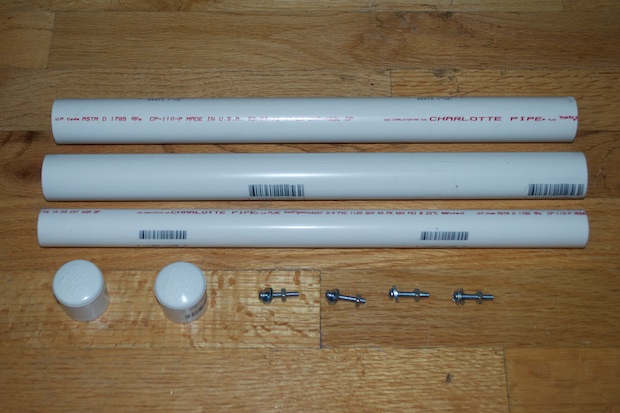
After the 4 pieces were printed, I attached the hardware.

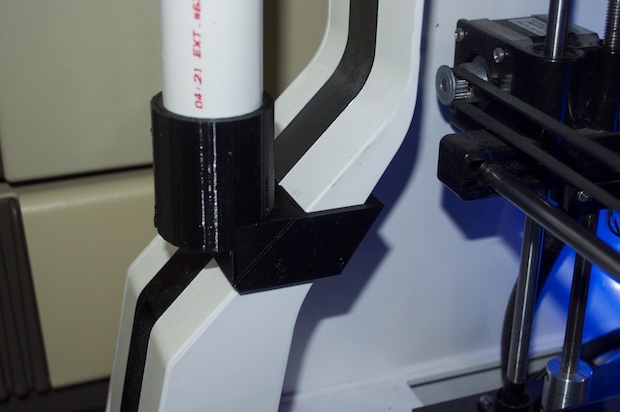
The whole assembly together looks like this. I was going to print the parts in white, but I figured that the black/white look would better match the printer.
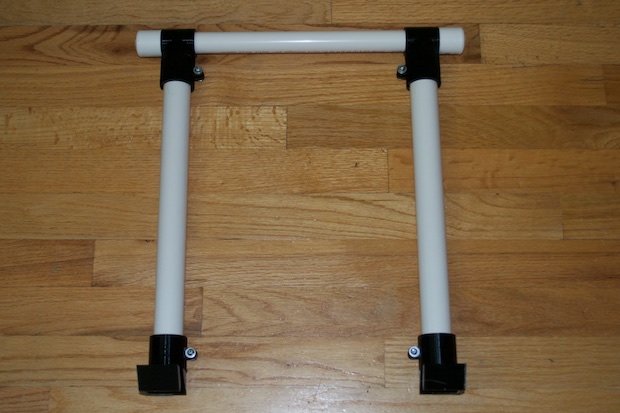
The bottom pieces just slide right onto the sides of the enclosure the same way that the stock holder does. Genius!
Boom. Nailed it.
Awesome. It’s a real pain having to constantly swap rolls all the time. It’ll be nice to have my top 4 rolls readily accessible.

