My Dad, forever bestowing upon me vintage goodies of days gone by, happened across a small stash of vintage calculators he’d been holding on to for a good 40 years.
They were a nice surprise. I opened a box that came in the mail from my Mom expecting it to be goodies for the kids. Well, it was goodies for the kids, but nestled among the candy and the toys were goodies for me too!
Back in the ‘70s, my Dad worked for Elliott Automation, later Pico Electronics Ltd. Pico was formed in 1970 by George Stevenson, David Campbell, Harry McLennan and Les Leech. They had all worked at Elliott's and were wizards in calculator chip design. George was the Director of Engineering and with his team, they pulled off a single-chip calculator design. The microprocessor they designed was ahead of its time and far more advanced than similar chips that followed it for years to come. Actually, one of their microprocessors was the world's first microprocessor. George Stevenson
patented it and years later successfully defended RadioShack against a lawsuit from Texas Instruments who claimed they invented the Microprocessor.
In 1971, the Monroe Calculator Company/Litton Industries became one of Pico's first major customers. Actually, Pico didn’t just sell them chips, they designed the whole calculator. A year later, Sinclair, Royal, Bomar, as well as many more, started using Pico's chips.
These calculators are all early models from the Pico days. Some clearly prototypes, but all real pieces of tech-history.
Litton Royal Digital V - 1972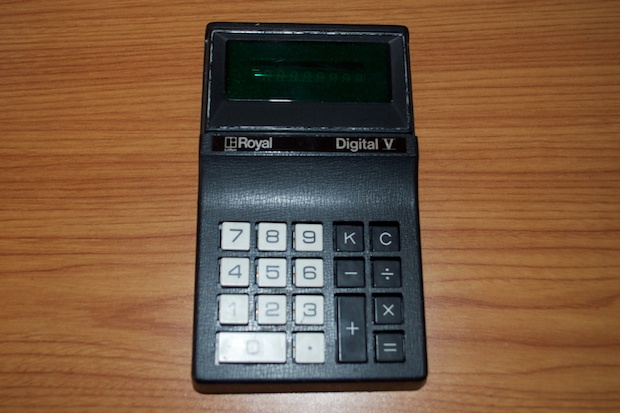
It’s too bad this early Digital V is missing the back.
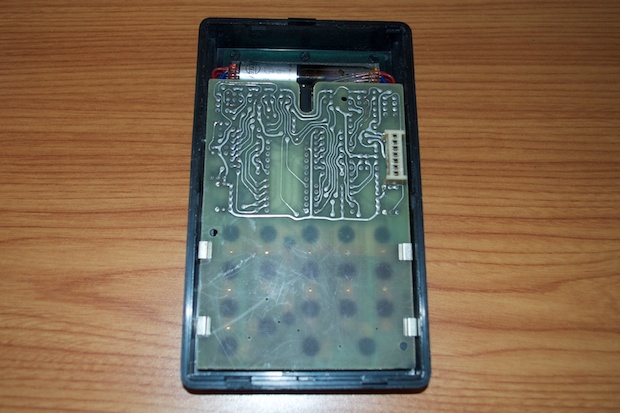
Carbon film resistors, gold silicon, and VFDs, oh my! You gotta love the vintage tech, right down to the hand drawn traces. They almost look like they were drawn with a silver Sharpie marker. There were no design tools back in the day, so it was all done by hand.
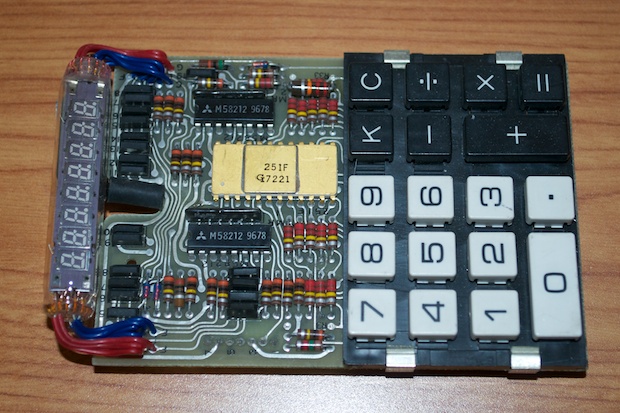
It’s funny, these guys probably thought nothing of it and that this was as good as it got. Strange how 40 years later, it would look like art.
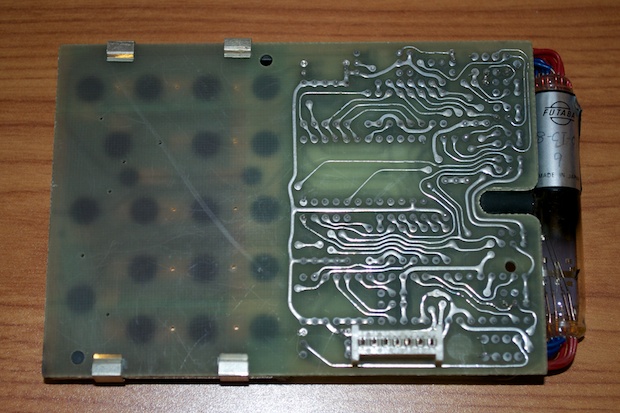
I wanted to check out under the keypad, so I removed it. It’s secured to the PCB with 4 little metal clips. They pop right off.

The keypad is composed of a few layers of rubber, metal, and plastic. Check out the gold contacts on the PCB! I’m rich!
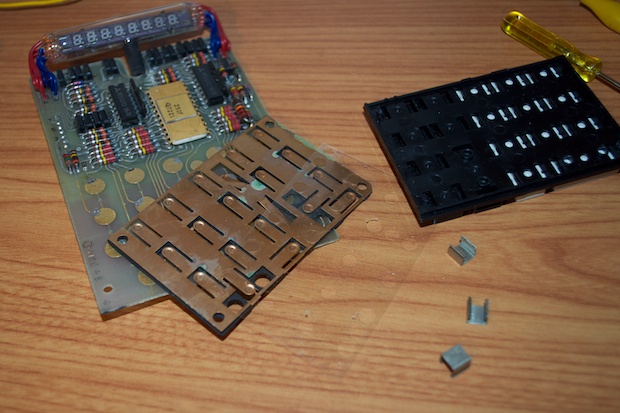
I wanted to try and fire it up, so I studied the traces on the board for a few minutes and identified Vcc and ground. I connected a 5V supply, but nothing happened. This guy seems to be dead. I might revisit it another day and dig in a little deeper, but I wanted to check out the other guys first.
Litton Monroe 30 - 1974This is probably my favorite one of the lot. I really like the vintage look it has. It feels really solid despite being surprisingly light. I like the fact too that it came with a case. You really got your money’s worth back in the day. Today you can spend $800 bucks on an iPad and they still make you buy the case separately.
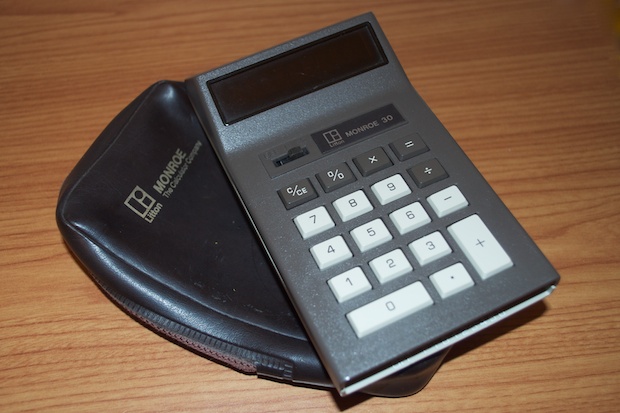
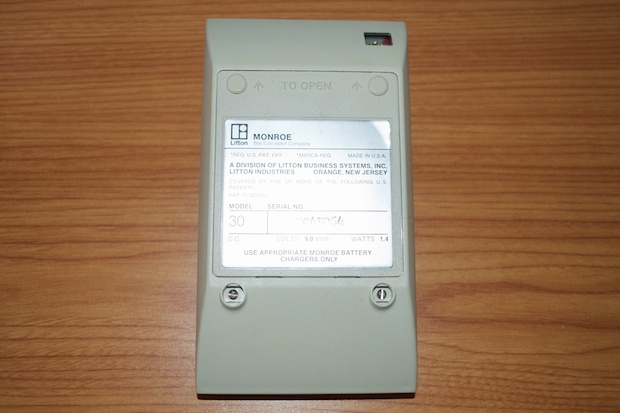
To remove the back cover, there’s two circular clips that you have to slide up.
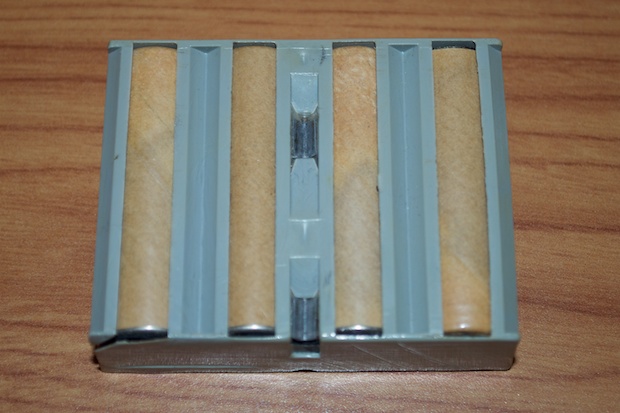
The back cover comes off to reveal a strange looking battery pack. Looks like model rocket engines. The 3-pin connector on the top right must have been for a DC adapter. So these batteries were obviously rechargeable. I didn’t know they have rechargeable batteries in 1974.
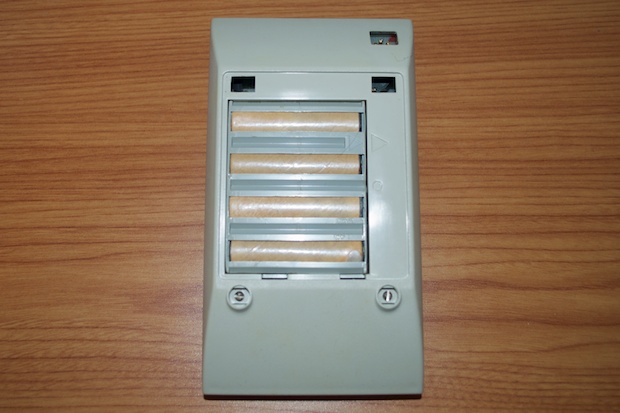
Removing the battery pack reveals a few terminals that engage the metal contacts on the back of the battery pack.
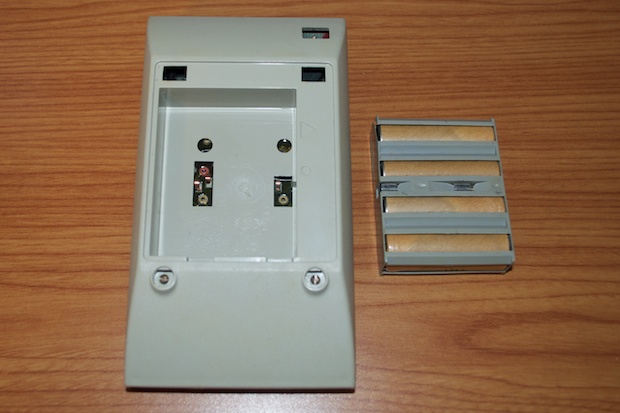
It’s strange. How is it the back label of the calculator states 9 Volts, but the battery pack has 4 cells? Who’s heard of a 2.25V battery before? Maybe they’re all 9V cells in parallel? Or a pair of 4.5s in series, in parallel with another pair of 4.5s? Maybe they’re regular old 1.5V batteries. Maybe it’s just that the charger is a 9V supply?
There’s no markings on the battery pack at all, and no apparent way of breaking it apart to see how it’s wired. It appears as if the plastic was molded around the cells. There’s no seams or clips or anything. It’s one solid piece of plastic. There’s a little crack on the bottom left, but not enough to peek inside and see how it’s wired up.
The back came off with 2 screws.
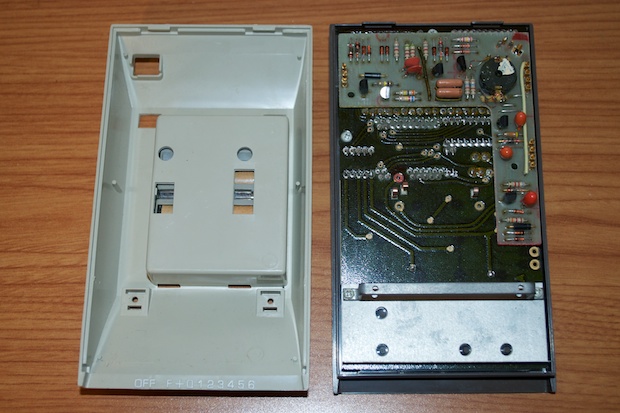
It’s a pretty nice looking board. It doesn’t look as hand-done as the first calculator, but the traces have definitely still been drawn by hand. Despite that, the board is definitely of a higher quality; complete with solder mask. It looks like the 9V supply comes in on the daughter board. Maybe it does some power management mojo to knock it down to 5V and the batteries really are just 1.5V cells. Who knows?
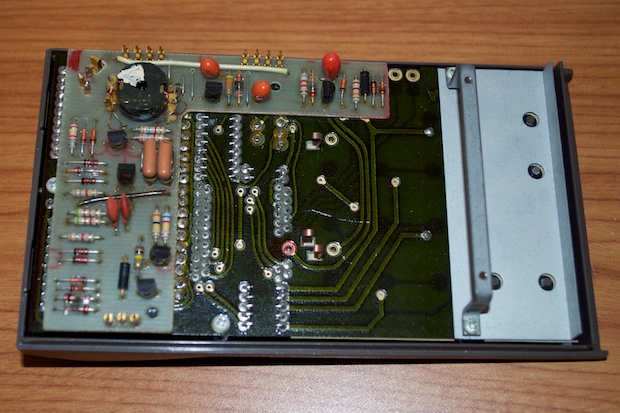
The metal chassis comes off via 2 screws.
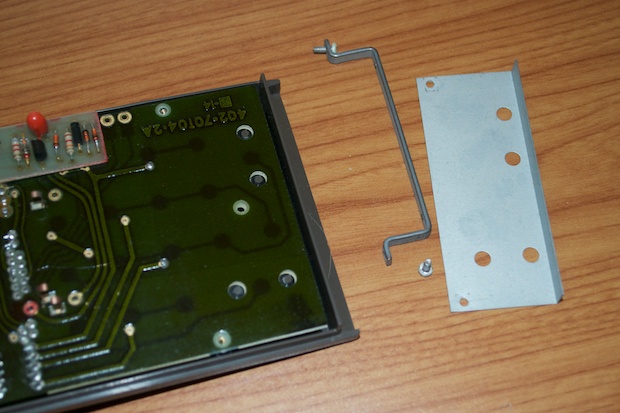
The daughter board also comes off. It just slides right off the pins. I guess this is how 2-layer boards were accomplished back in the day.
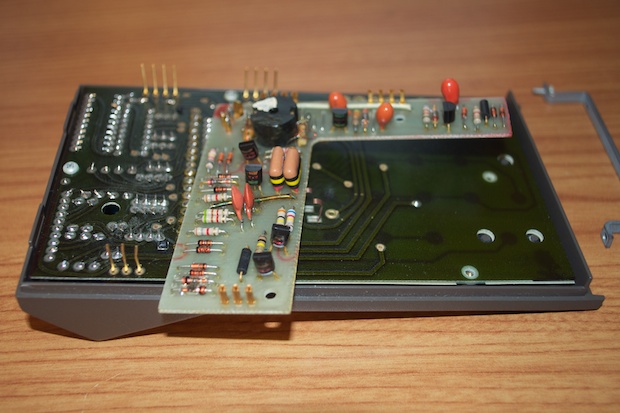
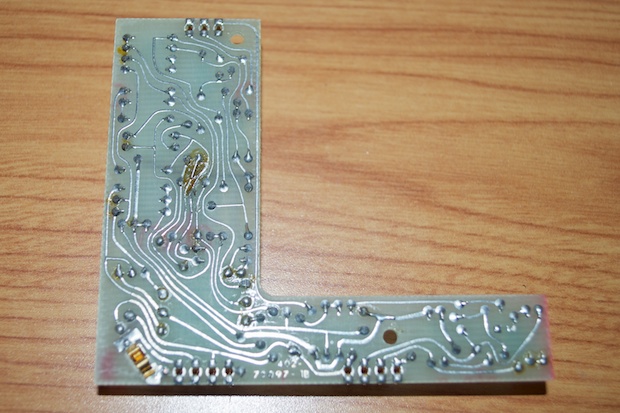
The quality of this board doesn’t come close to that of the mainboard. It almost seems like a hack, or an afterthought. However I do like the hand-drawn look of it. With the wavy, silver lines, it kind of reminds me of the ornamental decorations of an old book. I’ve been kicking around a few ideas for a Nixie Clock. Maybe I’ll give the PCB the ‘70s look.
It took 4 more screws before I could fully free the mainboard from the housing.
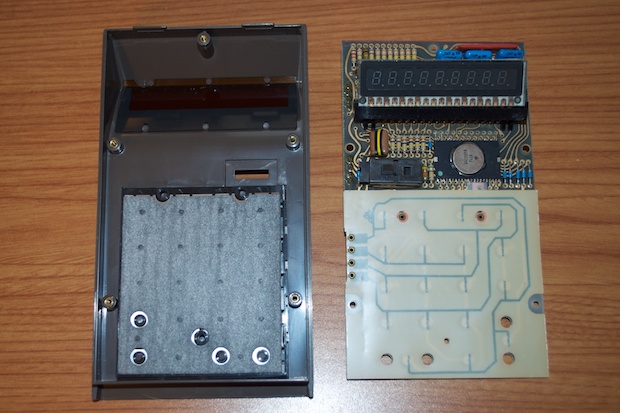
Arrr me hardies!!! Thar be gold here!
Will you look at that, all the traces are gold!
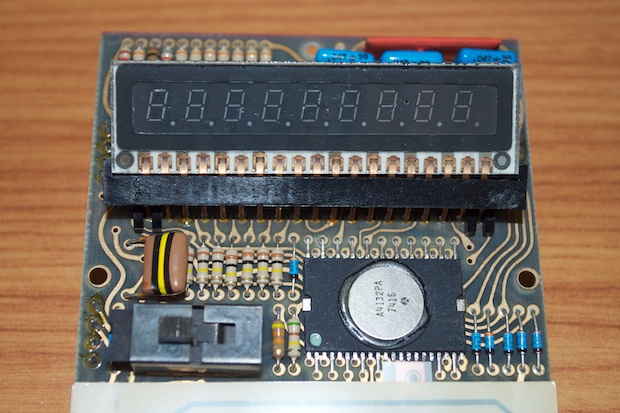
That’s a crazy looking chip too! I’ve never seen a chip like that with staggered pins before.
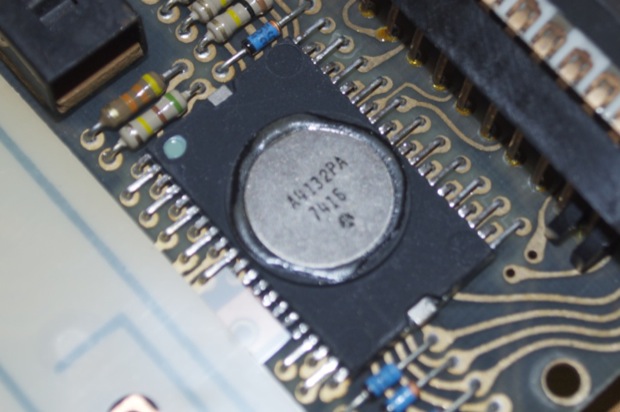
There was a date written behind the display that reads 1974.

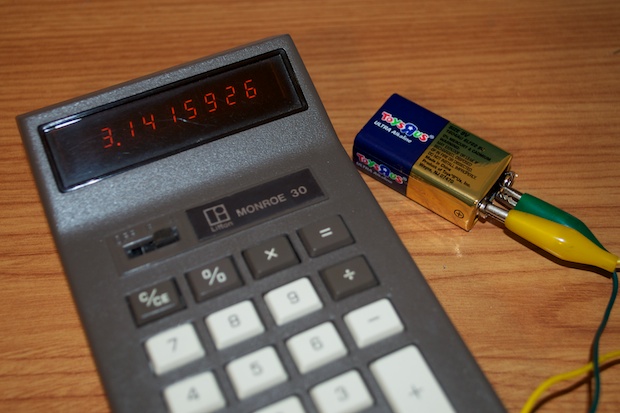
Going under the assumption that the batteries were indeed 1.5V cells, I hooked up a 5V supply to the battery terminals after figuring out which one was Vcc and which was ground. It worked. I then tried it with a 9V battery and crossed my fingers that I wouldn’t fry it.
Look at that. It works. Pi is the “Hello World!!” of calculators.
I soldered a battery connector to the terminals and popped the 9V into the back. There’s plenty of space.
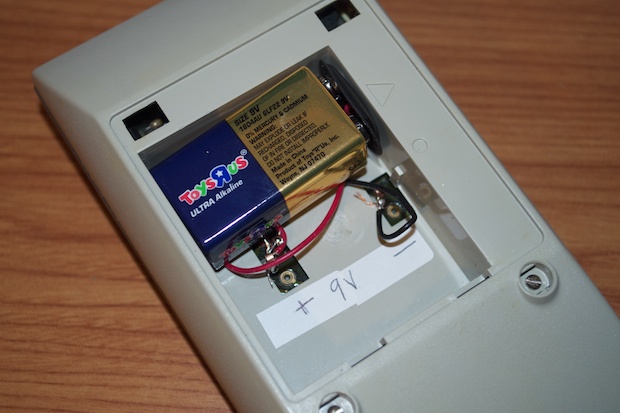
I put the cover back on and it was good to go.
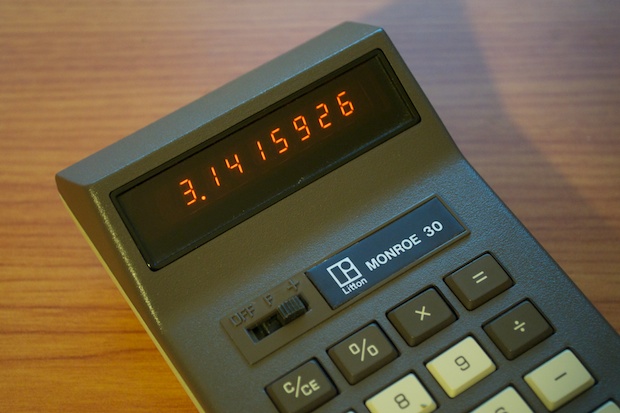 Bomar MX100 - 1974
 I actually managed to find the original retail price for this model. It sold for $179 in 1974. That’s $821 in adjusted dollars!!! That’s 128GB iPad money. People complain about how much iPhones and iPads cost now, but could you imagine spending $800 bucks on a calculator? 40 years from now, we’ll be laughing at the fact we spent $800 on an iPad. I’m calling it.
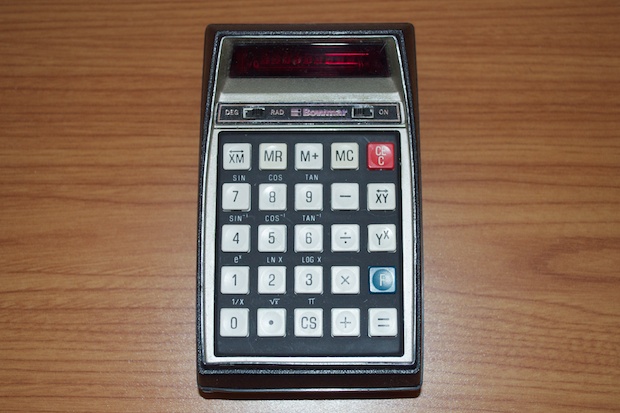
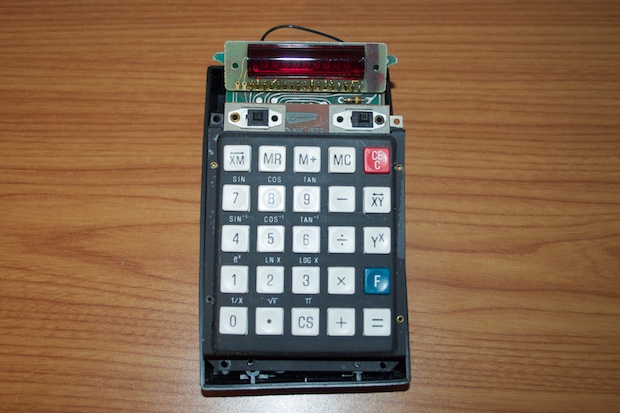
There’s not much to look at by removing the top cover. The mainboard, for the most part, is buried under the keypad.
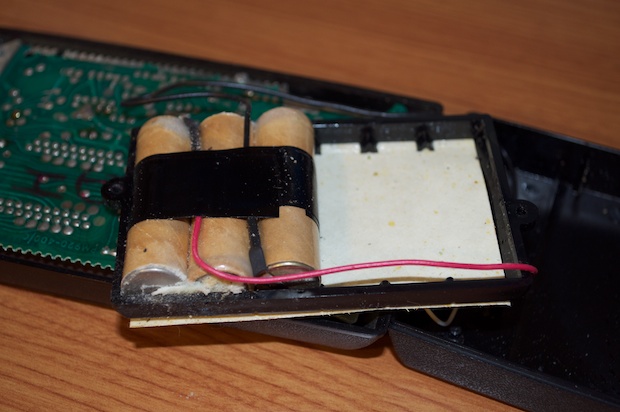
I flipped it over the other way to get to the back and found the dynamite, I mean old, crusty batteries.
I removed the batteries as well as the mainboard. It’s kind of cool how they angled the display by soldering it to a header and then just simply bent it.
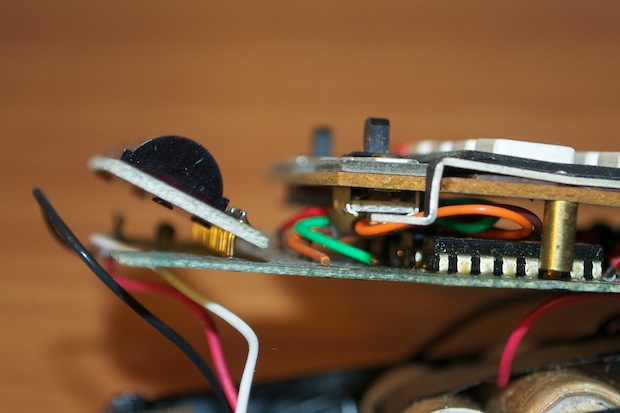
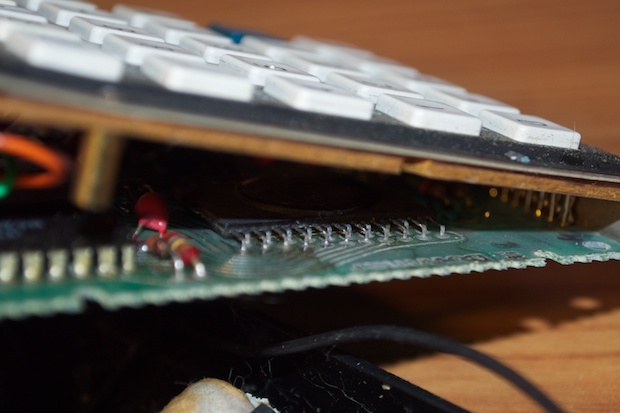
It’s hard to get a good look at the logic because the keypad is held in place by some rivets. If you look closely you can see it’s the same chip with the staggered pins that was used in the Monroe 30.
This was easy to wire up since I had a battery pack as a guide. I just connected my alligator clips to the inputs and it powered right up.
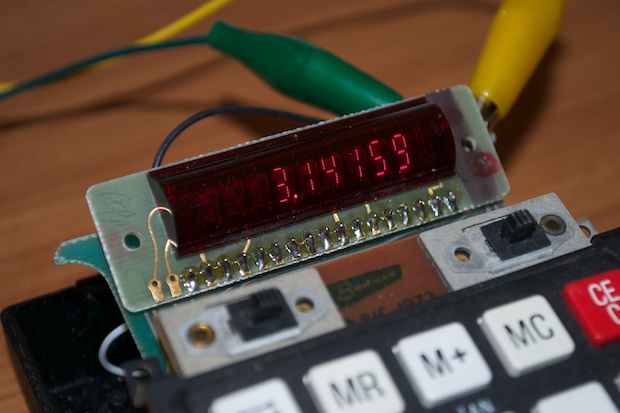
I don’t know if it’s a grounding thing or if there’s a loose connection, but the display kind of wigs out if you move anything.
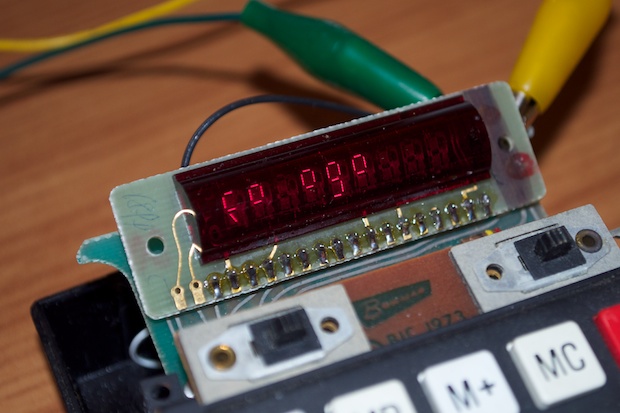
I hacked in a new battery pack and sealed it up.
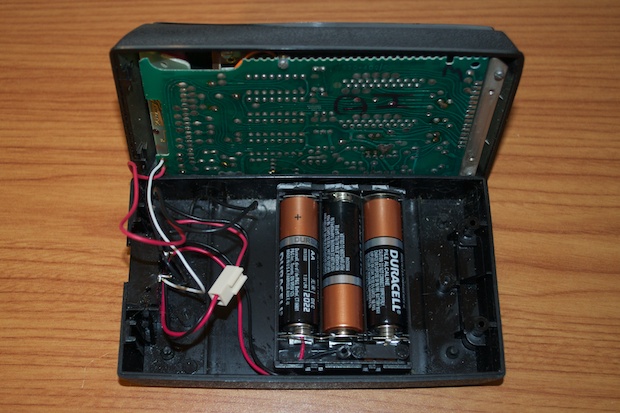
As good as new. It must have been a grounding thing. The keypad doesn’t like to be too far off the mainboard because once I had them screwed back together, the display stopped misbehaving.
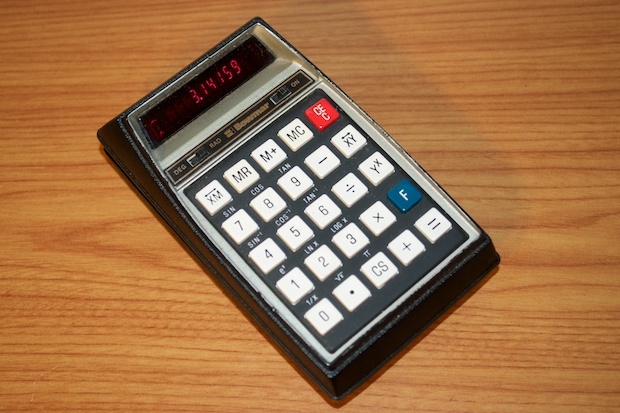 Bomar MX35 - 1973-75
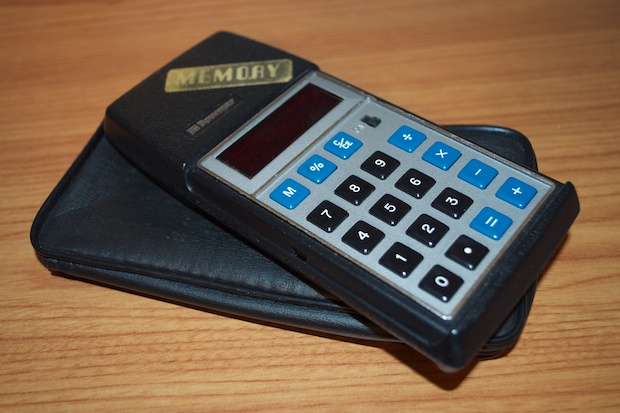
I couldn’t pin down an exact date for this guy. I couldn’t even find a reference to the model number either. I managed to find some that were close. Based on that it was made between 1973 and 1975. This is another one that came with a case. What’s great about this guy is that it’s pretty slim. This would have been easily carried in your pocket. I doubt you would have walked around with the Monroe 30 in your lab coat.
From a “cool vintage calculator” standpoint, the Monroe 30 is my favorite, but as far as one that I’d use on a daily basis, it would have to be this one.
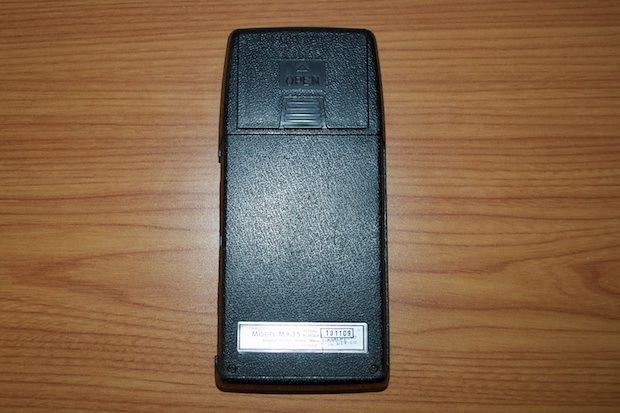
Yet another wacky propriety battery pack.
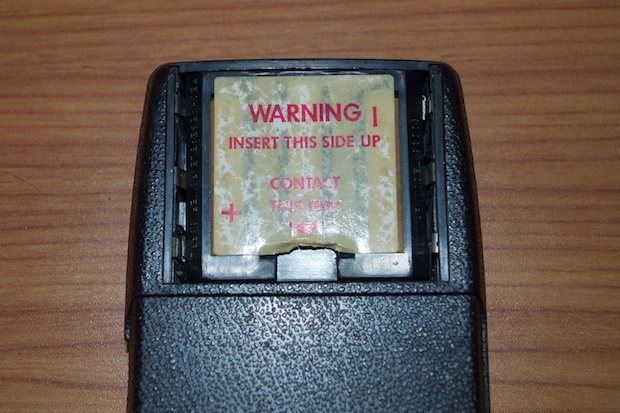
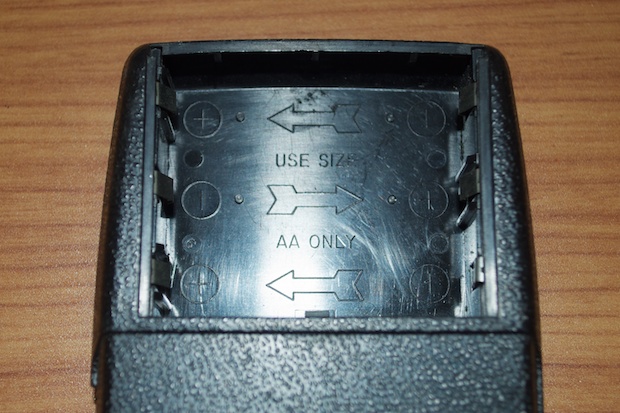
But wait….what’s this? “USE SIZE AA ONLY”? Nice! Even thought the battery pack has 3 small cells vertically, you can fit 3 AAs horizontally. Genius!
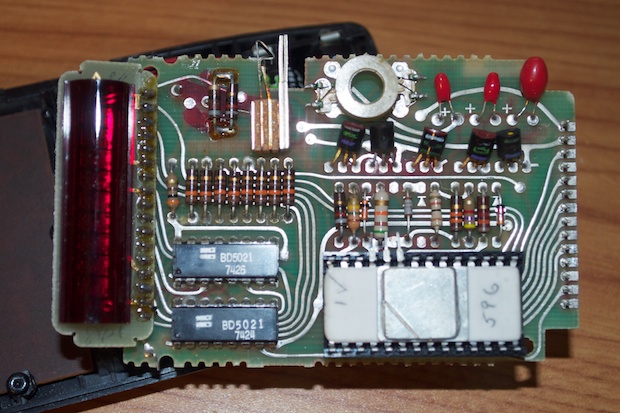
Removing the back cover reveals another hand drawn PCB.

I have no idea what that thing is hanging off the edge of the board, but there’s a hole in the side of the calculator so that you can get to it. It must be for some sort of adapter. Those capacitors and transistors look good enough to eat!
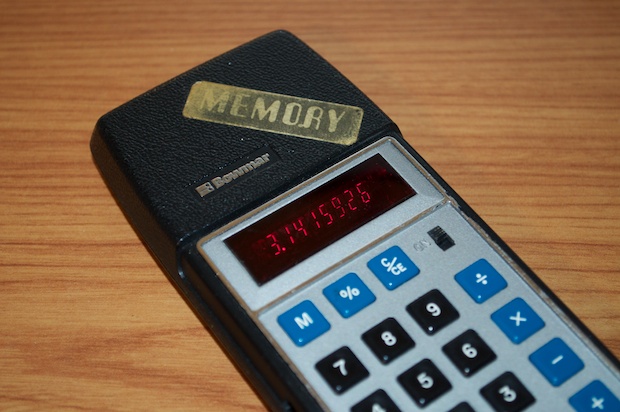
All I had to do was pop in some AAs and it was good to go.
 Phytron 32 - 1973
There’s no name or markings on this one. I didn’t know if it was some kind of generic case they used or if the phi symbol was indicative of who they designed it for. Have fun Googling for the phi symbol. I looked at hundreds of vintage calculators online and couldn’t find a single one that had the phi symbol on it. I stumbled up
vintagecalculators.com and contacted the owner to see if he knew who made it.
I promptly received a reply to my email and was pointed to one of his pages for the Phytron 32. As I had suspected, the phi symbol was indeed a logo.
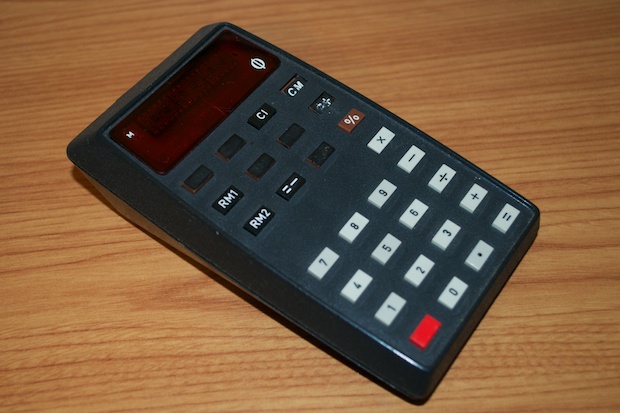
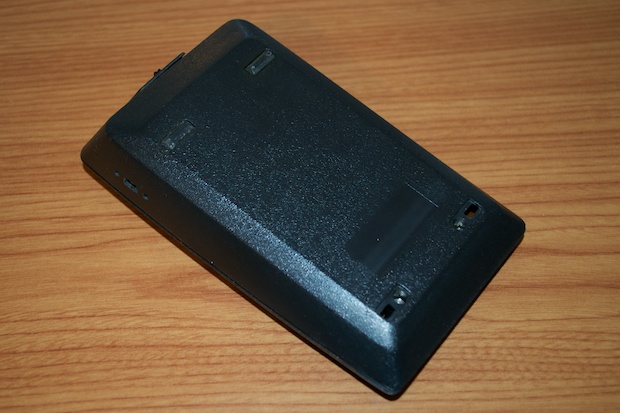
Woah! Don’t judge a book by its cover is right! However, in this case, it’s the opposite. The cover looks great. The inside? Not so much.
I took the two screws out of the top and started to open it when the chip just fell right out of it.
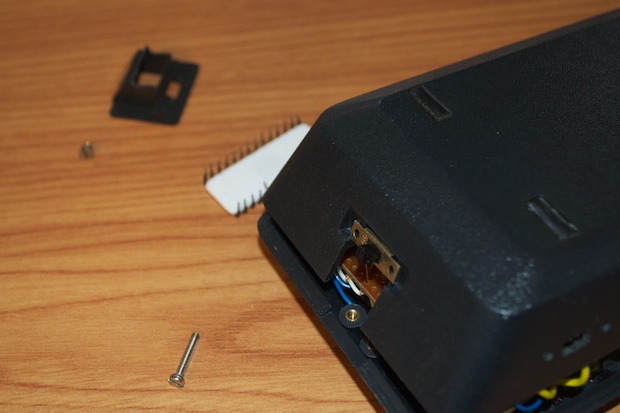
There’s no pin-1 identifier on the chip at all. How am I to know which end is which? I can only hope that whoever wrote “405EU” on it did it with the chip the right end up.
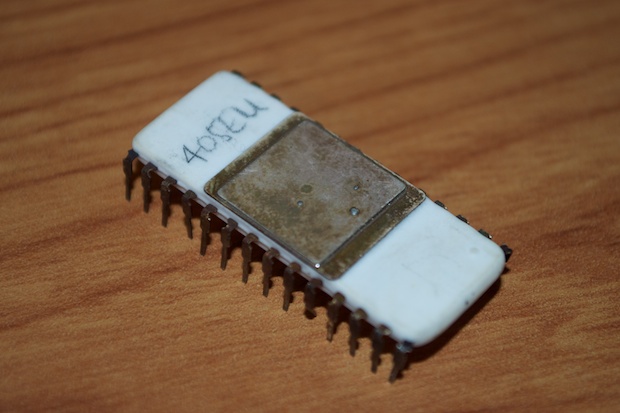
Wow, this one really is a prototype. Check it out. Totally homebrew!
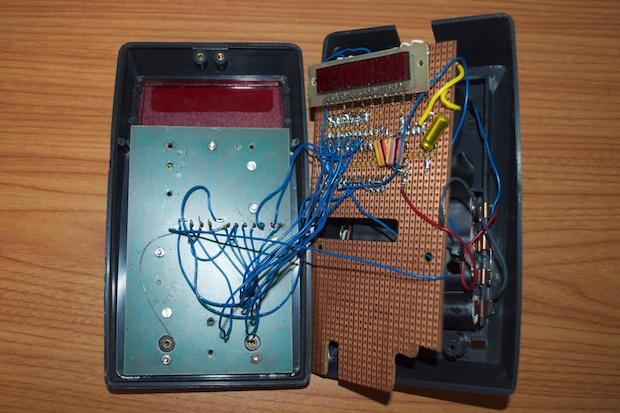
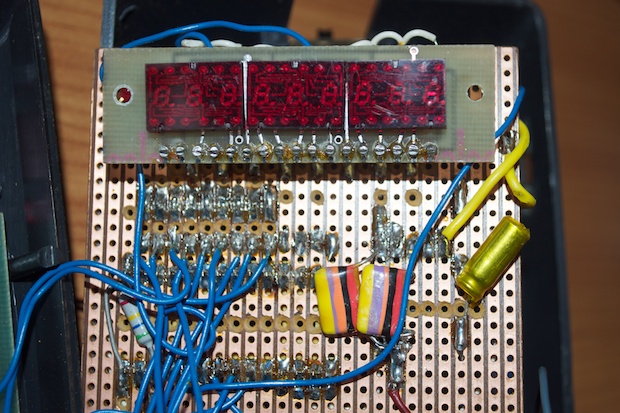
I flipped it over so I could take a look at the other side. There’s the socket that the chip fell out of. Based on the fact that all the resistors are on the one side, I can take an educated guess as to which way the chip goes in. (If the Boman MX35 is any indicator of chip orientation.) I guess I have a 50/50 change of getting it right, or wrong. Again, that’s assuming pin 1 on the chip is the one that I think it is.
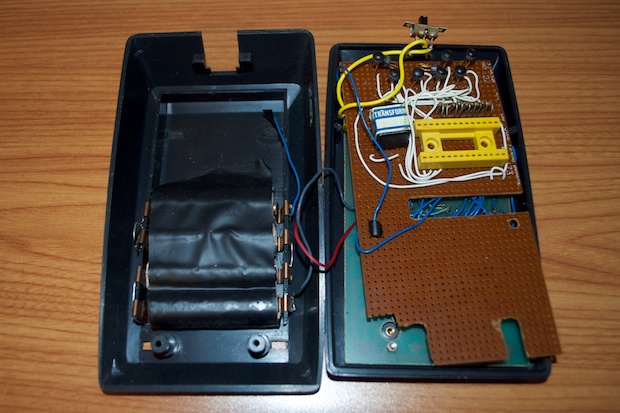
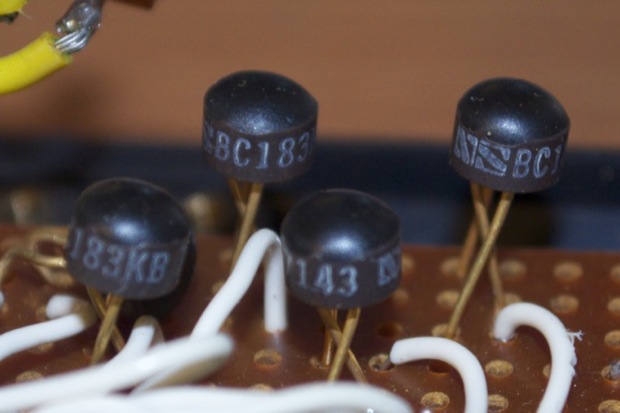
Those old-school transistors are a trip. Check them out. They’re BC183KBs by National Semiconductor. I tried to find out when National Semiconductor used that logo in an attempt to pin down a date, but Google failed me.
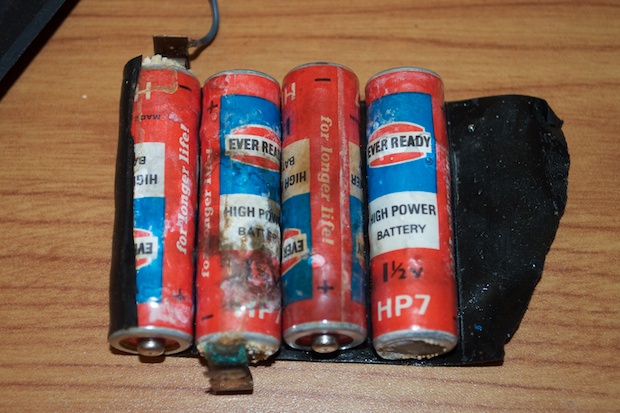
Dang! That’s a mess. When was the last time you saw an EVER READY battery? Hey, where’s the cat?
Not only did the chip fall out, but there were also two loose wires. I traced the wires to where I thought they should go. There were two pins on the back of the keypad without wires, so it looked like they'd go there.
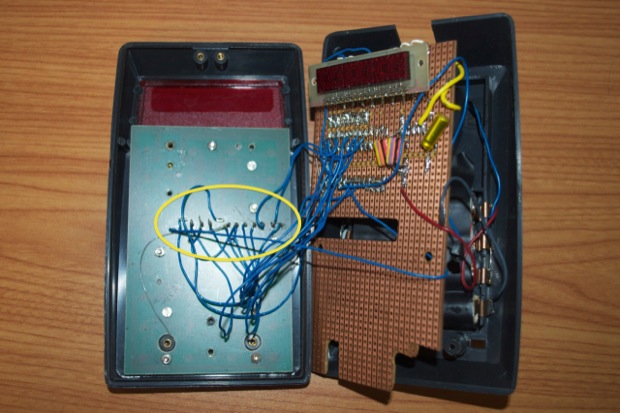
Worst case scenario, some buttons are swapped. I connected power to the battery inputs and turned it on. Nice dice. I bit the bullet and flipped the chip around, but it didn’t make any difference. This calculator appears to be totally dead. Along with the Digital V, I might have another crack at reverse engineering it, but that’s for another day.
All in all, 3 out 5 isn’t bad. It’s cool to see these guys up and running again. I’d love to bring one to work and leave it on my desk as a conversational piece, but the cleaning people steal stuff. So I can’t have anything cool at work.


