I've always wanted a Fender Strat. I used to play guitar back in the 90s. I sort of gave it up when the kids were born. Having twins in a 2 bedroom apartment didn't leave much room for a bunch of guitars and a half stack. I sold off most of my stuff, keeping an old Fender amp and my trusty Ibanez. I swear one day I'll pick it back up. Anyway, I never did get the Fender I always wanted. My Dad recently got into guitar so I picked him one up for Christmas. He's really happy with it.
It got me thinking about what it would take to build my own guitar. Not a full-size Fender, but a mini one. Something I can 3D print and laser cut. A footlong Fender!

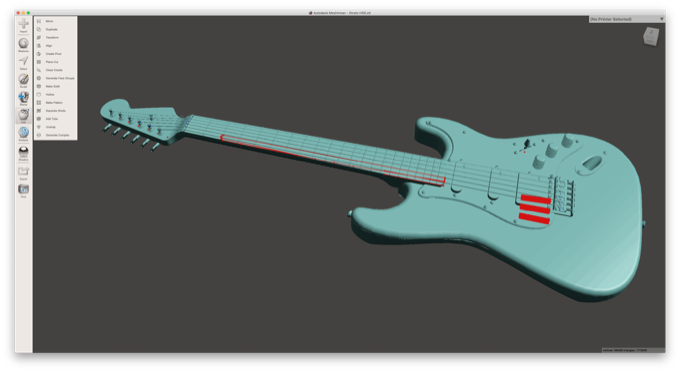
I was about to design my own model when I happened across a spot-on 3D model of a
Fender Strat online. Someone really went to a lot of trouble to make it perfect.
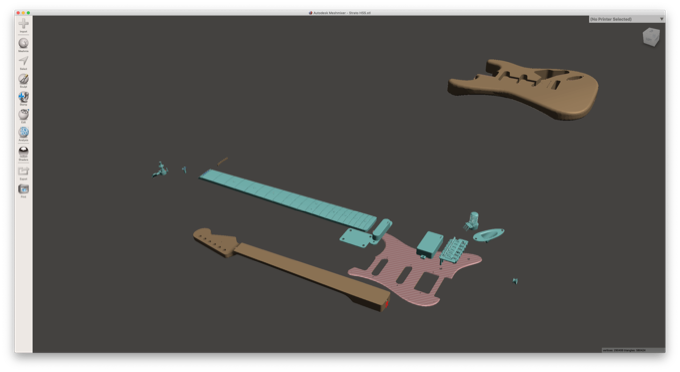
I deconstructed the model in Meshmixer and exported the pieces as STLs.
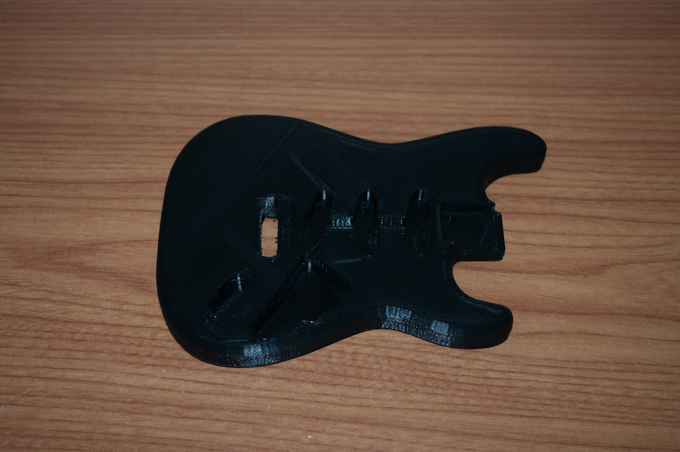
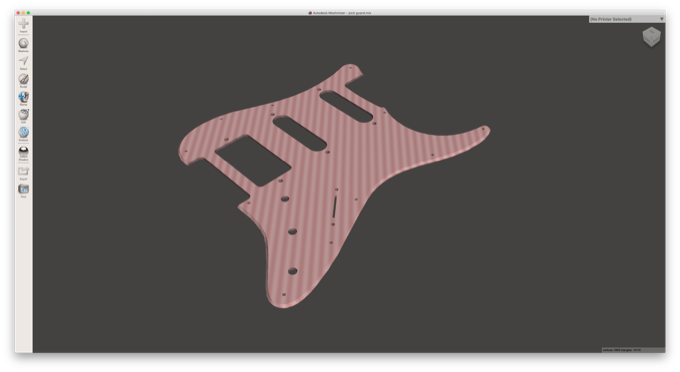
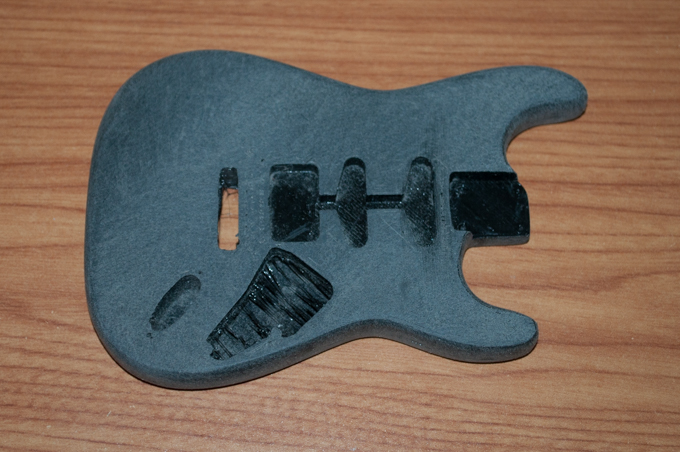
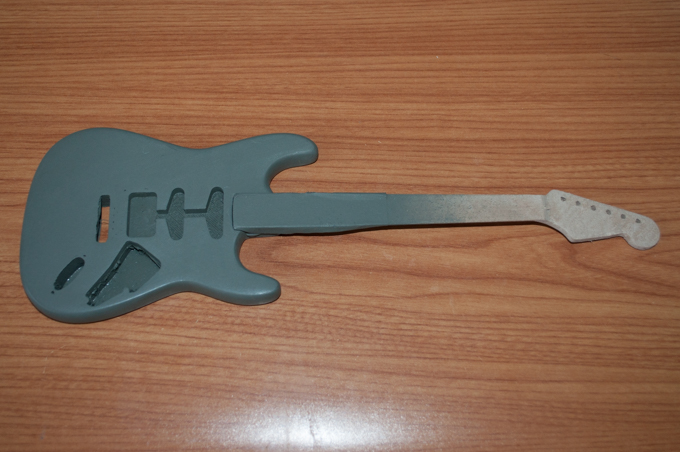
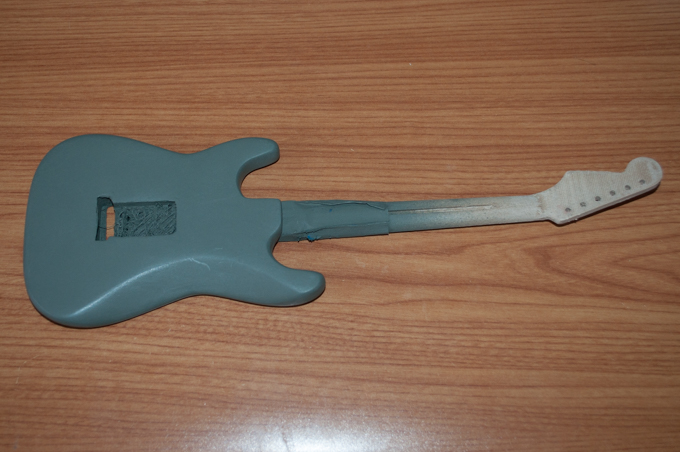
Although the pick-guard makes it look like it has two single-coil pickups and a humbucker, the model itself has three single-coil pickups. I had to take the model into SketchUp and modify it to accommodate a humbucker. I then 3D-printed it.

I know it's hard to see all in black, but it didn't come out half bad. I do need to sand the hell out of it to get rid of all the print lines.
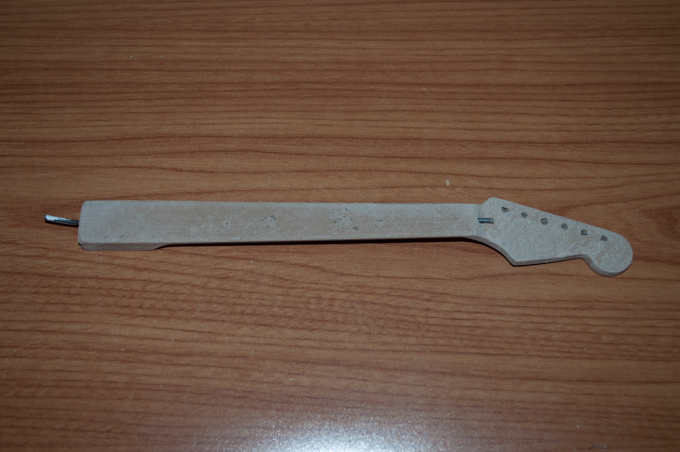
Next, I exported the neck and fretboard.
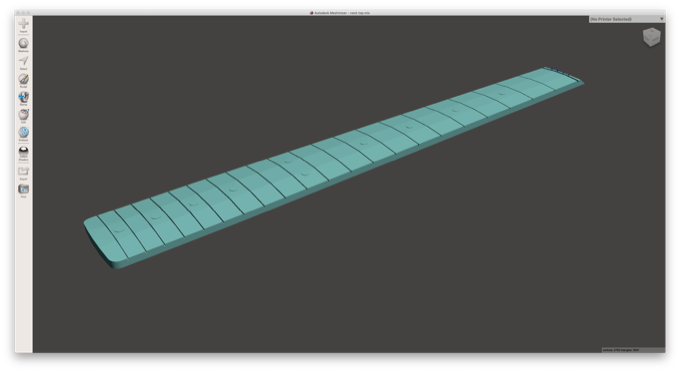
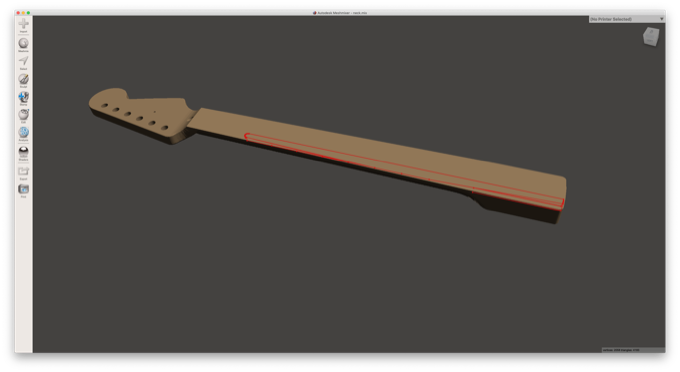
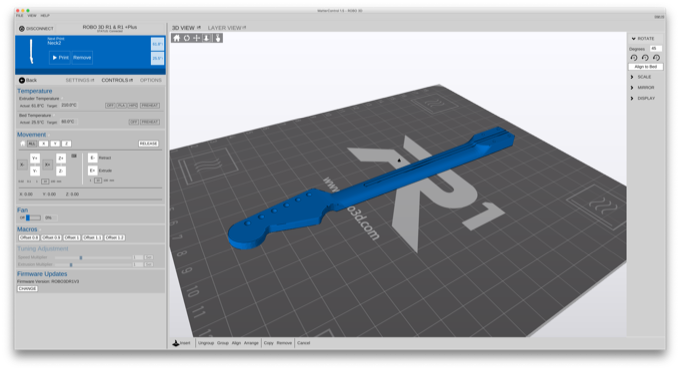
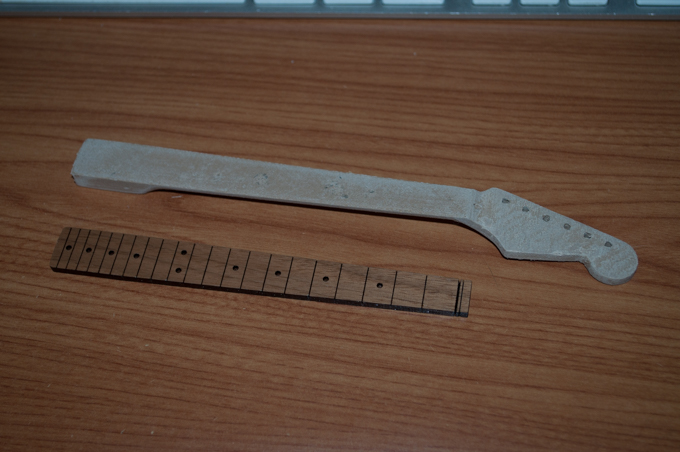
I then printed the neck in woodfill PLA.
I used the 3D model of the fretboard to create a 2D image of it. I then laser cut it.
This model even has a hole running the length of the neck for a truss rod. I used a length of metal that I cut from a wire hanger.
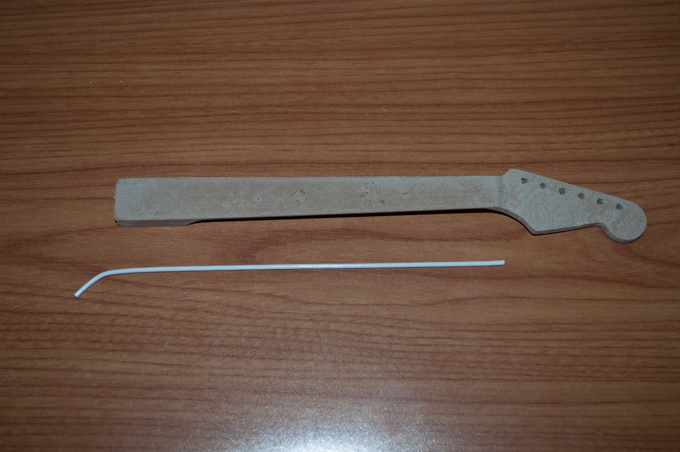
That's perfect. I'll just trim it off at the ends. That should give the neck a little strength.
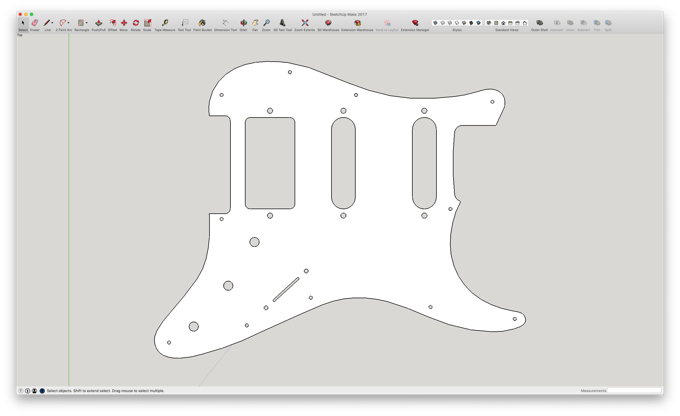
I then exported the pick-guard as a STL.
I took it into SketchUp to clean it up and export it as a SVG. The only white acrylic that I had onhand was 1/8" thick. That's far too thick. I looked around the house and found a white 5-Star notebook. It was perfect.
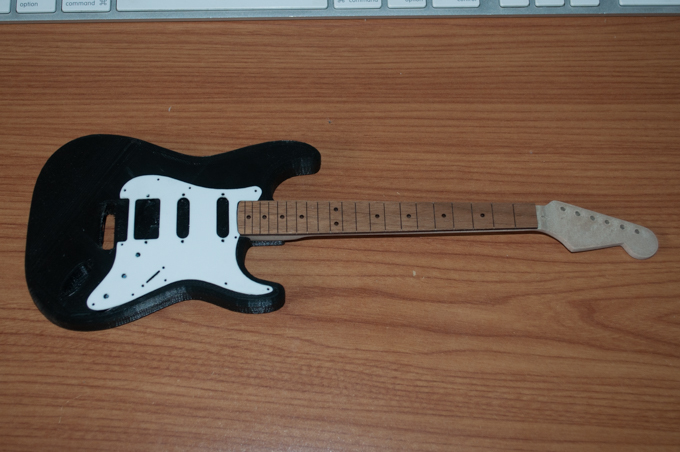
I put all the pieces together just to get a feel for what it's going to look like. That is actually pretty cool looking.
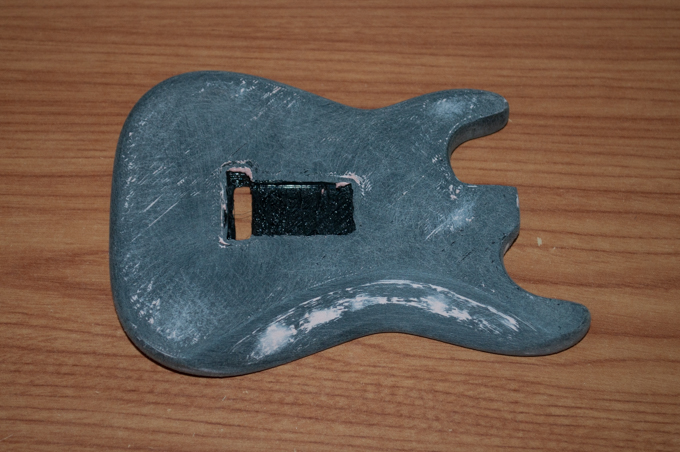
I then started to sand everything nice and smooth.
I applied some Bondo to fill the holes and sanded it down to an 800-grit finish.
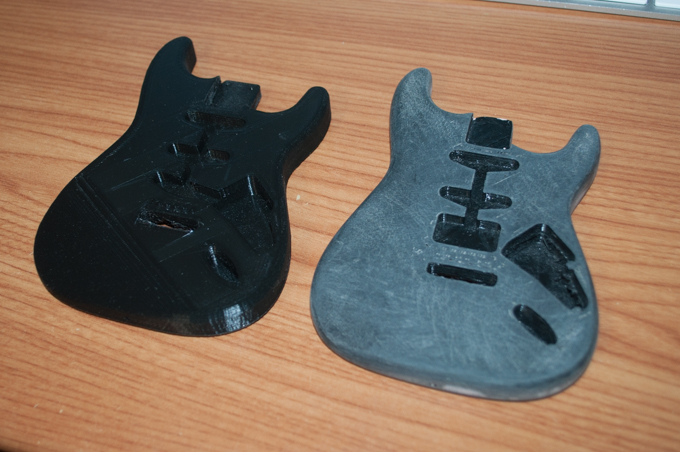
It's so smooth. What a difference when you see the before and after. The one of the left was a failed print. I printed it with a raft, which was impossible to pull off, and it made a huge mess on the back. I'll probably just use it to experiment on.
All sanded and ready for primer.

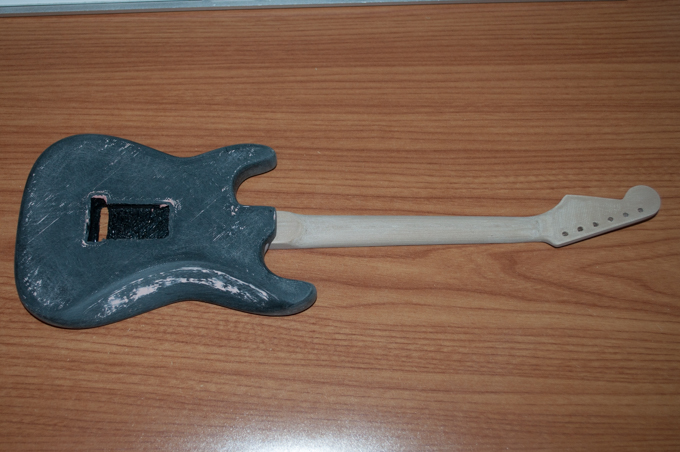
I then gave it two coats of primer. I also had another neck that was a failed print. The infill percentage wasn't right and I ended up with a hole on the back where the truss rod went. It turned out to to be a great handle to hold the body so that I could paint it. I just held it in place with some hot glue.
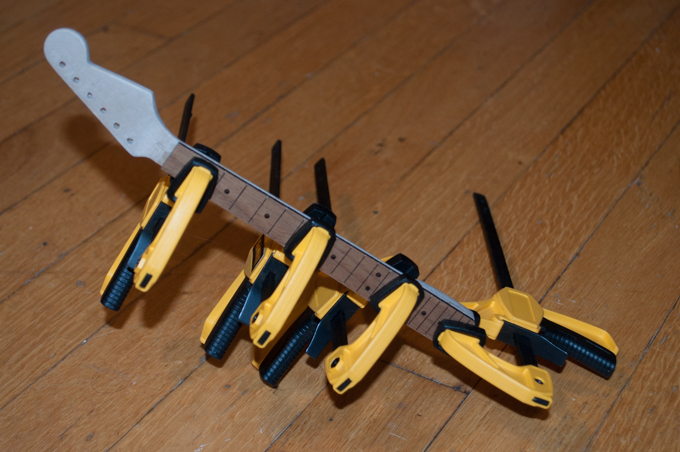
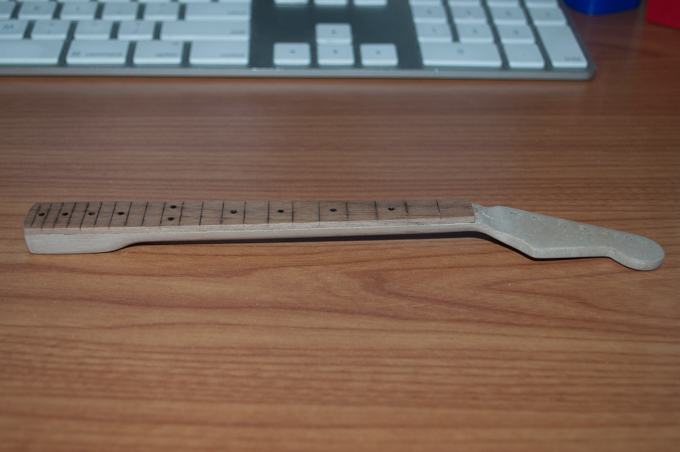
I then glued the fretboard to the neck and clamped it in place overnight.
Pretty cool.
I laser cut another fretboard to experiment with gluing on frets. The best method that I found was to Krazy Glue some legs cut off from 1/2 watt resistors. Once I was happy with the results, I tried it on the good neck.
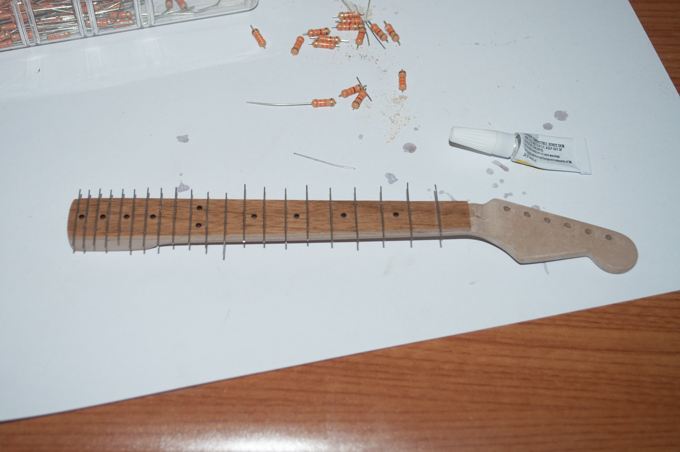
That came out great, but I hit a snag. I forgot to fill the fret markers in with plastic before I glued the frets on.
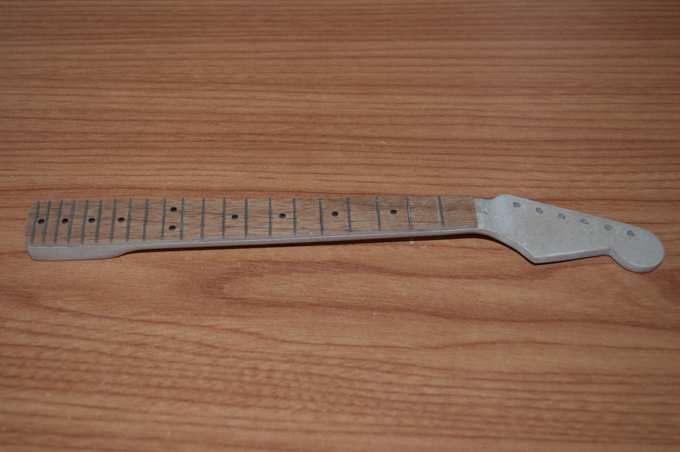
As it turns out, the hole size is a perfect fit for 1.75mm PLA. I can fit the PLA right in the hole, and snip it off with some flush-cutters. However, there was no way to sand them flush with the board with the frets in the way. I had to pop the frets off to sand the fretboard back down.

Now the slots for the frets aren't as deep as they were before. I'm not sure if I'll be able to glue frets back on. I might have to make another neck with deeper slots. What a pain that'll be starting from scratch.
See this project from start to finish:
Footlong Fender - Part I
Footlong Fender - Part II Footlong Fender - Part III Footlong Fender - Part IV Footlong Fender - Part V Footlong Fender - Part VI
