A while back I picked up a SparkFun 128x64 LCD and an Adafruit 66-channel GPS module to have a go at making a GPS clock.
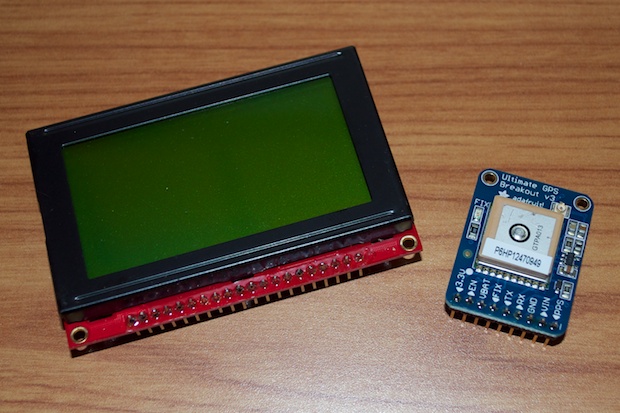
The great thing about setting the time and date via GPS is that I won't have to put any buttons on the clock. It'll set itself, and appear to be completely autonomous. By removing the buttons needed for entering menus and setting the time and date, I can hopefully make the clock that much smaller. Ideally, I don’t want it to be any bigger than the display itself. In addition, shaving a half inch or so off the PCB should save a few bucks when it comes to getting the PCB made.
I finally had a go at trying both the LCD and the GPS module today.
I figured out how to talk to the 128x64 LCD display. It's orders of magnitude harder to talk to than a standard 16x2 LCD. The library is way more complex. It took a few hours to wrap my head around the basics, but I got it.
Here’s how you wire it up:
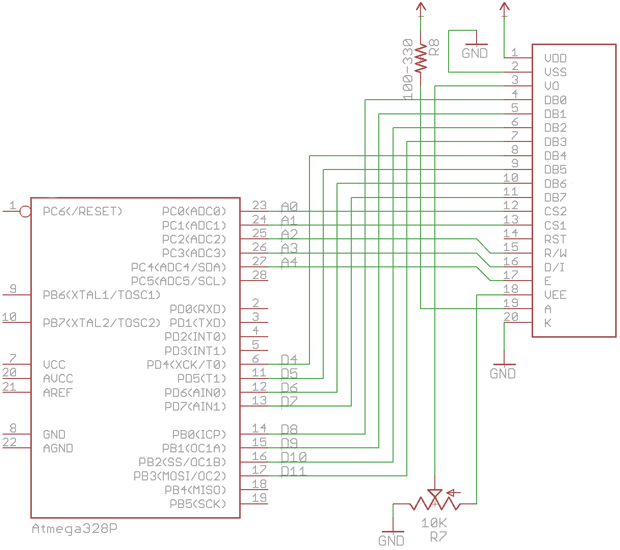
It should look something like this, hopefully a little prettier.

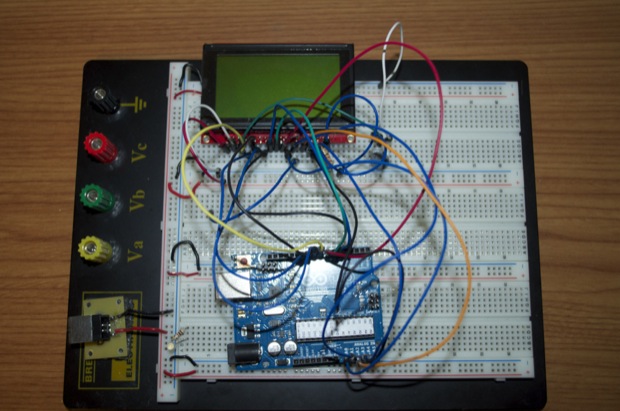
Once I had the hardware set up, I loaded the GLCD library and gave it the “Hello World” treatment.

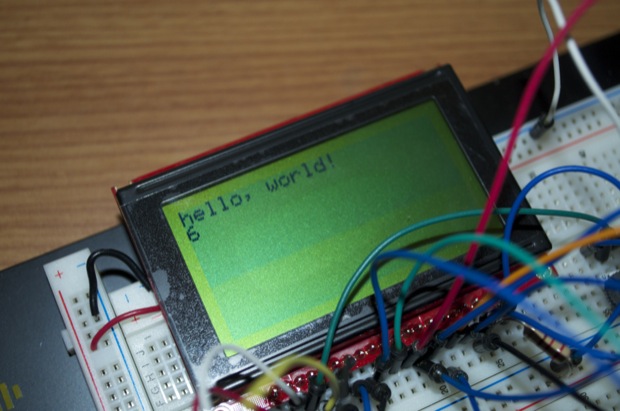
I then experimented with some of the various example sketches that were provided with the library in order to better familiarize myself with the capabilities of the display.
Graphics:
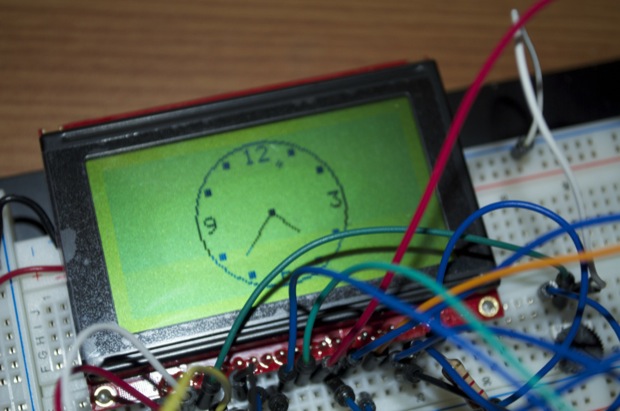

Animations:

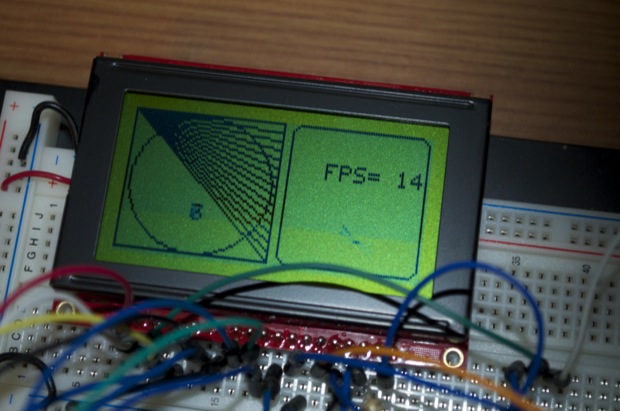
Pretty sweet. I think I’ll give my clock a nice animated splash screen at startup.
I then started to play around with some text to see how much I could fit on the display. I thought I was going to have to write a few custom fonts, but it turns out there’s already a few baked in.
With the standard 5x7 font, I can fit 8 lines on the display.

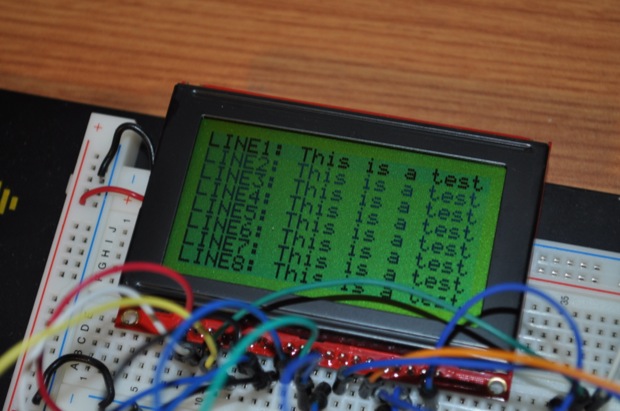
With the Arial 14 font, I can fit 4.

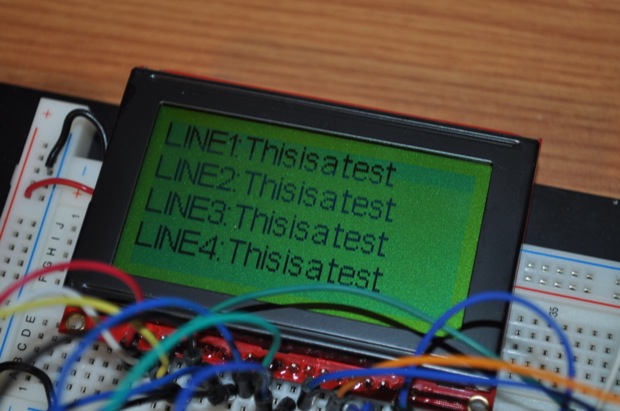
You have to be careful with the larger fonts. You can get text to step over each other and make a big mess if you’re not careful with your line spacing.
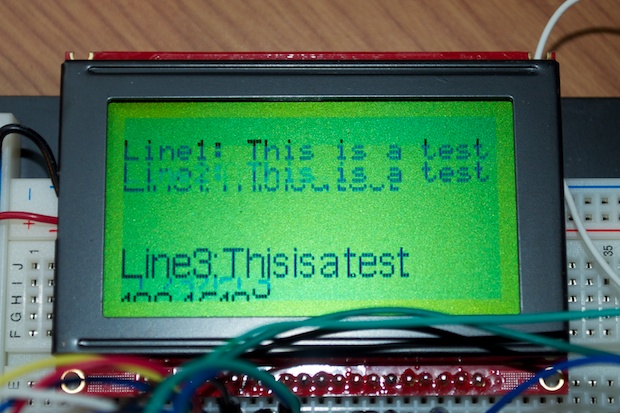
This is a sample sketch that’s used to illustrate how to divide the display in different areas. You can also invert text by giving it a black background.

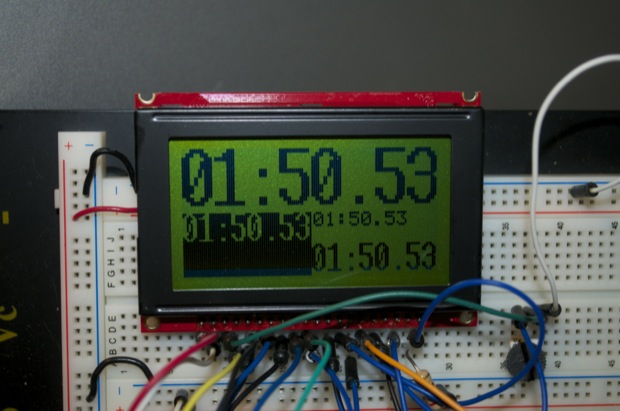
Using
Adafruit’s GPS tutorial, I managed to figure out how to get the GPS connected and talking.
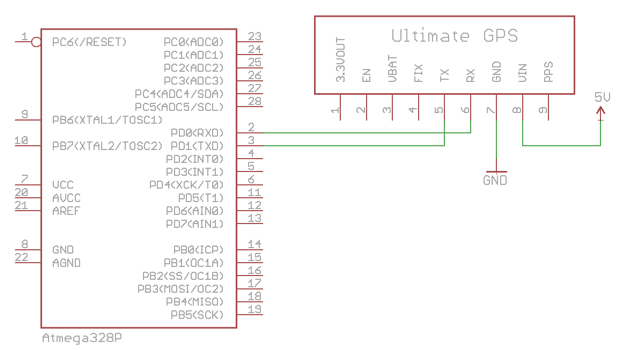
Here’s how you hook it up:

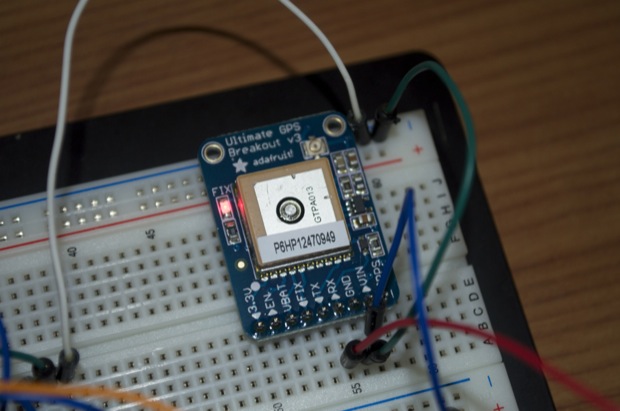
If you have a good signal, it'll connect to a satellite automatically at power up and start spitting out data.

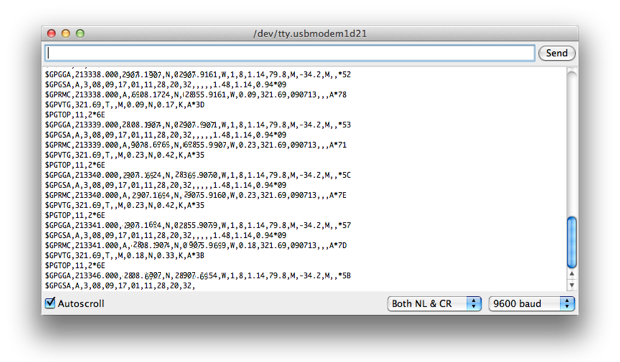
All I had to do was take that data and parse it into date and time info that made sense. I don't care about latitude and longitude, so I can ignore it. I did punch the latitude and longitude into Google maps and it's pretty much on the money, so that might be useful at some point. Maybe I’ll make something to automatically geotag the pictures I take with my Nikon.
As far as parsing the data, Adafruit had a sample sketch that made it easy to figure out how to do it. I was able to take the GPS strings and pass them right to the display.
  GLCD.SelectFont(fixednums7x15);
  GLCD.CursorTo(0,0);

  GLCD.print(GPS.hour);
  GLCD.print(":");

  GLCD.print(GPS.minute);
  GLCD.print(":");

  GLCD.SelectFont(SystemFont5x7);
  GLCD.CursorTo(0,2);
  GLCD.print(GPS.month);
  GLCD.print("/");
  GLCD.print(GPS.day);
  GLCD.print("/");
  GLCD.print(GPS.year);

  //GPS status
  linkStatus = (GPS.fix);
  GLCD.SelectFont(Arial14);
  GLCD.CursorTo(0,7);
  if (linkStatus < 1) {
    GLCD.print("GPS:OFFLINE");
  }
  else {
    GLCD.print("GPS:LINKED);
  }
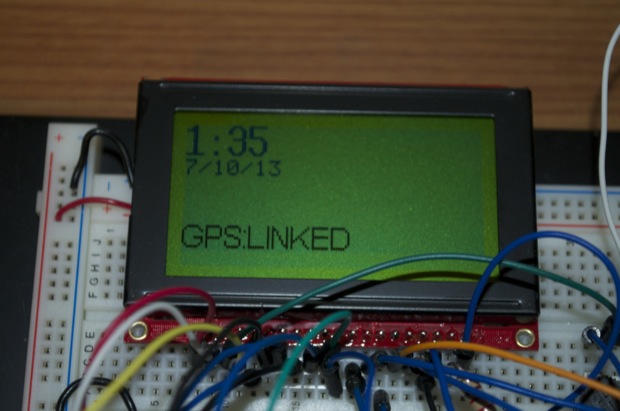
I then started to play around with the font sizes in order to fill the screen.

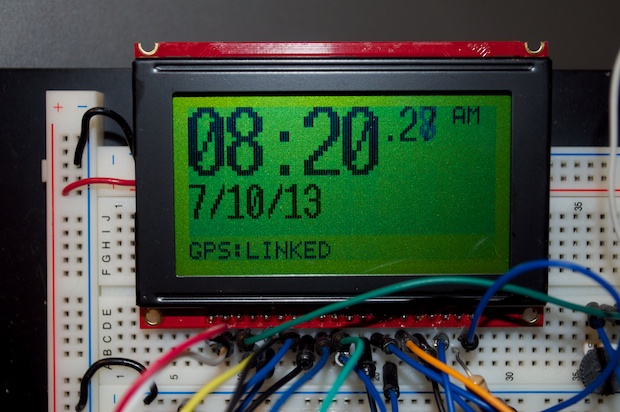
This is by no means the final design; I was just happy that I got it displaying the data. I'll have to play around with it some more. I’ll also need to put in come compensation for my time zone as all the data that comes from GPS is based off GMT.
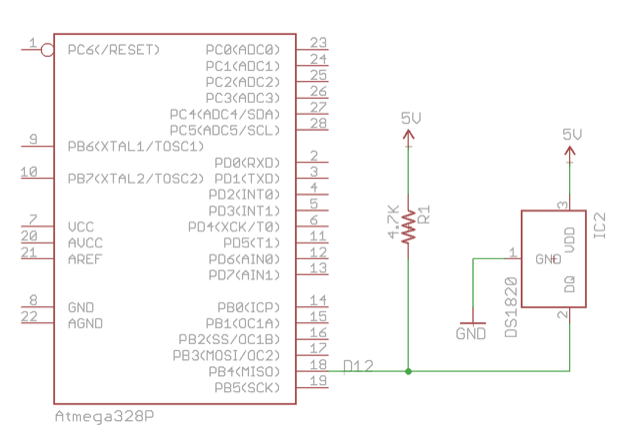
I’d also like to display the temperature, so I think that spare
DS18B20 sensor I have is going to come in handy after all.
I connected the DS18B20 and added the following code:
#include <OneWire.h>

int DS18S20_Pin = 2; //DS18S20 Signal pin on digital 2
OneWire ds(DS18S20_Pin);  // on digital pin 2
int tempCDS18B20;
int tempFDS18B20;

void setup() {
  Serial.begin(9600);
}

void loop() {
  tempCDS18B20 = getTemp();
  tempFDS18B20 = (tempCDS18B20 * 9.0)/ 5.0 + 32.0; // Convert C to F

  GLCD.SelectFont(SystemFont5x7);
  GLCD.print("    ");
GLCD.print(tempFDS18B20);
GLCD.SelectFont(SystemFont5x7);
  GLCD.print("F");

}

float getTemp() {
  //returns the temperature from the DS18S20 in Celsius

  byte data[12];
  byte addr[8];

  if ( !ds.search(addr)) {
    //no more sensors on chain, reset search
    ds.reset_search();
    return -1000;
  }

  if ( OneWire::crc8( addr, 7) != addr[7]) {
    Serial.println("CRC is not valid!");
    return -1000;
  }

  if ( addr[0] != 0x10 && addr[0] != 0x28) {
    Serial.print("Device is not recognized");
    return -1000;
  }

  ds.reset();
  ds.select(addr);
  ds.write(0x44,1); // start conversion

  byte present = ds.reset();
  ds.select(addr);
  ds.write(0xBE); // Read Scratchpad

  for (int i = 0; i < 9; i++) { //need 9 bytes
    data[i] = ds.read();
  }

  ds.reset_search();

  byte MSB = data[1];
  byte LSB = data[0];

  float tempRead = ((MSB << 8) | LSB); //using two's compliment
  float TemperatureSum = tempRead / 16;

  return TemperatureSum;
}
That seemed to work, but not very well. I did have to make a few additional tweaks.

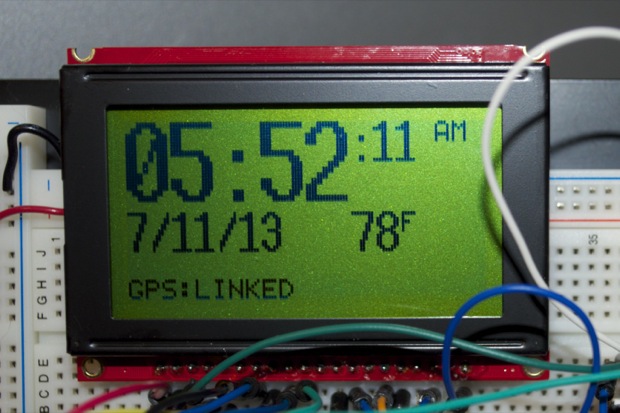
The DS18B20 must be a little slow and sending its data. Having the serial port set to 115200 for the GPS module causes the DS18B20 to spit out garbage. Actually, I don’t think it’s garbage, I just think it’s not ready, or I’m only getting partial data. It’ll send a temperature of 78 degress, but then subsequent loops display the temperature as -1768. Eventually it corrects itself after a few loops. So it must be that the data is incomplete at the time of the query.
The sample sketches for the DS18B20 have the serial port set to 9600. I don’t know if it needs to be that speed or if it’s arbitrary, but in my case, the data doesn’t seem to come through on every loop.
What I did to get around this was to put in a 5 second timer to sort of slow things down. That way I’m not reading the temperature on every loop; just every 5 seconds.
if (millis() - timer2 > 5000) {
    tempCDS18B20 = getTemp();
  }
That seemed to help, but the temperature would still display –1768 every now and then. I then defined a range of temperatures I wanted to display. Anything from 32F to 120F should be more than adequate, and will filter out those erroneous temperatures. The clock shouldn’t be exposed to temperatures outside that range. I might even be able to tighten that up since it’s never that hot or cold here, but I’ll leave it for now.
  tempFDS18B20 = (tempCDS18B20 * 9.0)/ 5.0 + 32.0; // Convert C to F
  GLCD.SelectFont(SystemFont5x7);
  GLCD.print("    ");
  GLCD.SelectFont(fixednums8x16);

  //check to see if the new temp is valid (within the range I want to display).
  //This helps parse out erroneous -1768 temp readings. If it's good, pass it to the 'oldTemp' var
  if ((tempFDS18B20 > 32) && (tempFDS18B20 < 120)) {
    oldTemp = tempFDS18B20;
  }

  //if temp is valid, go ahead and just display it,
  //or else display the oldTemp reading saved
  if ((tempFDS18B20 > 32) && (tempFDS18B20 < 120)) {
    GLCD.print(tempFDS18B20);
  }  else {
    GLCD.print(oldTemp);
  }

  GLCD.SelectFont(SystemFont5x7);
  GLCD.print("F");
When a successful read has been made (the temperature is within my range) I’ll display it. If subsequent reads fall outside that range, they will be ignored. I’ll continue to display the “old temperature” until a new within-range temperature is read.
It’s seems like a hack, but it works. It’ll do for now until I can nail down exactly what’s causing the timing problem.
I’d also like to have an alarm. I threw an audio amp and a speaker into the design for the alarm function, as well as the “chime on the hour’” feature. However, that raises an issue. How do I set the alarm when I don’t have any buttons? How do I toggle the “chime on the hour” function on and off?
Come to think of it, I should probably put in a menu that allows you to select your time zone too, rather than hard-coding it. So again, I’m probably going to need some buttons. Or do I?
SparkFun recently added a cool little IR remote to their lineup. This might be perfect!
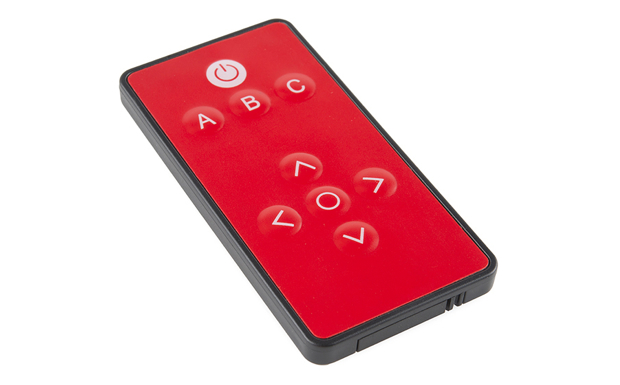
I can add an IR sensor to the clock and control it with a remote! How cool is that?
In theory, I’d be able to add features to the clock in the future without having to worry if I’ll have a button to access/control it. There’s plenty “mode” buttons (A, B, and C) on the remote that I can use. Maybe the mode buttons can change the GUI of the clock: text based, analog dial, or maybe even a
Pong Clock!
The left/right arrows can be used to step through fields and the up/down arrows can be used to change them. The center button could be an enter/accept button.
The more I think about it, the more ideas I get! It’s perfect!
Until I can get my hands on an IR sensor and the remote, I’ll have to use buttons. I added a few buttons to activate and configure a settings menu. From there, I’ll be able to tweak my settings.
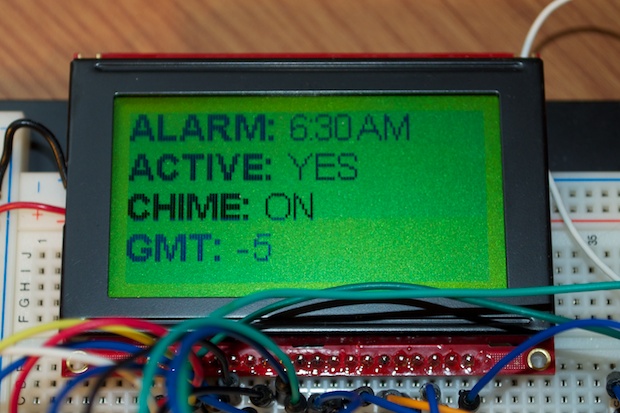
That’s just placeholder text until I finish the code.
Once an alarm time has been set, it’ll appear on the main display. Again, just placeholder text for now.

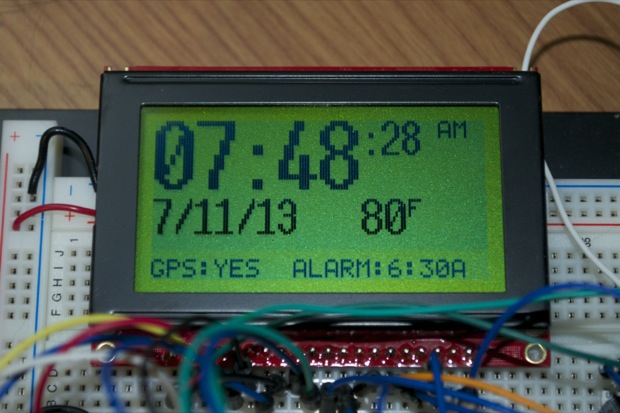
As far as the GPS fix indicator on the bottom left, I might change that. In fact, I’ll most likely change that. Ideally, the time/date shouldn’t be streaming from the GPS module 24-7. I should just use it to sync the time/date. Maybe it’ll look for a signal once a day, and if it can get a fix, it’ll pull in the time and date. Then the time and date will run locally. That way if I don’t get a fix, the clock will continue to run. I’ll then probably change the GPS fix indicator to something like “Last Sync: xx/xx”.
As I said before, ideally I’d like the clock to be no bigger than the LCD. I jumped into Eagle and put together a schematic.

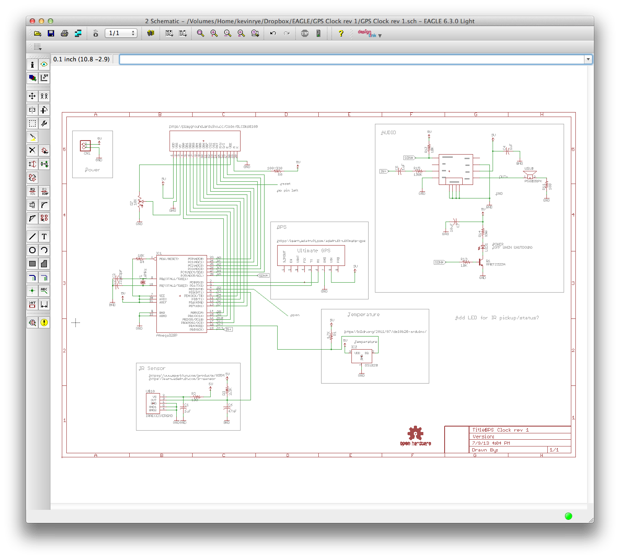
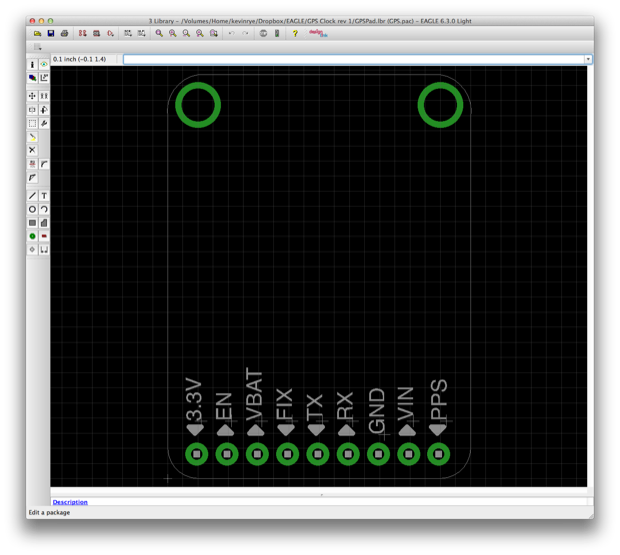
Instead of just popping a 9-pin header into the design for the GPS breakout board, I created a package that matches the footprint for Adafruit’s GPS module.

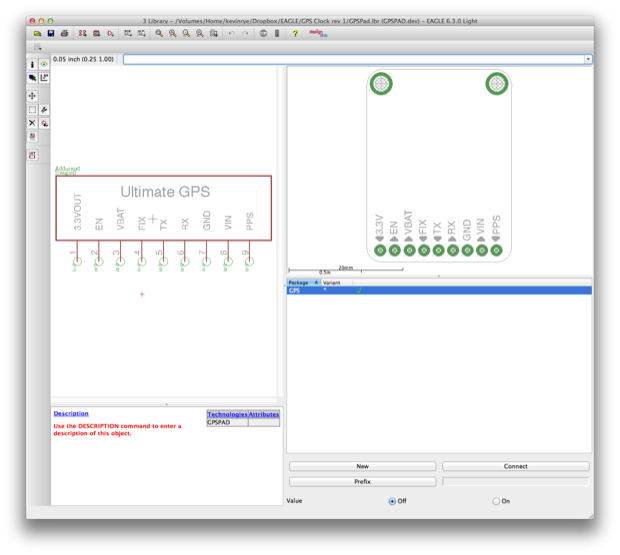
I then made a new 9-pin header and connected it to my package.

That way I can drop it onto my PCB as a daughterboard and know exactly what real estate I have to play with. I also resized one of the
Sick of Beige templates in order to accommodate the LCD, leaving as little extra space as possible.

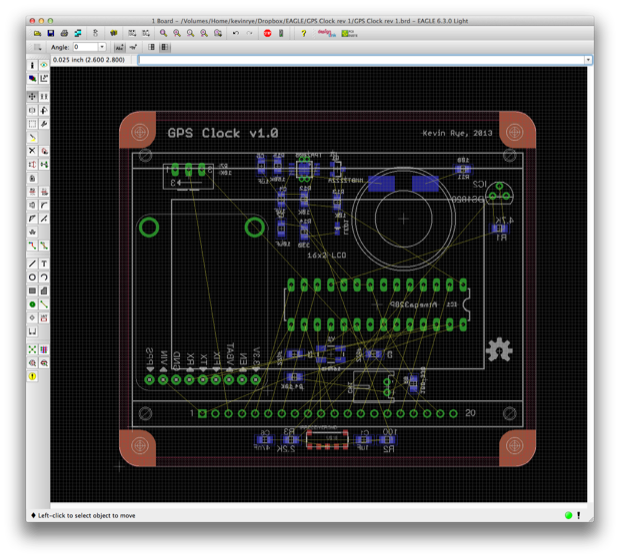
I like to keep the majority of the electronics on the front of my PCBs to sort of “showcase” the design, but I think in this case I won’t mind having everything on the back. Here’s a 3D model to better illustrate the look that I’m going for.

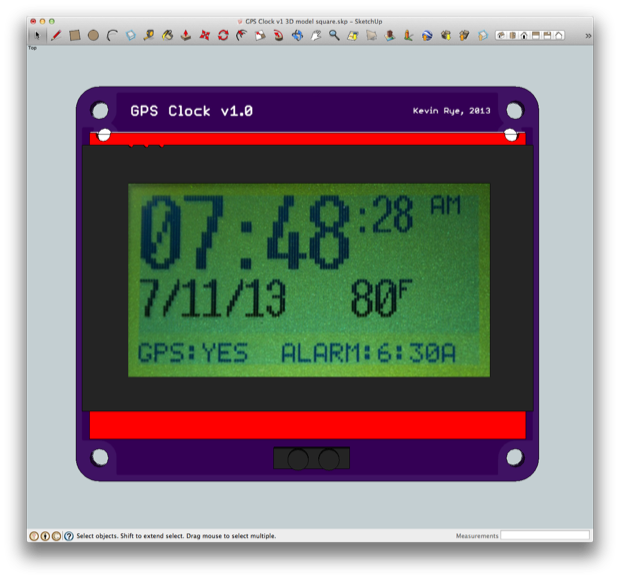
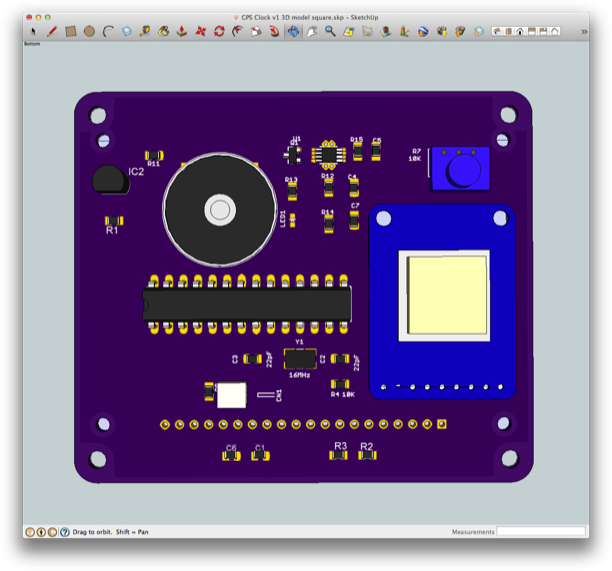
I added the IR sensor to the bottom of the PCB in the center since there’s some space there. It might be too distracting if I put it up top. Besides, that’s where the text is going to be, so it’s probably better off at the bottom anyway.
I might also try my hand at making some kind of irregular-shaped PCB. This is just a “rough sketch”, but you get the idea.

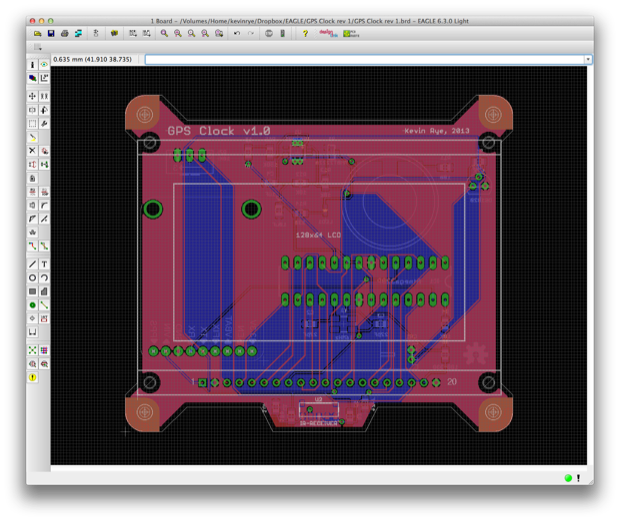
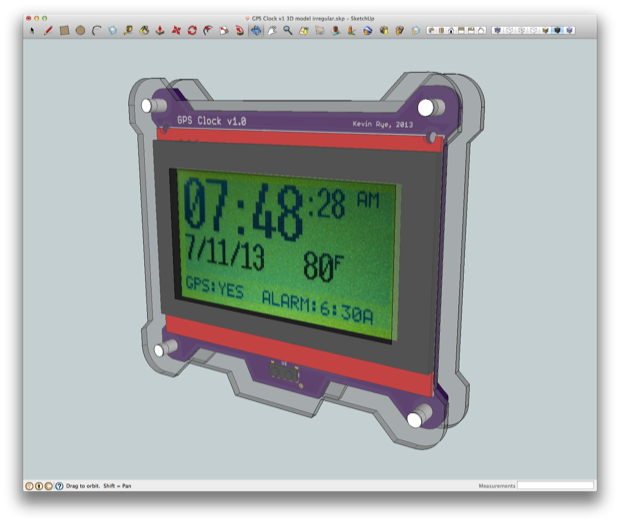
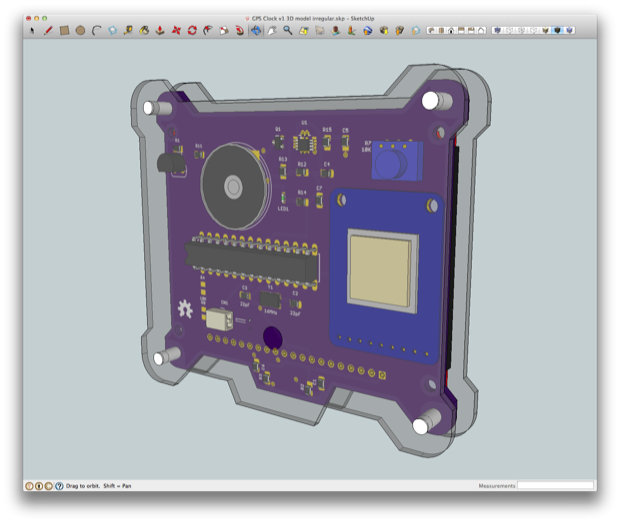

It took me all of 5 minutes to tweak the edges, so I was thinking the design was a little rough and that it would need some refinements. However, after seeing the 3D model, I think it does look kind of cool.
This is going to be a pretty sweet looking clock!
See this project from start to finish: GPS Clock Prototyping, Part I
GPS Clock Prototyping, Part II Arduino Mega 2560 GPS Clock Prototyping, Part III GPS Clock Prototyping, Part IV GPS Clock Prototyping, Part V GPS Clock Assembly, Part I GPS Clock Assembly, Part II GPS Clock Assembly, Part III GPS Clock Assembly, Part IV GPS Clock Rework - Ditching the Joystick, Part I GPS Clock Rework - Ditching the Joystick, Part II GPS Clock Rework - Ditching the Joystick, Part III


