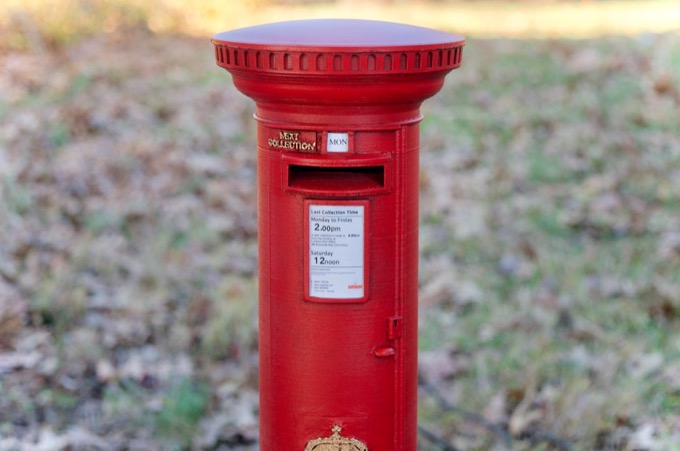
The 3D-printed Balgonie Place sign that I made for my Mom for Christmas came out so great that I decided to make something for my sister too. After all, they both have Scottish-themed rooms at home. I think a pillar box would make a nice addition.
Read More...
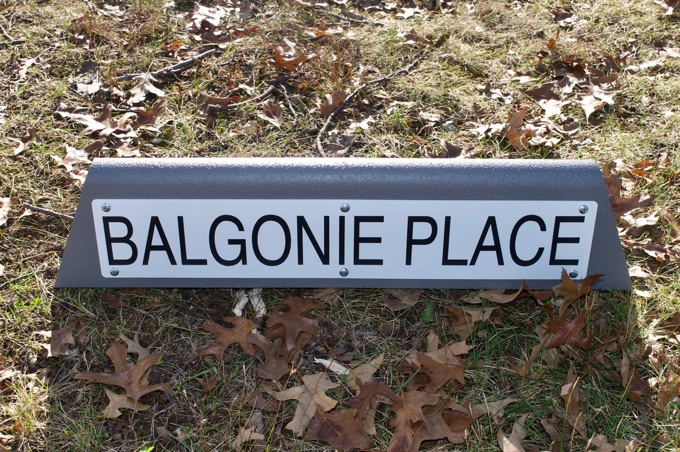
On the street where my Mom grew up in Scotland, there's a concrete sign on the corner of the street. I thought it would be something neat to 3D print for her.
Read More... Sep 20, 2020 Filed in:
3D Modeling | 3D Printing
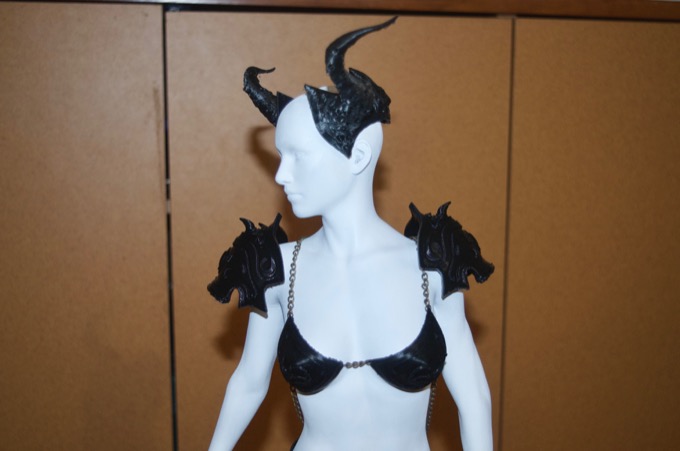
With the weapons complete, it was time to start designing the armor.
Read More...
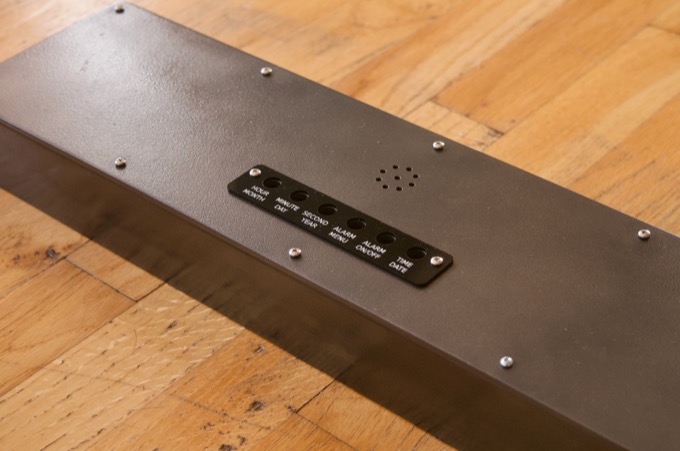
The enclosure for the new clock is almost complete. I just need to make the front panel and then I can assemble the PCB.
Read More...
It's time to make some weapons!
Read More... 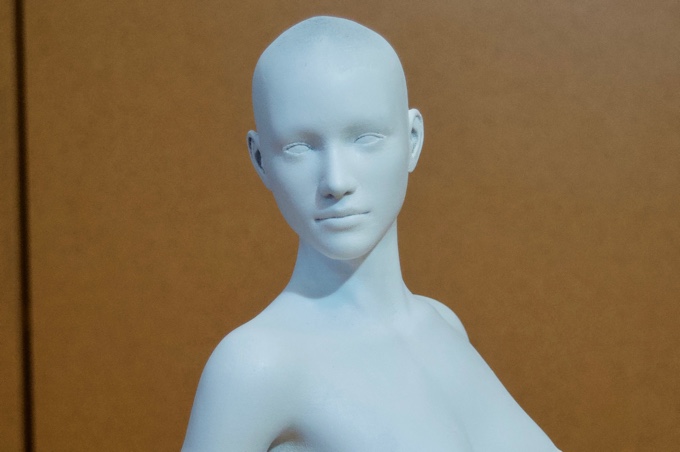
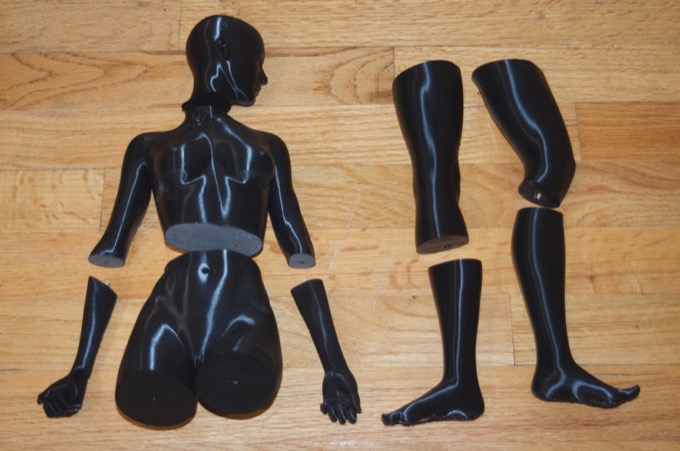
With all the parts to the new model printed, it was time to glue, sand, and paint.
Read More...Aug 07, 2020 Filed in:
Laser Cutting
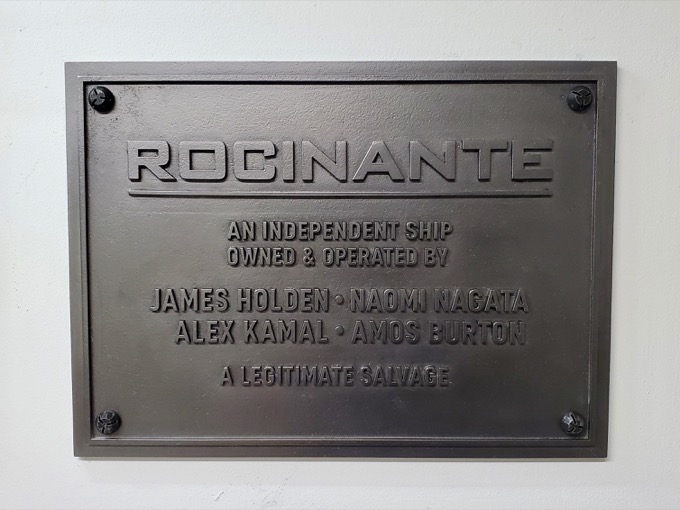
A friend of mine wanted to make a Rocinante wall plaque from the TV show The Expanse. I told him if he shot me an SVG for it, I'd be more than happy to laser cut it out of wood.
Read More...
I was so impressed with the way that my last 3D-printed figurine turned out that I just had to make another one. This model took a whopping 148 hours and 46 minutes to print.
Read More...
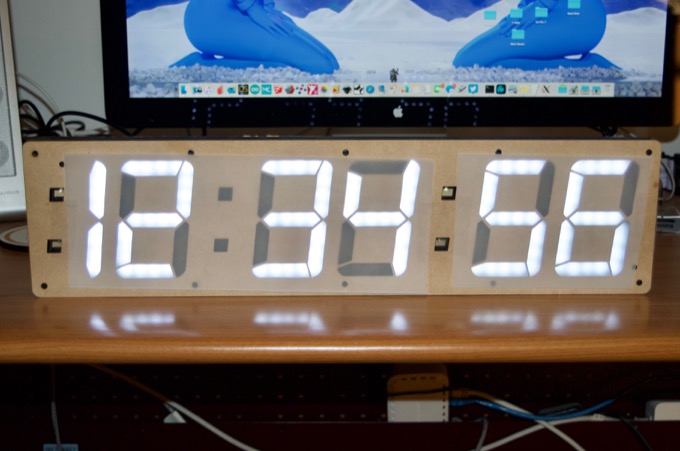
154 LEDs! Wow, was that a lot of work. I have to admit, this was so much harder than I thought it was going to be. I though I'd bang this out in a single afternoon, but it took three sessions of several hours each to solder all the LEDs and the connections.
Read More... Jun 04, 2020 Filed in:
Restoration | Tools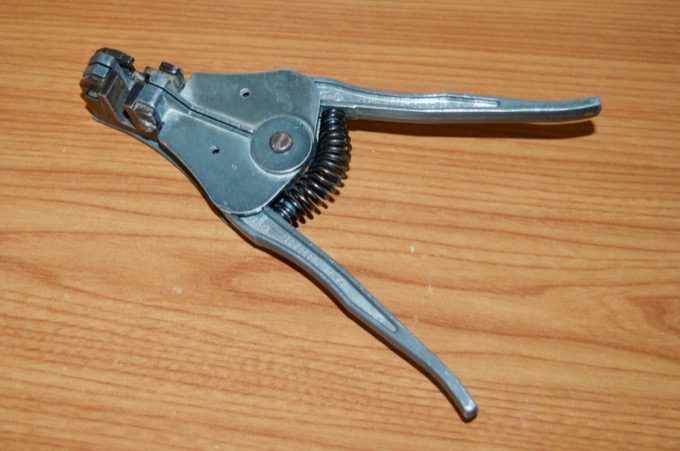
My Dad gave me his vintage Stripmaster a few years back. It's pretty filthy. It's been sitting in my tool box for a while but I rarely ever use it since I always feel like I have to wash my hands after using it. I decided to finally take this thing apart and give it a good cleaning.
Read More...Jun 03, 2020 Filed in:
Electronics | Laser Cutting | DIY
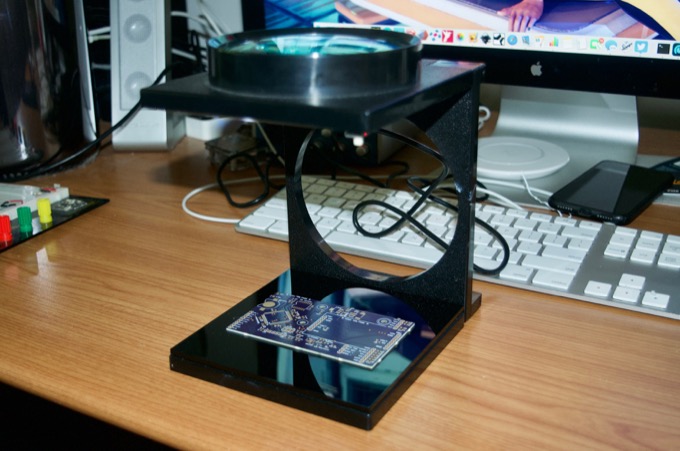
I’ve had this fold up magnifying glass for like 35 years. I use it all the time. I was using it to do all the soldering on the huge clock that I’m making. I spent all day on it and I was like man, I wish this thing had a light underneath it!
Read More... 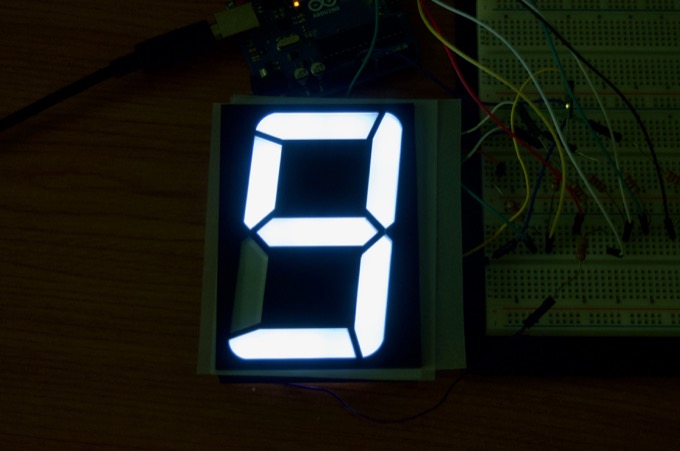
I've always wanted to build a clock with custom built 7-segment displays. I've been itching to build a new clock for a while now so I want it to be something really cool. Maybe it'll be the biggest clock I've ever built.
Read More...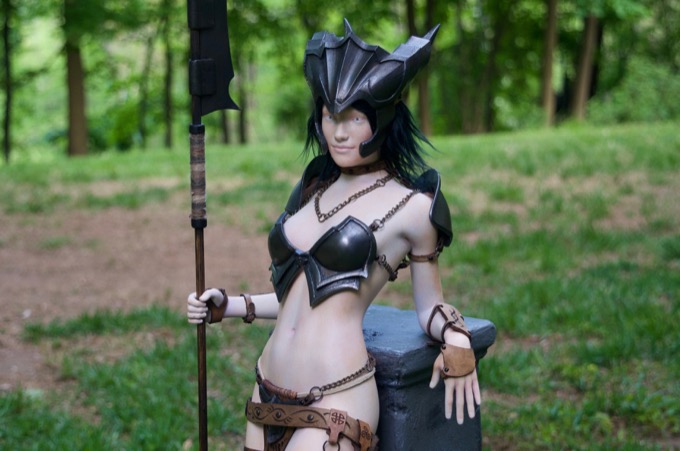
I can't believe the figurine is complete. It looks awesome. It took me four months and a lot of hard work to complete.
Read More...
All the clothes and armor have been made. It was a lot of work, but it was a lot of fun. The model is looking fantastic.
Read More...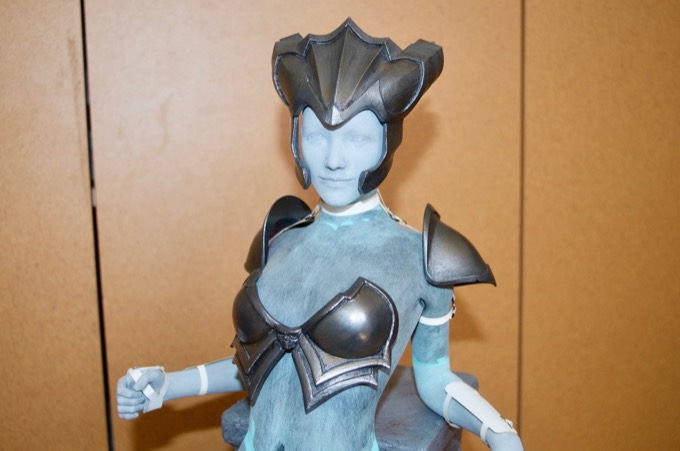
All the armor pieces have been sanded, primed, filled, painted, and weathered. They turned out amazing.
Read More...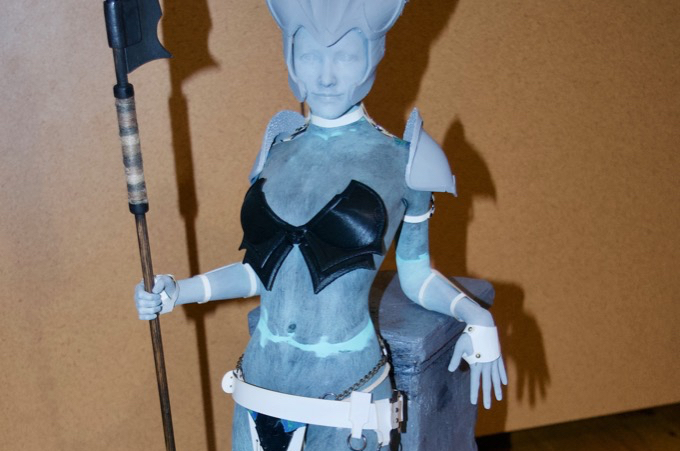
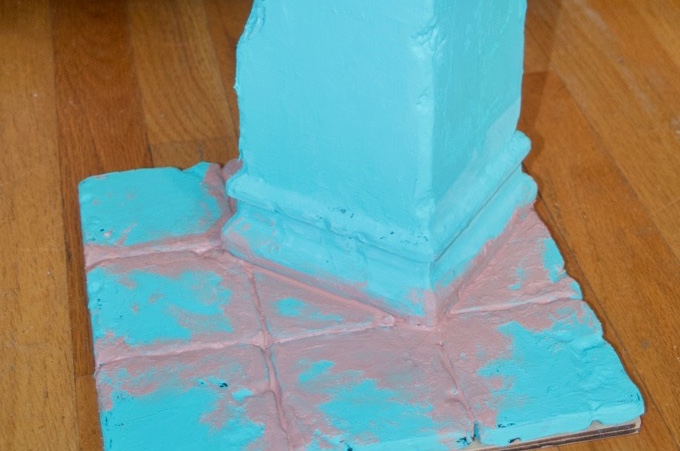
I think that's everything that I need. I can now sand and paint all the 3D-printed parts, laser cut the leather parts, and sand and paint the figurine.
Read More...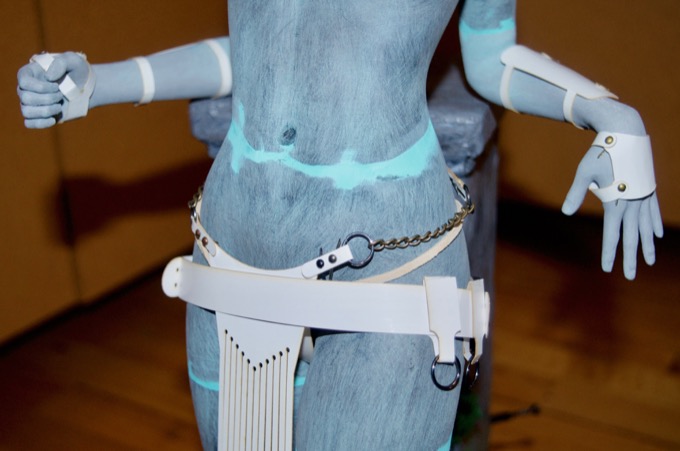
That last 3D model that I printed had clothes as part of the model. It made it really hard to paint. For this model, I decided to print the entire model without clothes and make them separately out of real materials.
Read More...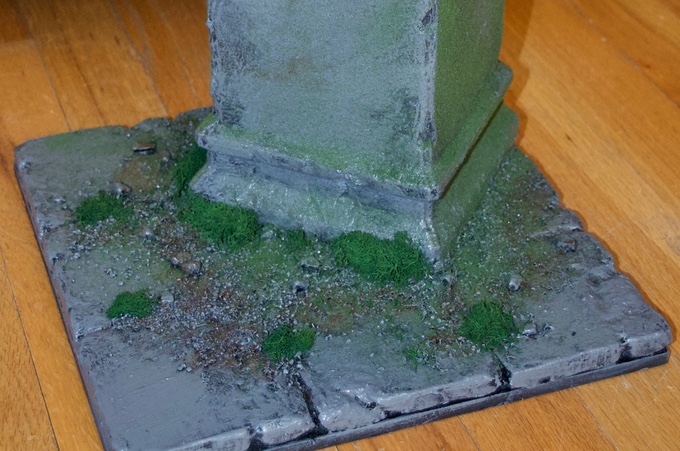
With the weapons out of the way, it was time to finish the base. It came out awesome!
Read More...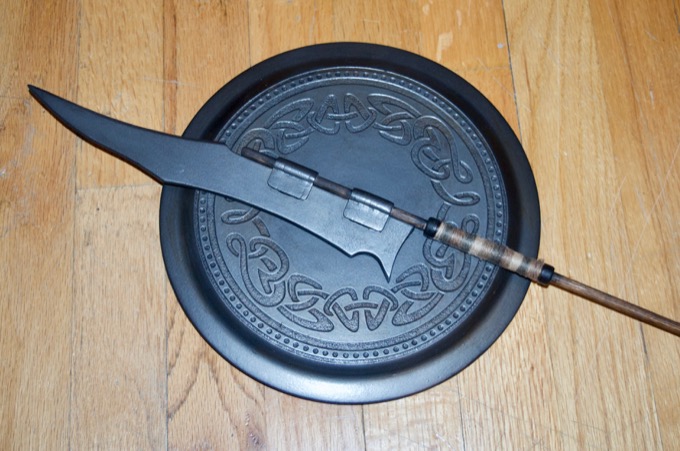
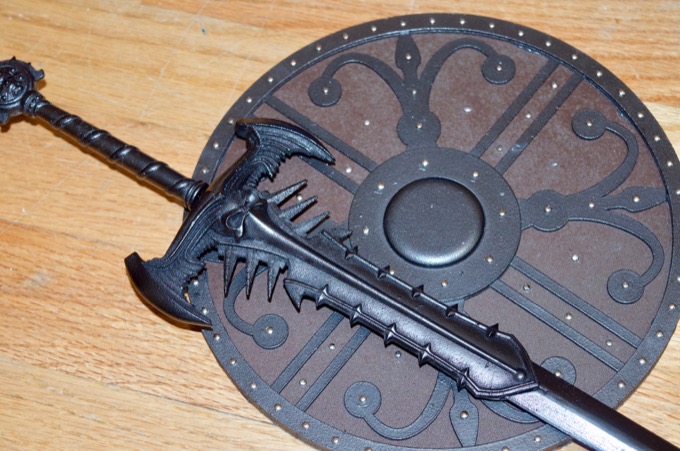
I'm really happy with the way that the spear and shield turned out. A friend of mine turned me onto the technique of using graphite powder to give objects a metallic finish. It looks awesome.
Read More...Feb 01, 2020 Filed in:
3D Modeling | 3D Printing
I can't believe it's been a month since I started this project. Time flies. This build is really starting to take shape. All the parts have been made and it's time to start painting.
Read More...
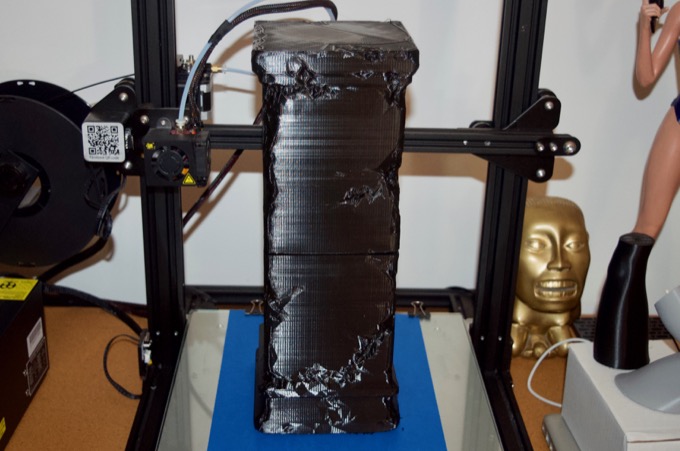
The Victoria 7 model has been printed and the weapons have been made. The last parts to make are the column and the base.
Read More... 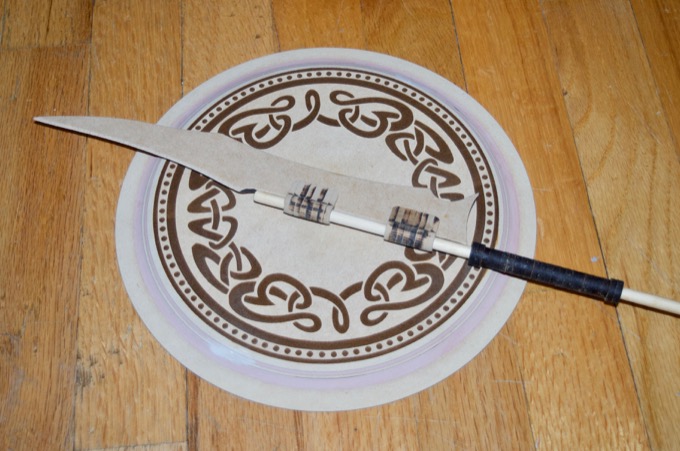
With the Victoria 7 model completely printed, it's time to make the spear and the shield.
Read More...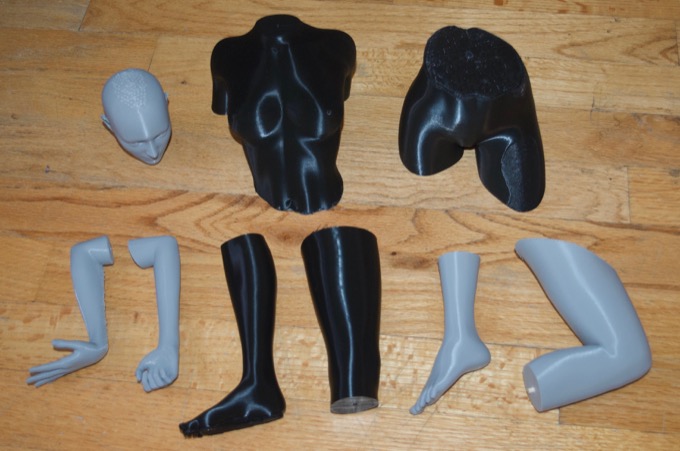
It's time for another 3D-printed figurine. This one will be truly epic! It’s going to be bigger than the last, and way more complicated.
Read More...
