Aug 22, 2015 Filed in:
Clocks | Laser Cutting
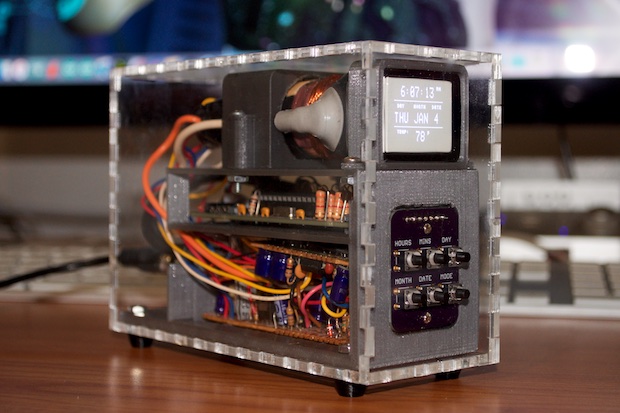
I'm really proud of this one. I learned a lot from this project, and it was a lot of fun. It has a little bit of everything: PCBs, coding, 3D-printing, laser cutting. I put a lot of work into it, and I think it came out great. It's probably my most unique clock yet.
Read More...

Since this is my first nixie clock, I really wanted it to be something special. I've been wanting to build a nixie clock for over 15 years. I started out with a 7-segment clock back in 2001 just to get my feet wet, but I just never got around to it. I'm so glad that I bit the bullet and just went for it. I put a lot of work into this clock, and spared no expense. I learned a lot from this project. I'm sure the next nixie clock will come out even better.
Read More... Aug 21, 2015 Filed in:
Nixies | Electronics
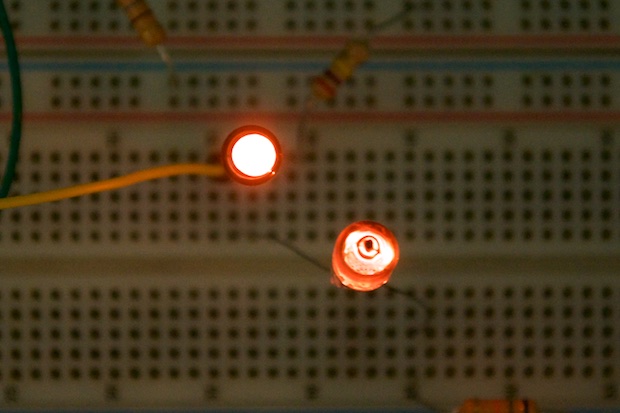
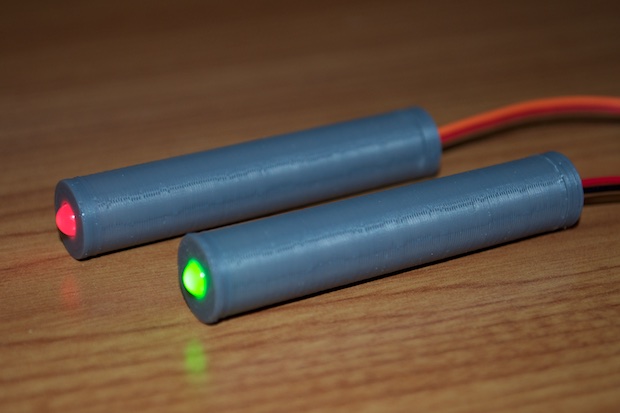
I was using IN-3s for the colons on the nixie clock because I thought that was all that was available as a single bulb for use as a colon. I didn’t like the fact that they appeared to be made to be viewed from the front, not the top. I don’t like all that extra glass on top. I did a little searching and found that there’s an IN-1, and it's made to be viewed from the top. What a difference it makes!
Read More... Aug 13, 2015 Filed in:
3D Printing

The prototype case for my nixie clock came out awesome. I want to print the final version in wood-filled PLA. You know, for that vintage look. I ordered a roll of colorFabb's woodfill PLA. It's pretty expensive stuff. It's not even a full 1kg roll and it's $58 bucks, but the results are well worth it.
Read More... 
The clock is built, the case is prototyped, and the code is 90% complete. This project really picked up some steam. I'm almost finished!
Read More...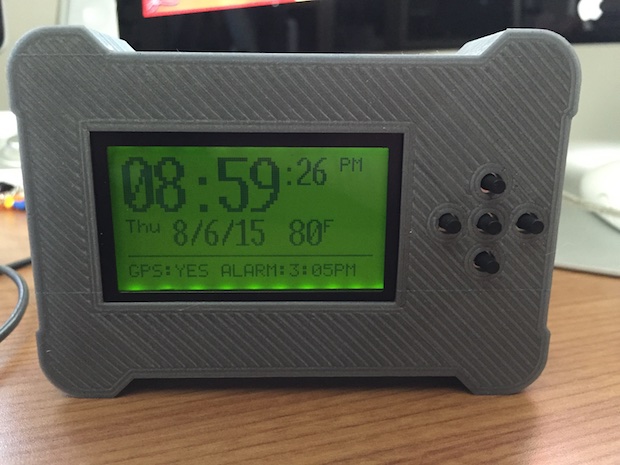
My new GPS button boards arrived in the mail. I hacked them into my new 3D-printed case. It works perfectly. All that's left is to firm up the code and this one's a wrap.
Read More...Jul 30, 2015 Filed in:
Arduino | Electronics | PCBs | Nixies | Clocks
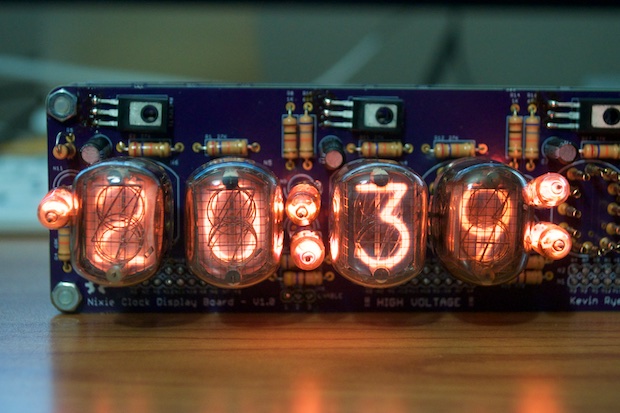
There is still much work to be done. I have to put in a bunch of code for the set buttons, the date, the alarm. Little things. I also still have to design a 3D-printed enclosure for it, as well as order some more nixies for the 2 that arrived DOA. In any case, it's coming along great!
Read More...
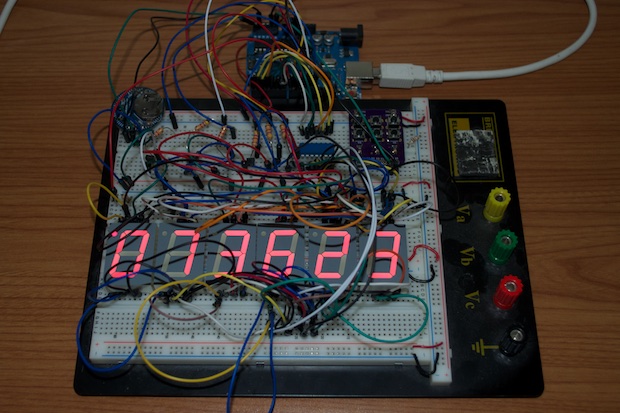
I love it when everything just comes together at the end and it just works. No hacks, no head scratching, no second spins. It just works. This project involved some serious engineering, and I'm really happy with the way that it's coming out.
Read More... 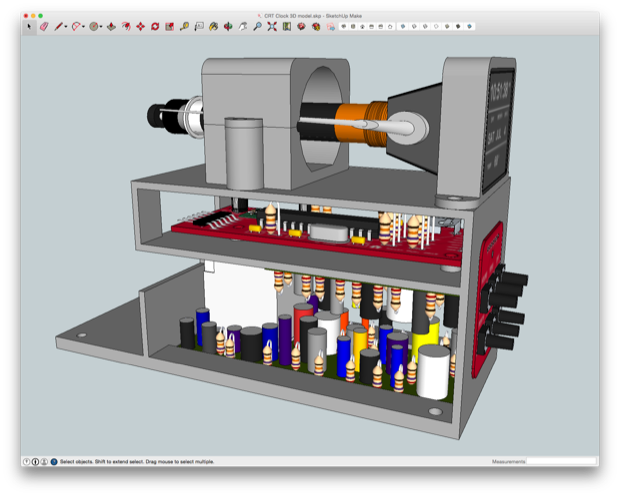
Now that I know I can display my own custom time and date on this camcorder CRT, it's time to get serious about a PCB and a 3D-printed case.
Read More...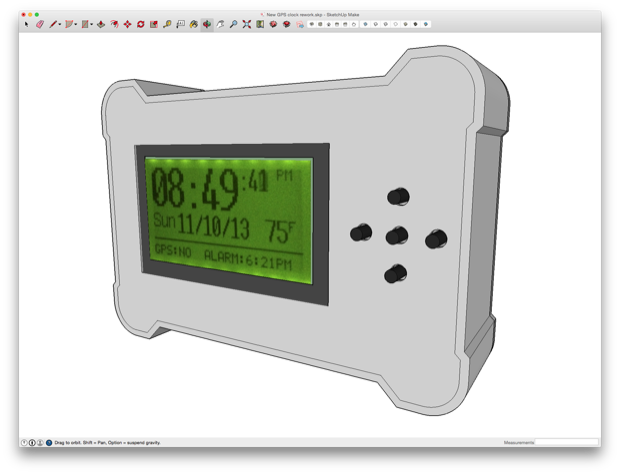
With the GPS button board designed and ordered, it was time to put together a 3D model and design a new case for the clock.
Read More...Jul 20, 2015 Filed in:
Electronics | PCBs | Arduino | Nixies | Clocks
At long last! My nixie main boards arrived. This project has been long in the making, but it's finally starting to come together.
Read More... Jul 10, 2015 Filed in:
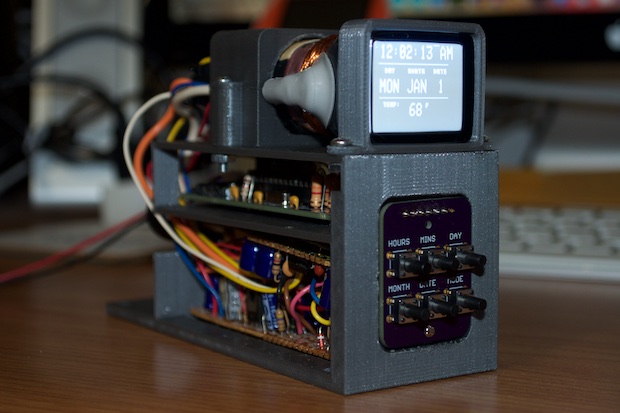
Arduino | Electronics | Hacking | CRTs | Clocks
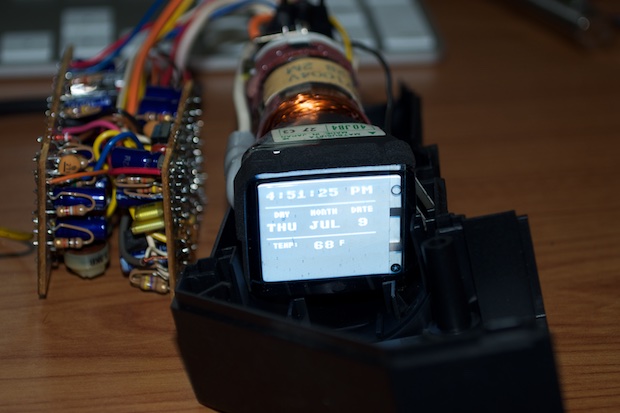
Not only have I successfully figured out how to use the TVout library to display a custom "gui" showing the date and time, but I also figured out how to hack it into a vintage camcorder viewfinder CRT.
Read More... 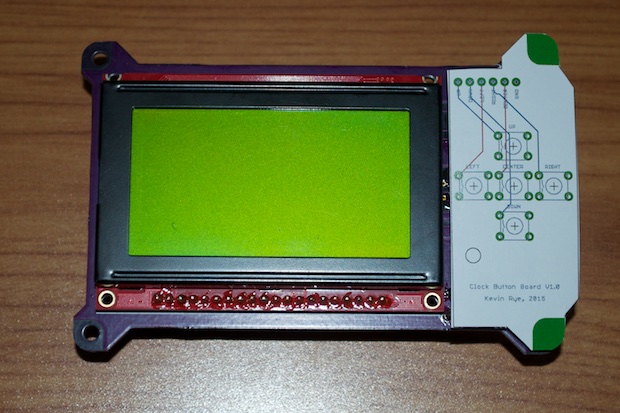
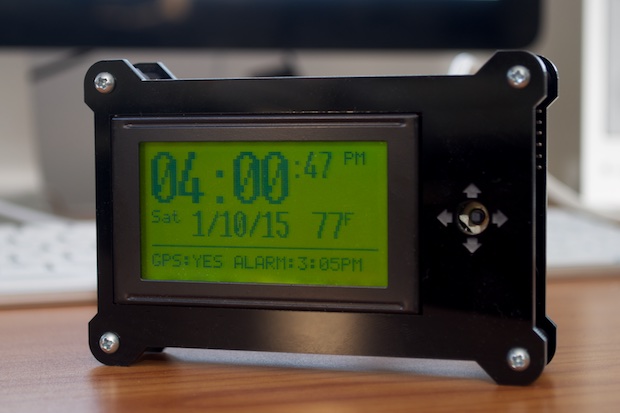
The GPS Clock has been fully assembled and sitting on my desk for months. I started this clock two years ago. I just can't seem to get the code to where it needs to be. I just want to put this project to bed already!
Read More...Jul 05, 2015 Filed in:
3D Printing | 3D Modeling
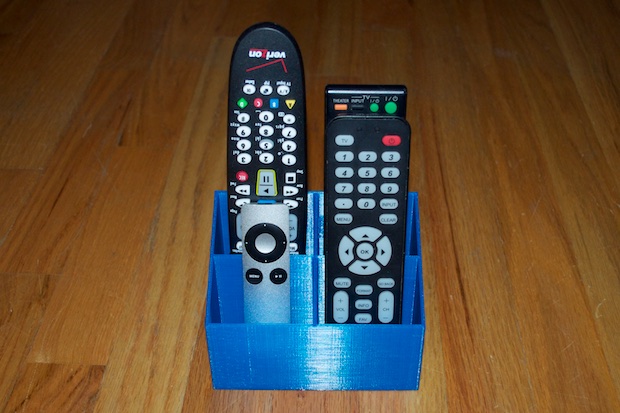
My wife's been bugging me to print some kind of remote stand for the bedroom. It's an awesome idea. We have 4 remotes in the bedroom and it seems like we're always loosing them. If we had some kind of caddy to put them in, I think we'd be less likely to lose track of them. I just keep forgetting about it. Although, I am reminded every time I have to hunt high and low for the Apple TV remote to end up finding it under one of the pillows.
Read More... Jun 30, 2015 Filed in:
Arduino | Hacking | Electronics | TV | CRTs
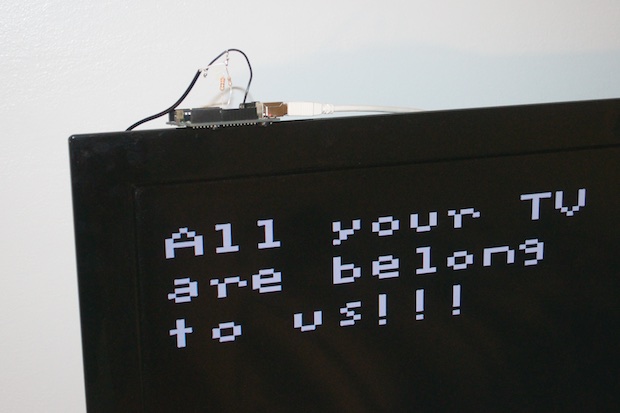
I've always wanted to make an oscilloscope clock or something similar using a really small CRT. Perhaps input some video with the use of something like the Uzebox ATmega game console. I found a cool little 5" black and white TV in the garbage the other day. Although it seems like it's toast and maybe a lost cause, it got me thinking about cool TV and CRT hacks.
Read More...
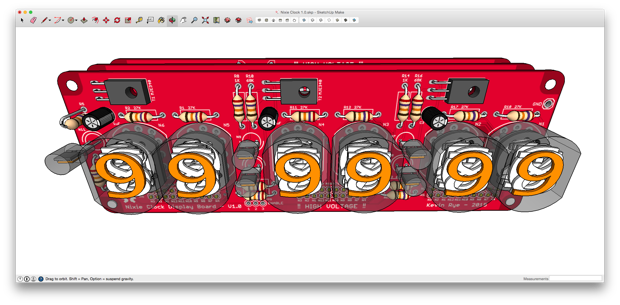
I've been struggling trying to make the PCBs since EAGLE limits the board size on the free version to 100mm x 80mm. I have to make everything modular. That means one board for the power supply, one for the audio stuff, one for all the logic, and 3 each for the nixies and the drivers. 5 PCB designs, 9 boards in all. They'll all have to be clipped together with wires and headers, etc. The whole thing seems less than ideal. I wanted to be able to just make one big board. I know I can’t make the entire clock one giant PCB. It’ll have to be at least 3 "layers" stacked up, but not made out of 9 separate boards. I bit the bullet and paid the $169 upgrade fee to the EAGLE Hobbyist version. It allows 160mm x 100mm PCBs. What a difference! Now I can make PCBs that are 6.29” long!
Read More...
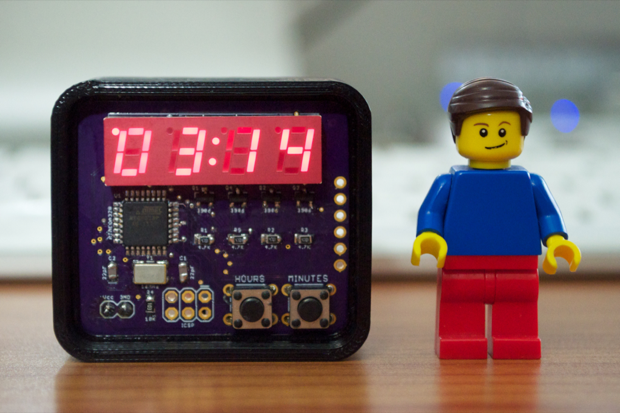
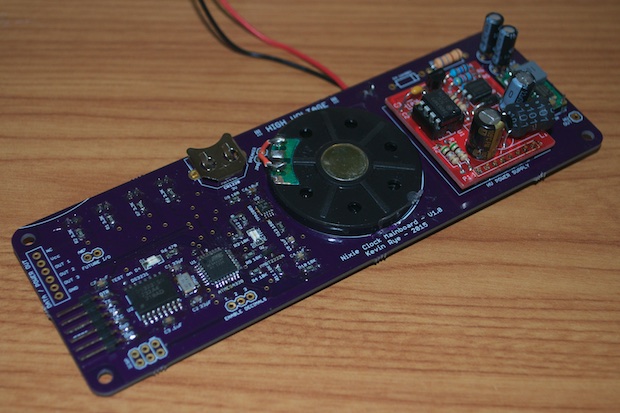
I hope the LEGO minifig gives you a good sense of scale. This clock is pretty small. It's amazing how small the Mini Clock has become after just 3 iterations. I'm really happy with the way that it came out.
Read More...
I just can't sit still. I always have something in the works. I need to always have something in the works. This is especially true when I'm waiting two weeks for a board. I think most of my projects start during the lull of another. I especially like it when a project goes from concept to a PCB order in about an hour! If only every project was like this. I'd have a room full of gizmos!
Read More... Jun 23, 2015 Filed in:
Electronics | Nixies
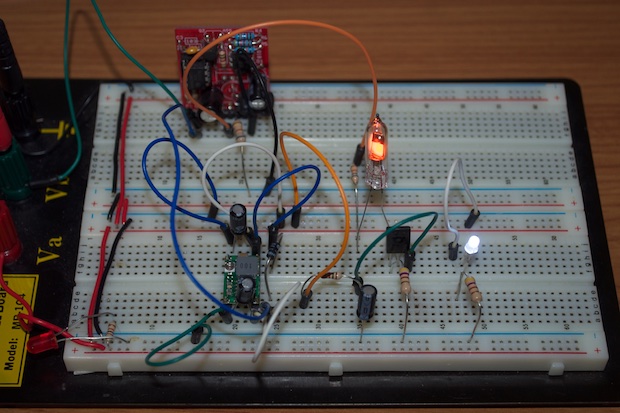
The past few months have seen zero progress in the nixie clock department. It's time to dig back in and make some progress. In order to power the logic of my clock, I need to regulate the 12 volts that's feeding the nixie power supply PCB. I decided to go with a super small buck converter that I found on eBay for $3 bucks. Works like a charm.
Read More... May 27, 2015 Filed in:
Electronics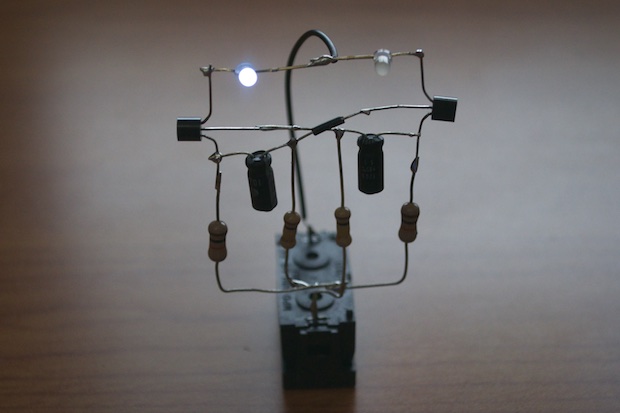
While digging through some old paperwork looking for an old receipt, I happened to find an old schematic that my Dad chalked up for me as a kid. The classic astable multivibrator. I just had to build one again for old times' sake.
Read More...May 26, 2015 Filed in:
Electronics | Clocks | Arduino | PCBs
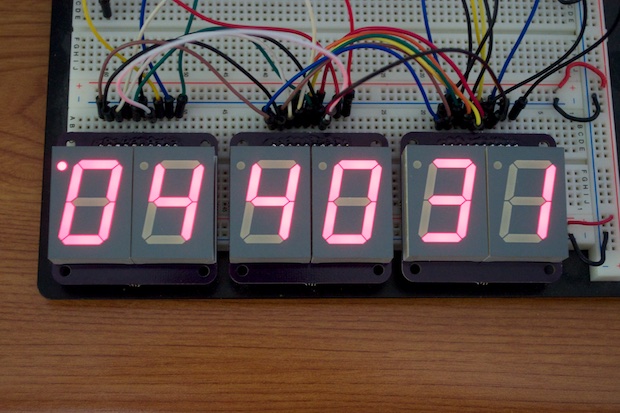
I got my hands on a few really small 7-segment displays around 10 years ago. Back in the day, I didn't have the slightest clue as to how to multiplex them. I just put the wraps on a new 7-segment clock to replace the innards of my old 7490 clock. Seeing how easy it was to multiplex those 7-segment displays, I thought I'd have a go at trying to make another Mini 7-Segment Clock out of one of these teeny-tiny displays.
Read More... May 26, 2015 Filed in:
Electronics | Clocks | PCBs
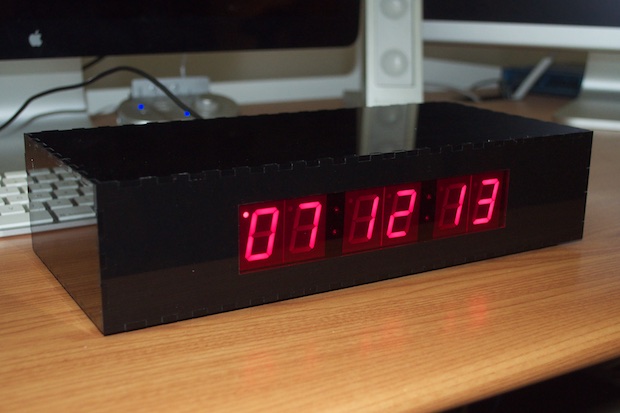
I'm really happy that it all came together so well. I love when I design a board and it just works. I attacked this project fairly aggressively. It only took me 3 weeks to go from concept to final build. Not to mention, two weeks of that was mostly waiting for PCBs to arrive. I probably saved myself another 2 weeks by already having the enclosure built. The code was relatively straightforward and the PCBs were easy to design since I was able to apply what I've learned from my other clock builds. There wasn't much "R&D" involved at all. I basically just banged this one out.
Read More...
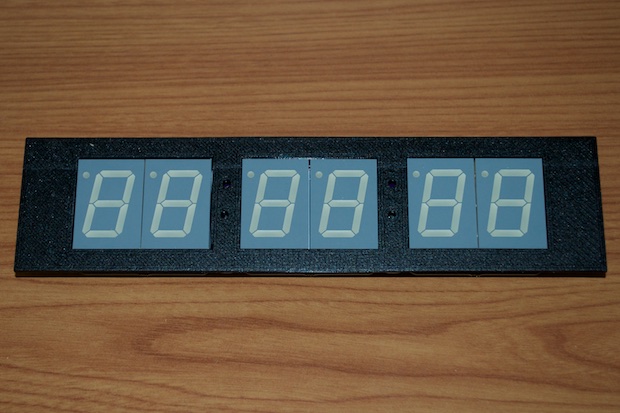
With the display electronics complete, it was time to move beyond the concept phase and begin the actual prototyping of the 3D-printed frame. It came out better than I could have anticipated. I totally nailed it!
Read More... May 18, 2015 Filed in:
Electronics | Clocks | PCBs
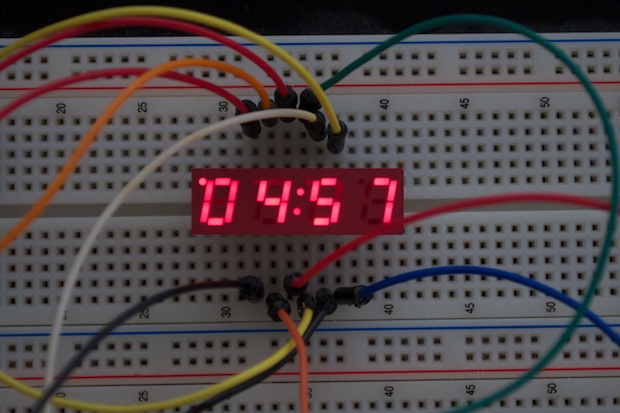
After a 13-day wait, I had my 7-segment LED breakout boards in-hand. It only took a few minutes to solder the boards together. I just have to wait a few more days for the colon boards and I can finalize the 3D-printed frame.
Read More...
I was extremely satisfied (and proud) of the way that the enclosure turned out for the rework of my 7490 Clock. The electronics on the other hand, is another story. The innards of that clock were from a prototype I built in 2001. It was a proof of concept. It led to the design of what would become an extremely well-polished and accurate clock. It's just a shame to throw it in a closet and forget about it. The case came out so nice and it looks great in the living room. I'm going to gut it, and replace my old 7490 prototype board with something brand new.
Read More...
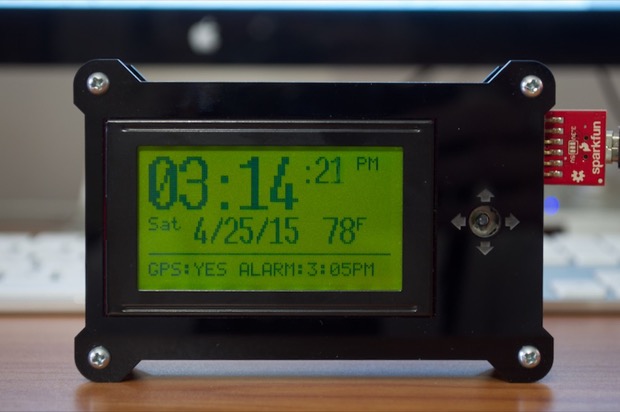
It's been almost 4 months, but it's time to put the wraps on the code for the GPS clock. I've been so busy with other 3D printing and 3D rendering projects. 3D printing a joystick for the 5-way switch has proved to be far more difficult than I had anticipated. I'd really hate to think that this $2 button is going to be the death of this $100 clock! I should have just stuck with my original design and used buttons.
Read More...
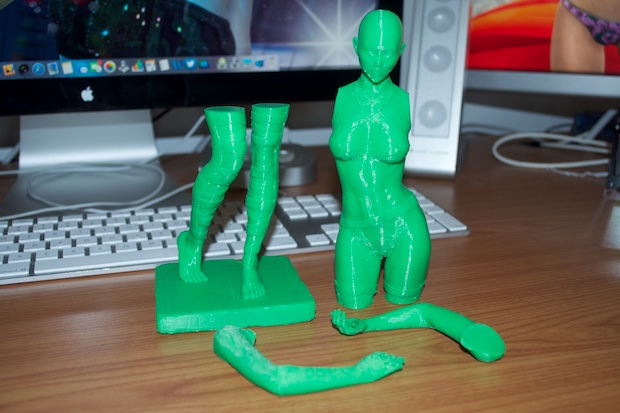
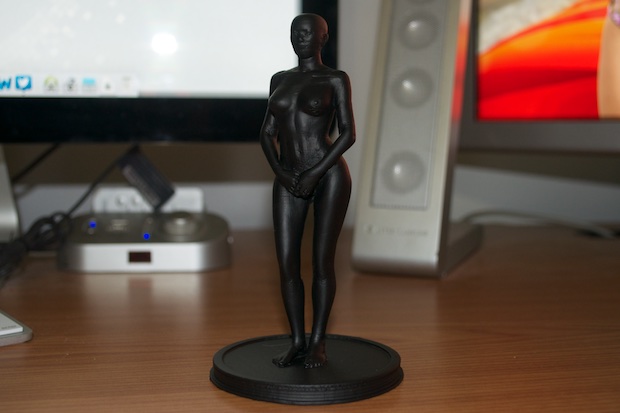
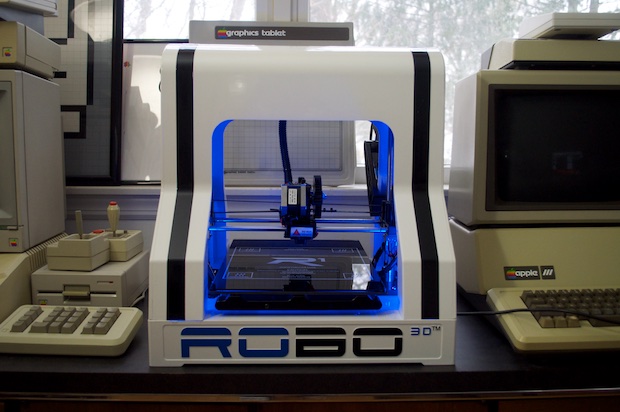
My first "official" 3D print of Mei Lin came out pretty good. However, it could be better. Everything can always be better! Not to mention, I discovered a shortcoming in the ROBO 3D firmware that messes with the z-axis. It's no wonder my last Mei Lin print was only 11" tall! I know I eye-balled the height, but I thought I was pretty darn close to 12 inches. Knowing now that my model was probably "squished", I decided to have another go at printing it.
Read More...
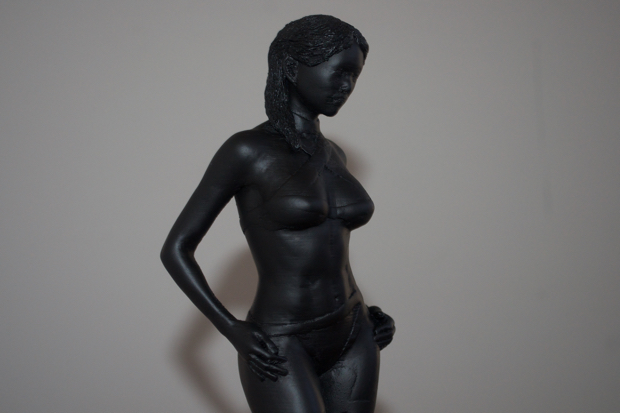
Continuing with my experiments in printing DAZ 3D models with my 3D printer, I figured I’d up-the-ante with my next print. Seeing as my last attempt was a total success, I wanted to see if I could print a model with clothes…. and twice as large!
Read More... Apr 11, 2015 Filed in:
LEGO | 3D Printing | 3D Modeling
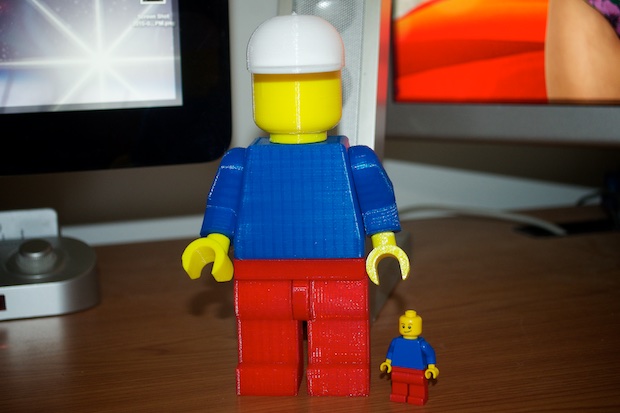
I found this LEGO Minifig on Thingiverse and I just had to print one. My kids love it, but too bad it's a prop for MY desk!
Read More... Apr 03, 2015 Filed in:
Computers | Repairs
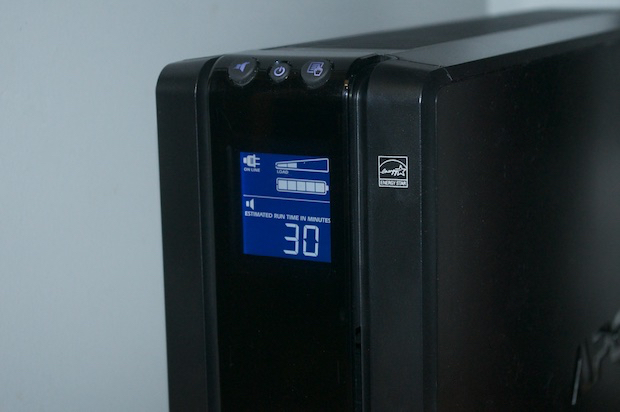
It seems like it was only a year or two ago that I got my APC 1500 UPS battery backup. Wait, it was just the other year! Christmas of 2012 to be exact. It's only been 2 years and 3 months and already this battery is as dead as a doornail. I looked up the lifespan of the battery and it was supposed to be good for 3 to 5 years. So I feel like I got a little short-changed. Not only did I receive a timely response from APC tech support, but they said my unit is still under warranty. Within 48 hours, I had a brand new unit!
Read More...
It's not the main reason I wanted to get a 3D printer, but a big one. I wanted to get a 3D printer in order to print large models of my 3D art creations. I've seen a few people do it online with mixed results. The how-to isn't widely documented and it's not a feature built into DAZ Studio by default. You'd think that printing a simple cube from one app shouldn't be any less difficult than printing a human-shaped figure from another. Unfortunately, it's easier said than done.
Read More... Mar 15, 2015 Filed in:
3D Printing | Painting

I was thumbing through Thingiverse looking for something fun to print. I came across a cute Little Groot figurine. I thought my wife would like it. Guardians of the Galaxy is one of her favorite movies. I used to paint D&D figurines back in the late 80s when I was a kid, so this didn't come out half bad considering it's been a good 25 years since I've painted something… and my wife loves it!
Read More... Feb 19, 2015 Filed in:
3D Printing | 3D Modeling

After waiting a few extra days, my patience was rewarded with the delivery of 3 rolls of filament. I think I've gotten the hang of PLA, but as far as ABS goes, I'm going to quit while I'm ahead.
Read More... Feb 14, 2015 Filed in:
3D Printing
After many, many years of putting off the purchase of a 3D printer, I finally bit the bullet. My wife ordered one for me and had it shipped overnight so that I'd have it for the 3-day holiday weekend!
Read More... Feb 13, 2015 Filed in:
Upgrades | Computers
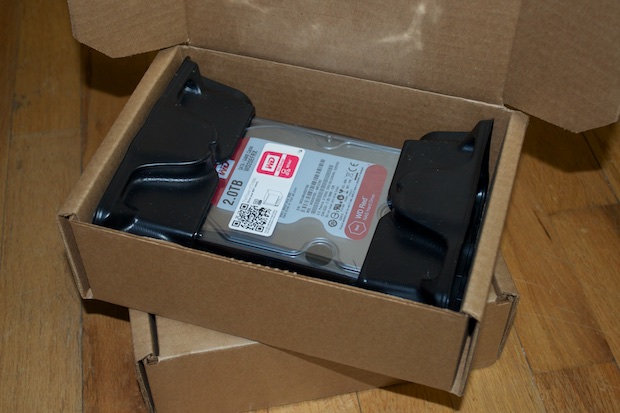
The other night I noticed that Time Machine failed to complete a backup to my Drobo. There was some weird error about the Drobo being set to read-only. I fixed it, but it reminded me that I had an old 640 and 750 Gig drive in there that needed to be upgraded.
Read More...
I've been working on this clock for a long time, and a lot of effort has been put into it. I've learned so much from this project. I do have to admit some parts of the code aren't as elegant as they should be, but it works. With the code complete, all that's left to do is try my hand at designing a 3D printed joystick for the 5-way switch.
Read More... 
