Aug 08, 2015
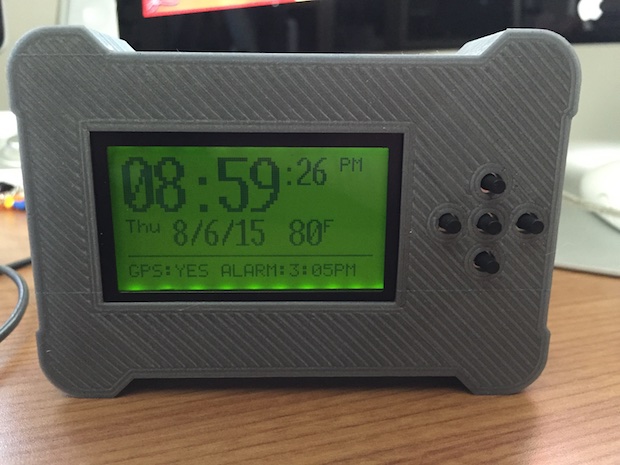
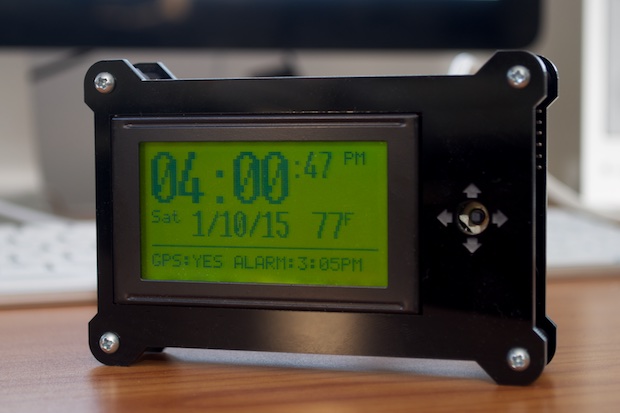
My new GPS button boards arrived in the mail. I hacked them into my new 3D-printed case. It works perfectly. All that's left is to firm up the code and this one's a wrap.
Read More...Jul 20, 2015
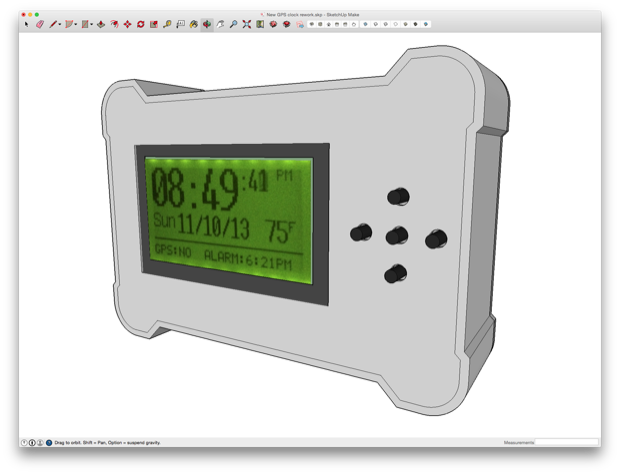
With the GPS button board designed and ordered, it was time to put together a 3D model and design a new case for the clock.
Read More...Jul 06, 2015
The GPS Clock has been fully assembled and sitting on my desk for months. I started this clock two years ago. I just can't seem to get the code to where it needs to be. I just want to put this project to bed already!
Read More...Apr 25, 2015
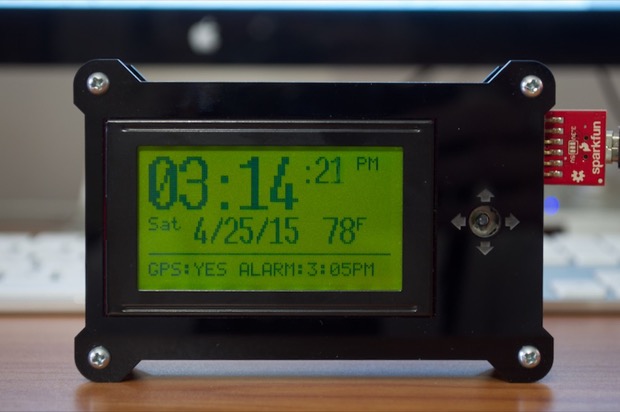
It's been almost 4 months, but it's time to put the wraps on the code for the GPS clock. I've been so busy with other 3D printing and 3D rendering projects. 3D printing a joystick for the 5-way switch has proved to be far more difficult than I had anticipated. I'd really hate to think that this $2 button is going to be the death of this $100 clock! I should have just stuck with my original design and used buttons.
Read More... Jan 10, 2015
I've been working on this clock for a long time, and a lot of effort has been put into it. I've learned so much from this project. I do have to admit some parts of the code aren't as elegant as they should be, but it works. With the code complete, all that's left to do is try my hand at designing a 3D printed joystick for the 5-way switch.
Read More... Nov 08, 2014
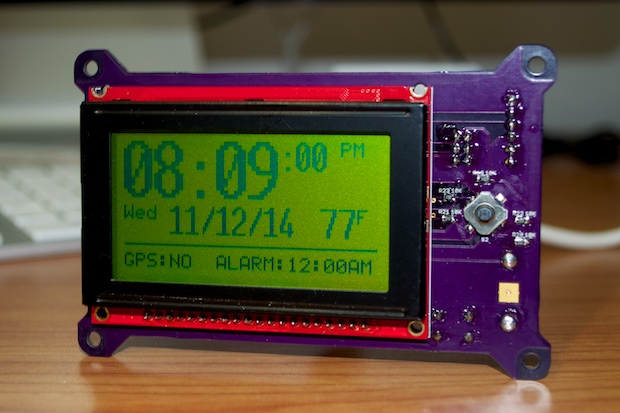
If you’re following along, you know that version 1.0 of my GPS clock was a total bust. I somehow managed to screw up the PCB. I had the FTDI RX and TX lines tied to the wrong port on the ATmega2560. There was just no way to rework the board. Besides, I like to keep my final projects looking neat and clean. Rework wires are just a big no-no in my book. That meant that I had to fix the error on the PCB and place another order. I got my boards and most of my parts. I soldered together what I could. So far, it looks like it’s going to work!
Read More... Sep 25, 2014

I was amazed at how fast my GPS PCBs arrived in the mail. Usually OSH Park takes a good 2 weeks to turn around a board. However, this time they arrived in 5 days. The boards look great...and they arrived just in time for the weekend!
Read More... Sep 14, 2014
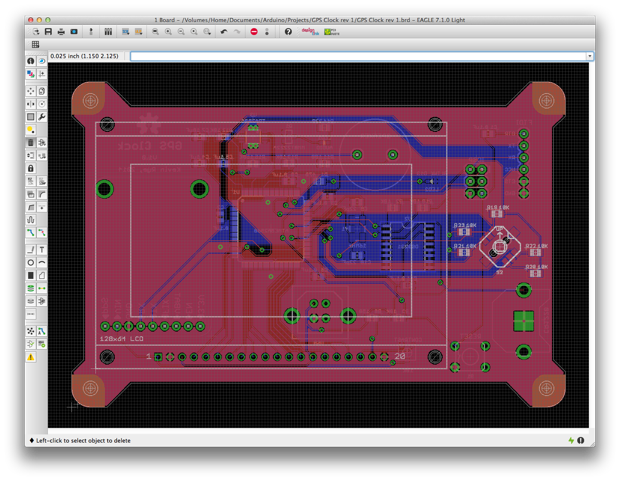
Wow, has it been a long time since I worked on the GPS clock. A whole 8 months! The prototyping and PCB design was completed a long time ago. I just didn’t want to order the PCBs until the code was complete. The PCBs cost $60 bucks from OSH Park. That’s a lot of money to spend on PCBs that might not work, so I really wanted to make sure everything was solid. I just keep getting distracted with other projects. It’s time to just bite the bullet and finish it.
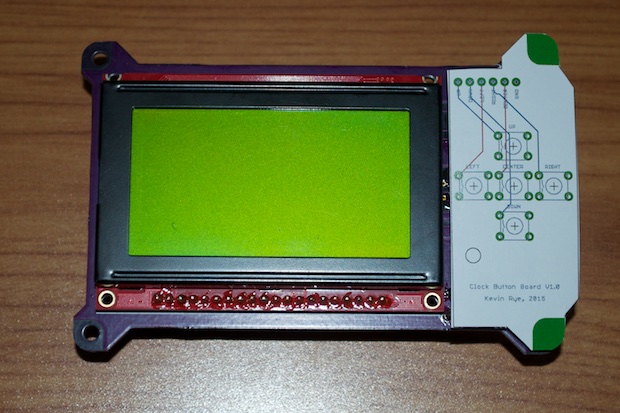
Read More... Dec 15, 2013
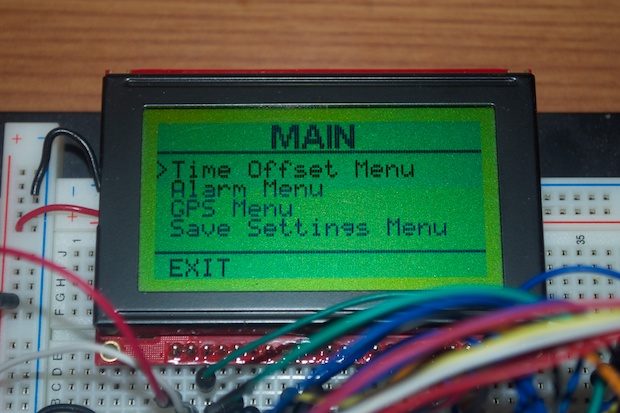
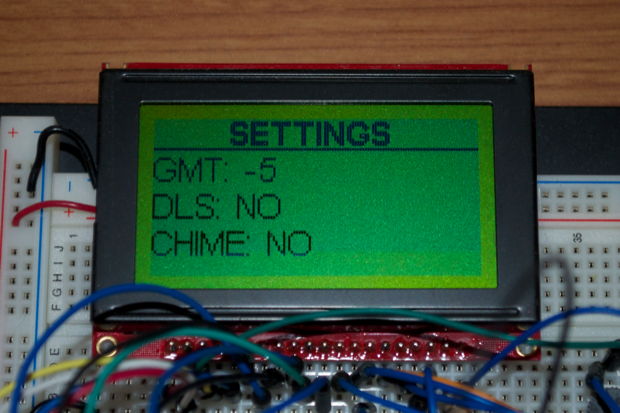
I decided to use a 5-way switch the fully control the clock’s menu system. Removing the rest of the buttons required a re-write of the menu system. I first needed to map the whole thing out in order to better visualize what options the menus would use, and what actions would be allowed in each menu. I created a spreadsheet to map it all out. It was then a matter of translating that into code.
Read More... Nov 10, 2013
I decided to ditch the IR remote in my GPS clock in favor of buttons. Once I had all the IR code implemented, I realized that it just wasn’t the way to go. Instead of the IR remote, I’m basically going to include a keypad on the clock that pretty much mirrors the functionality of the remote.
Read More... Nov 01, 2013
It’s been a few months since I worked on the GPS clock. I couldn’t nail down exactly how I wanted it to work. I had a few ideas floating around, as well as a list of what features I wanted to include. However, in order to build the clock without compromises, I would have to overcome several hurdles. Considering I was already juggling a few other projects, I figured it was best to shelf it until I had a clearer vision of exactly how I wanted it to work and how I’d pull it off.
Read More... Jul 11, 2013
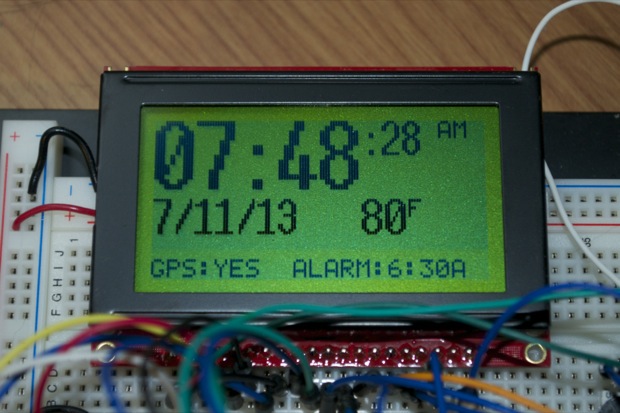
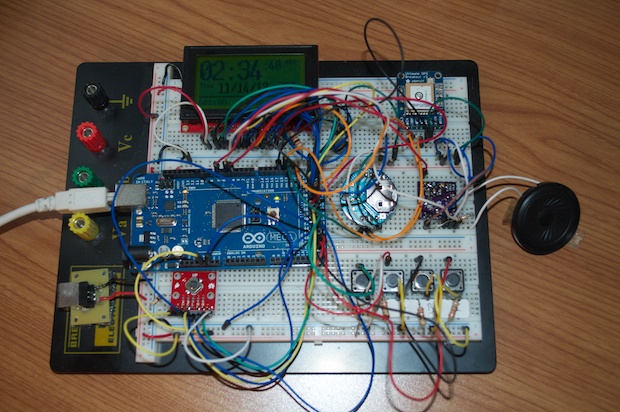
A while back I picked up a SparkFun 128x64 LCD and an Adafruit 66-channel GPS module to have a go at making a GPS clock. The great thing about setting the time and date via GPS is that I won't have to put any buttons on the clock. It'll set itself!
Read More... 
