Jan 22, 2024
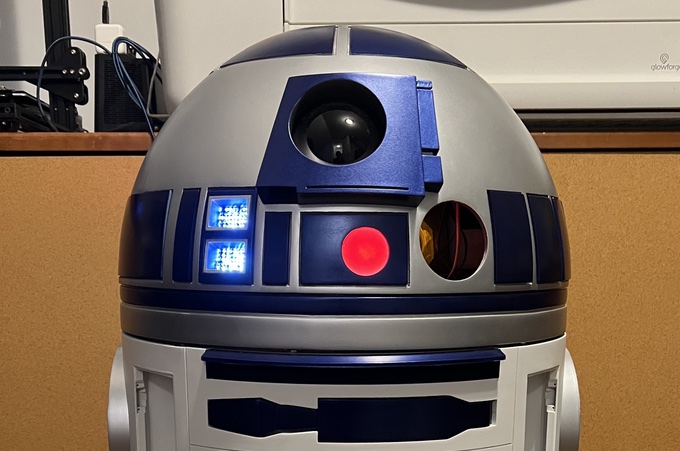
It took over a month the complete the dome. I still have to mount the holojprojectors, but I will do that later once I print the servo arms. For now, I'm calling it done.
Read More... Jul 12, 2023
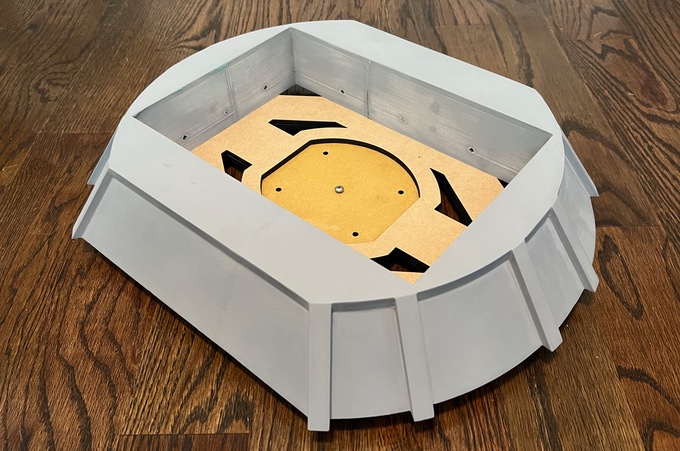
Finally! After well over a month of printing and sanding, I have one piece ready for painting!
Read More... Sep 26, 2022
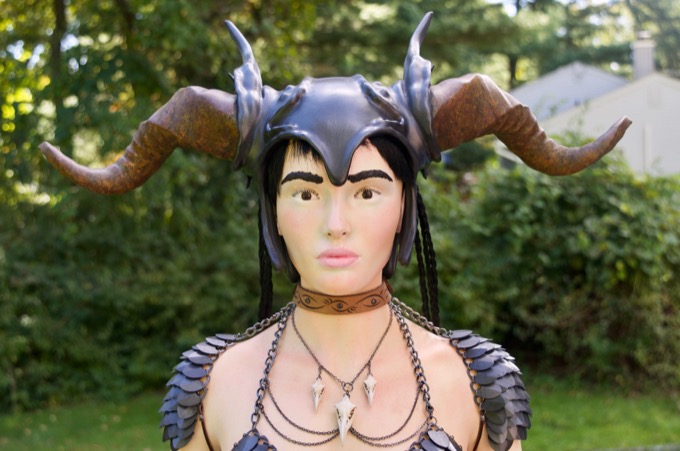
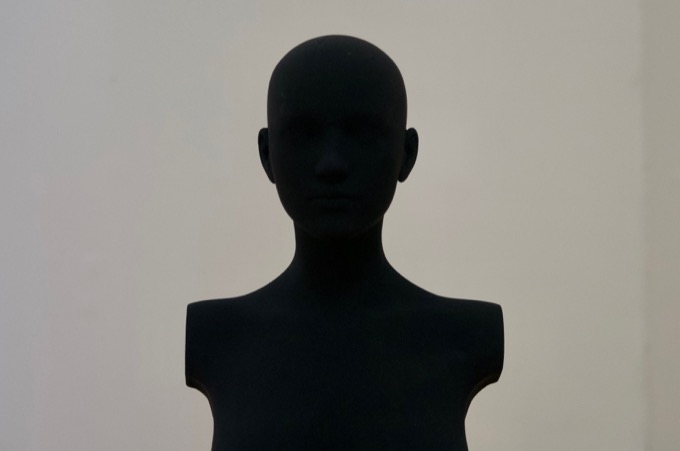
That's it! It's finally complete. I am so happy with how it came out. I think this is my most elaborate project yet! I can't wait to see what's next!
Read More... Sep 25, 2022
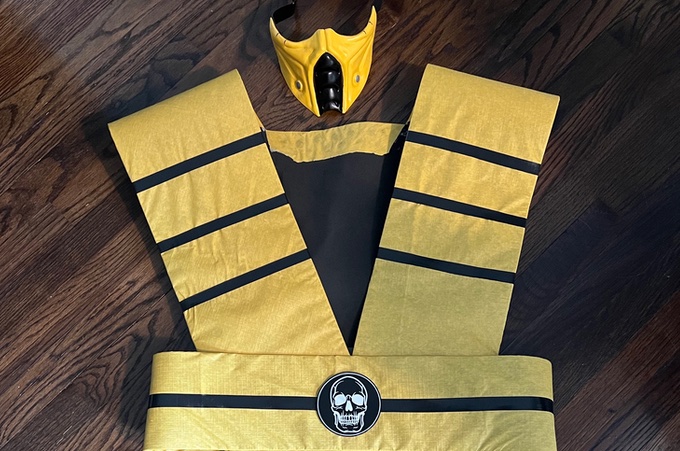
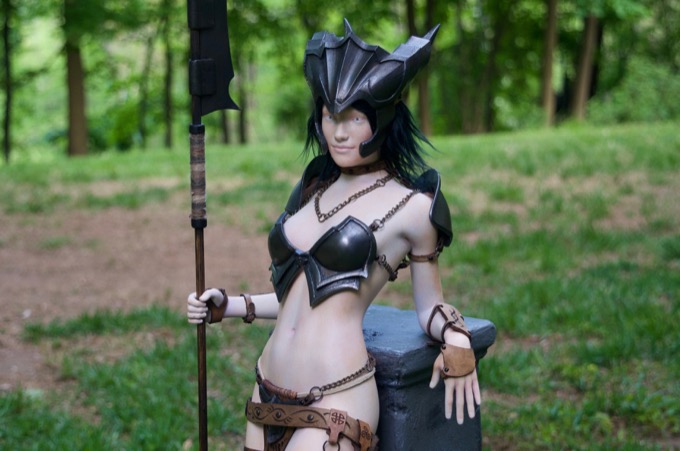
I took a step away from the Scale Mail Bust to work on a weekend project for my sister-in-law. She needs a Scorpion outfit for Comic-Con stat!
Read More...Jun 07, 2021
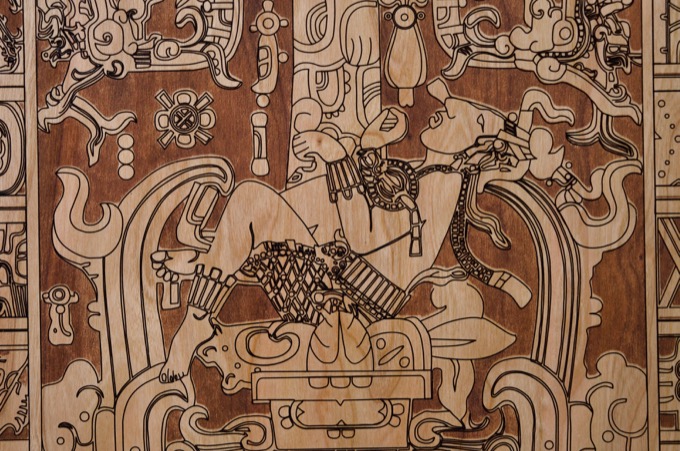
My Dad was watching Ancient Aliens and there was an episode about the Mayan King Kʼinich Janaabʼ Pakal's tomb cover. Some believe the image depicts the king at the controls of a spaceship. My Dad thought it looked really cool and asked if I could make him one for his birthday.
Read More...Apr 24, 2021
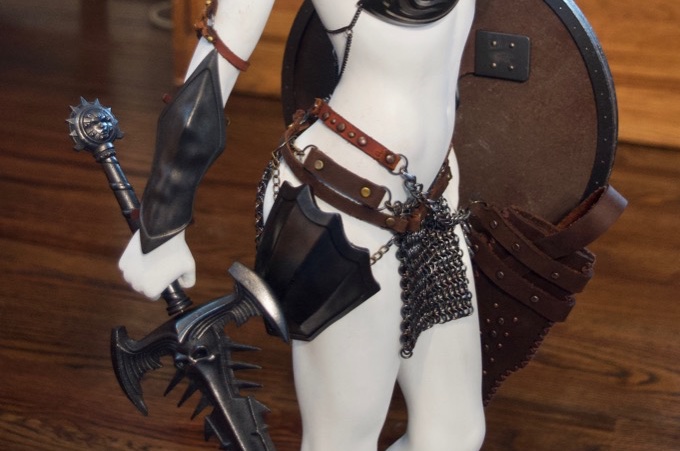
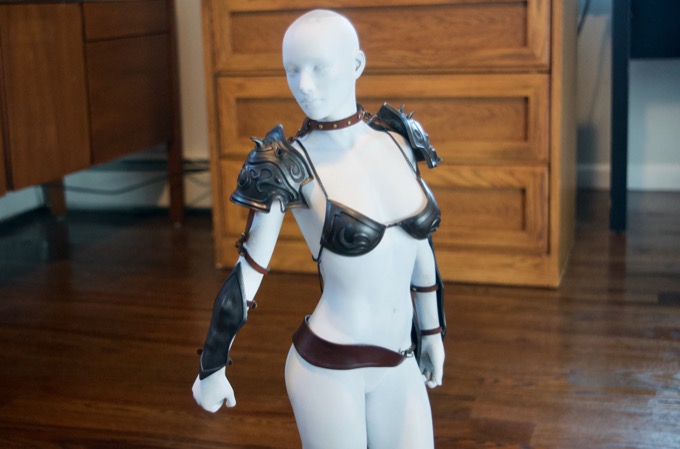
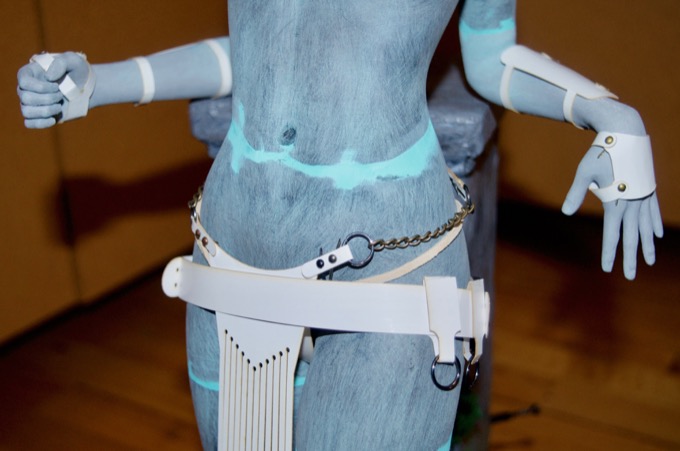
The figurine clothing and armor is now complete. I just have to paint it and complete the base.
Read More...Apr 11, 2021
For the loin cloth, I wanted to try my hand at making some chain mail. It was time-consuming and tedious work, but a nice challenge. I think the end results look really good.
Read More... Mar 24, 2021
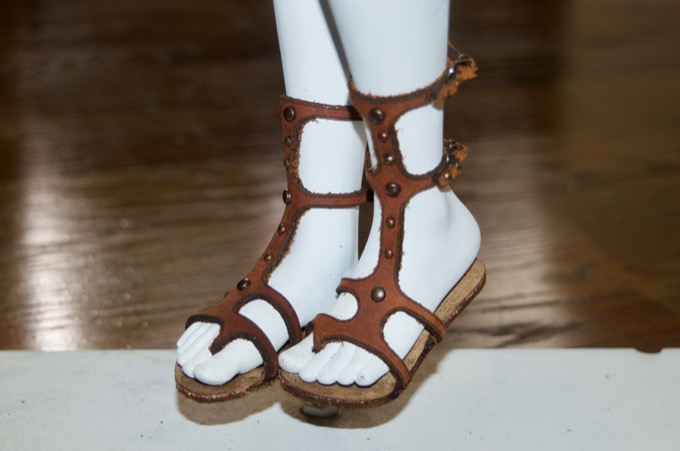
I am really happy with the way that the shoes turned out. They are way better than the shoes that I made for the last figurine.
Read More...Feb 28, 2021
I took a six month break from working on the figurine because I was waiting for the ELEGOO Saturn resin 3D printer to hit the market. In the end I decided to go with the ELEGOO Mars 2 Pro printer instead. Now that I finally have a resin printer, I can get to work on printing the armor.
Read More...Nov 19, 2020
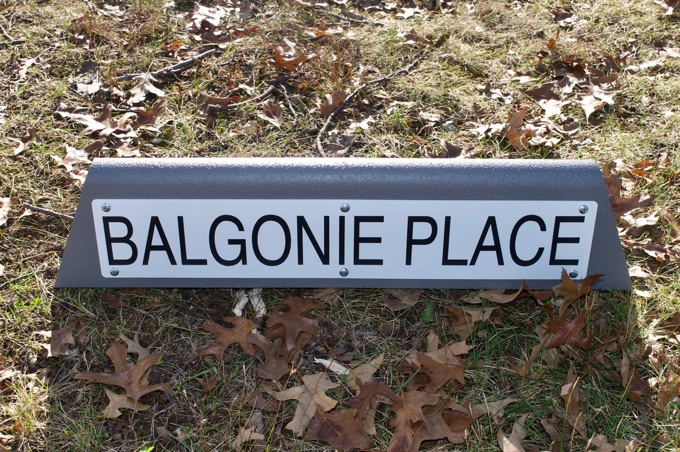
On the street where my Mom grew up in Scotland, there's a concrete sign on the corner of the street. I thought it would be something neat to 3D print for her.
Read More... Sep 20, 2020
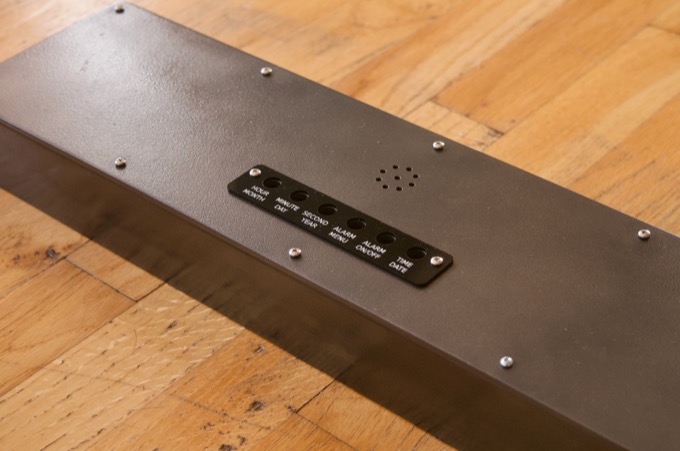
The enclosure for the new clock is almost complete. I just need to make the front panel and then I can assemble the PCB.
Read More... Sep 05, 2020
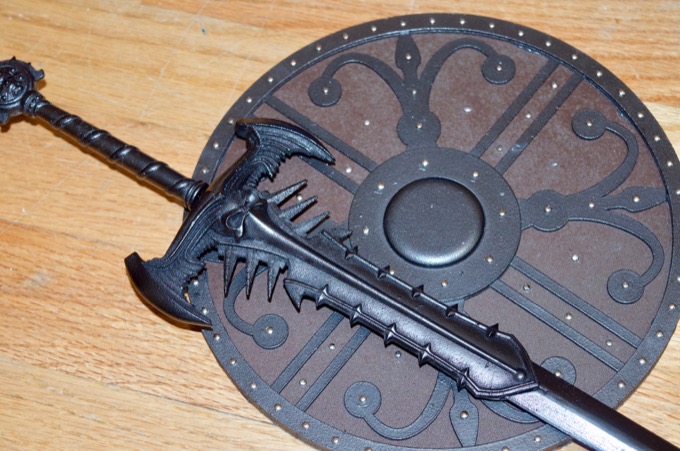
It's time to make some weapons!
Read More... Aug 07, 2020
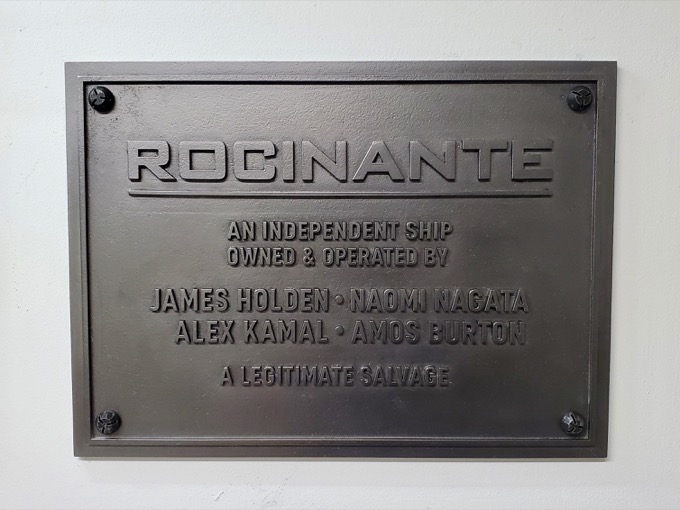
A friend of mine wanted to make a Rocinante wall plaque from the TV show The Expanse. I told him if he shot me an SVG for it, I'd be more than happy to laser cut it out of wood.
Read More...Jun 20, 2020
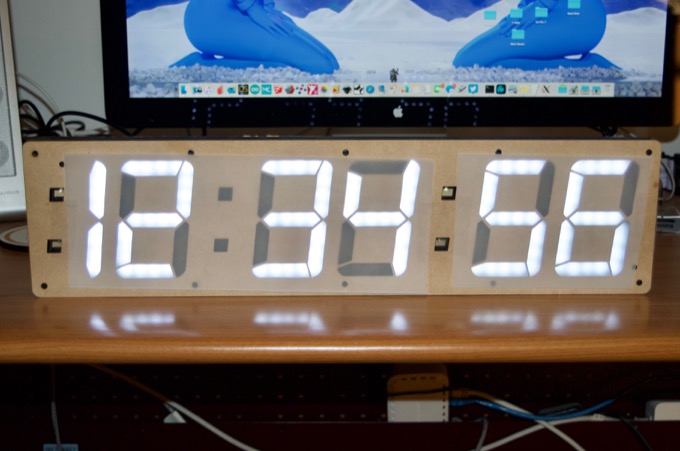
154 LEDs! Wow, was that a lot of work. I have to admit, this was so much harder than I thought it was going to be. I though I'd bang this out in a single afternoon, but it took three sessions of several hours each to solder all the LEDs and the connections.
Read More... Jun 03, 2020
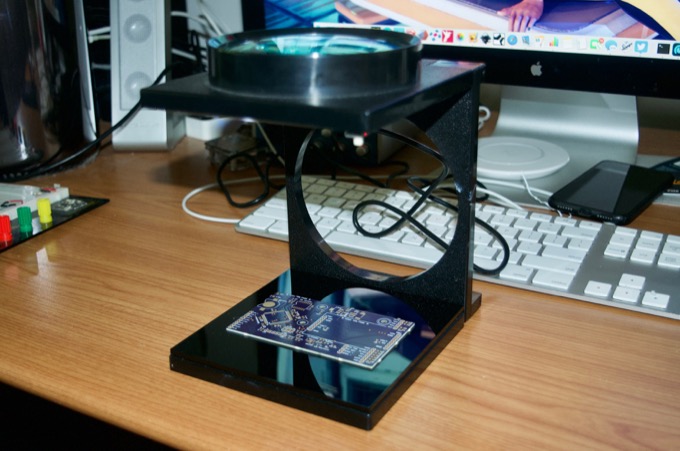
I’ve had this fold up magnifying glass for like 35 years. I use it all the time. I was using it to do all the soldering on the huge clock that I’m making. I spent all day on it and I was like man, I wish this thing had a light underneath it!
Read More... Jun 01, 2020
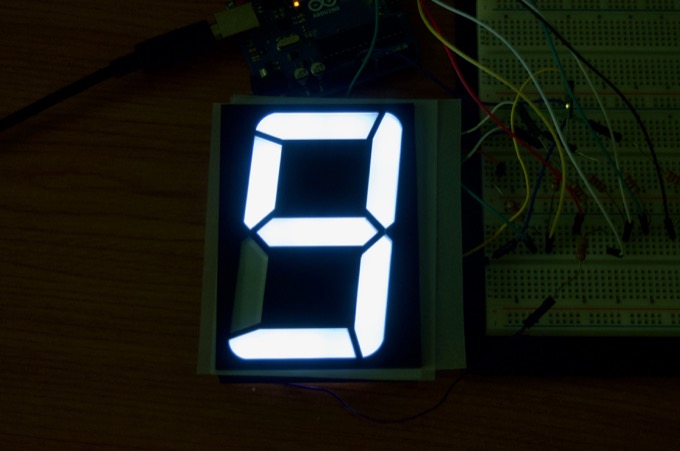
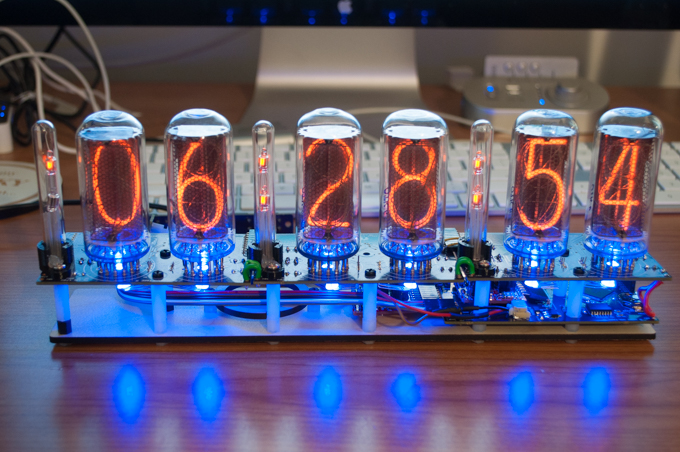
I've always wanted to build a clock with custom built 7-segment displays. I've been itching to build a new clock for a while now so I want it to be something really cool. Maybe it'll be the biggest clock I've ever built.
Read More...May 17, 2020
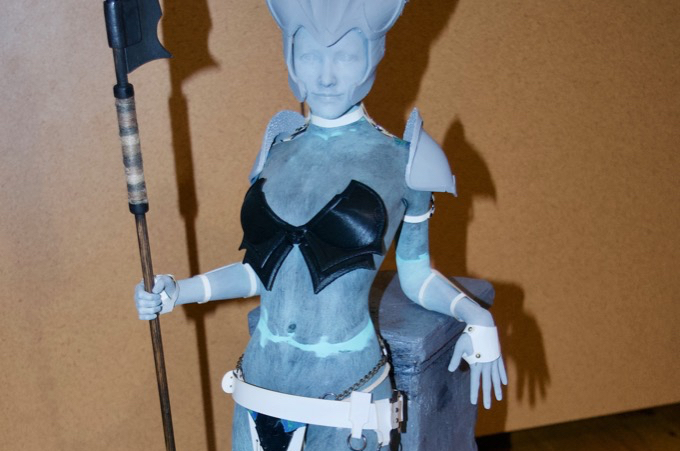
I can't believe the figurine is complete. It looks awesome. It took me four months and a lot of hard work to complete.
Read More...Mar 21, 2020

All the clothes and armor have been made. It was a lot of work, but it was a lot of fun. The model is looking fantastic.
Read More...Feb 28, 2020
I think that's everything that I need. I can now sand and paint all the 3D-printed parts, laser cut the leather parts, and sand and paint the figurine.
Read More...Feb 23, 2020
That last 3D model that I printed had clothes as part of the model. It made it really hard to paint. For this model, I decided to print the entire model without clothes and make them separately out of real materials.
Read More...Feb 15, 2020
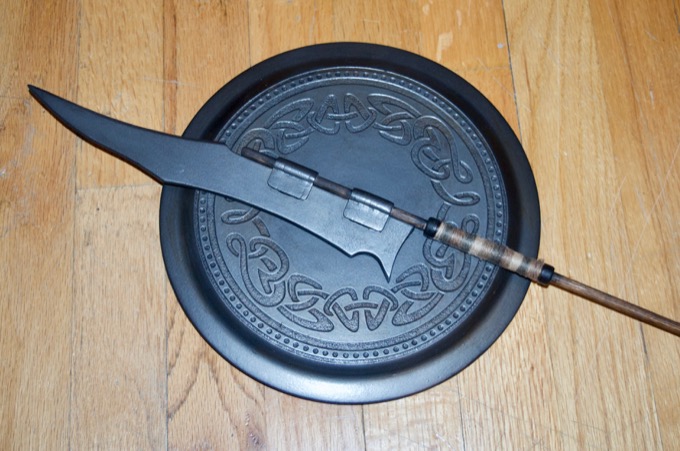
I'm really happy with the way that the spear and shield turned out. A friend of mine turned me onto the technique of using graphite powder to give objects a metallic finish. It looks awesome.
Read More...Jan 17, 2020
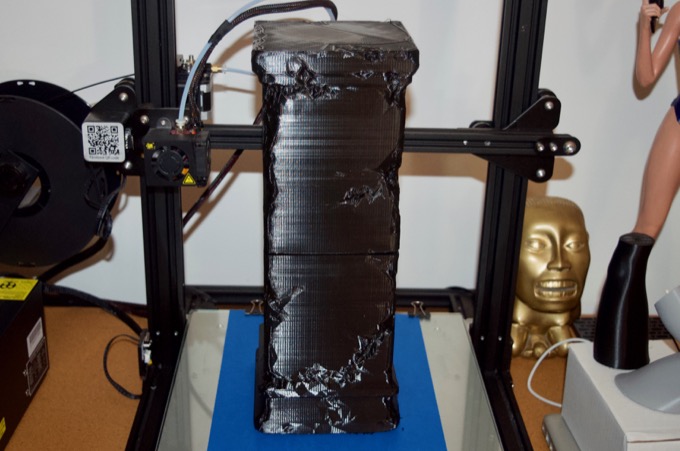
The Victoria 7 model has been printed and the weapons have been made. The last parts to make are the column and the base.
Read More... Jan 13, 2020
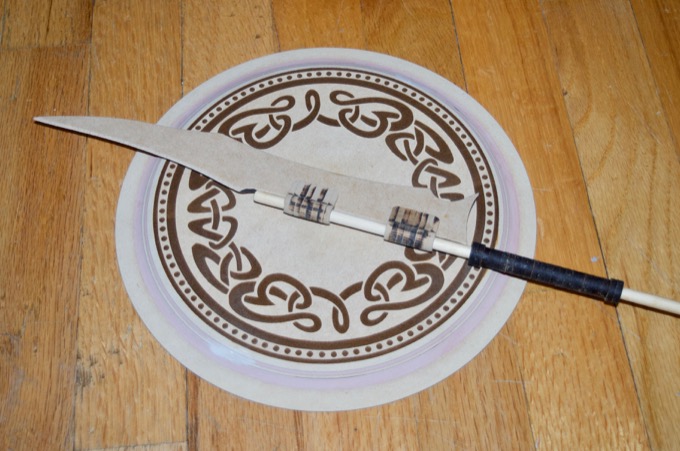
With the Victoria 7 model completely printed, it's time to make the spear and the shield.
Read More...Dec 07, 2019

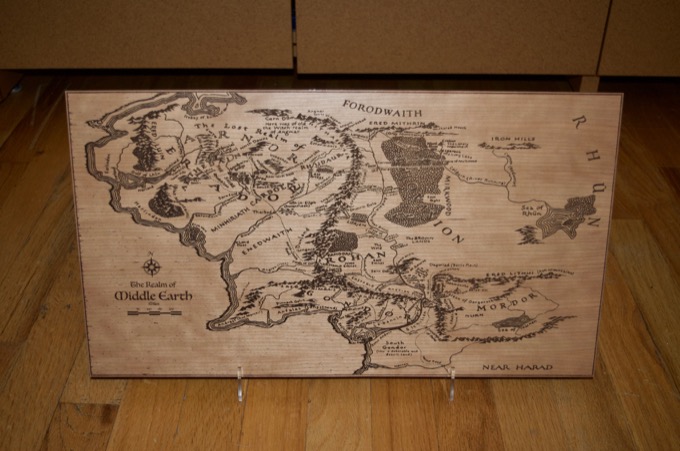
My wife is a huge Lord of the Rings fan. I've always wanted to make her a map of Middle Earth. This seems like the perfect project for the Glowforge!
Read More...Oct 01, 2019
More progress has been made. The model is assembled, sanded, primed, and ready for the final paint job. I also finished making the base for it.
Read More...Sep 22, 2019
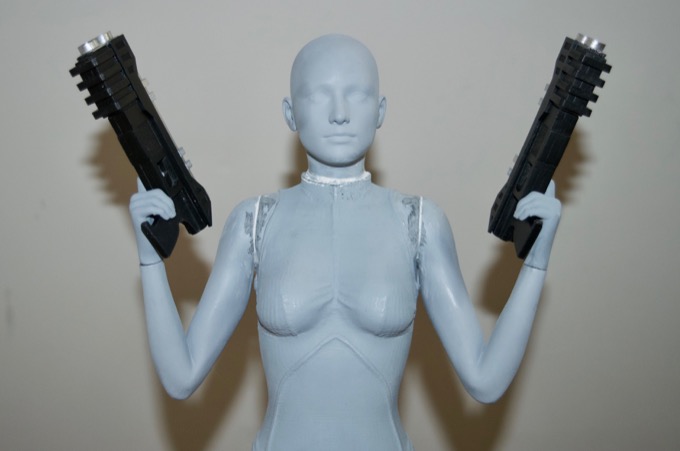
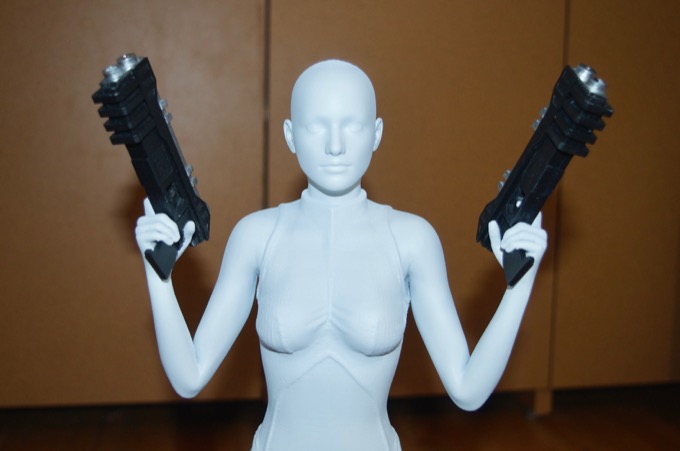
The guns came out awesome. I just have to glue on the thumbs and clean up all the seams and I can start with the final paint job.
Read More...Aug 24, 2019
This Black 3.0 paint is amazing. The Victoria 8 figure is all painted and secured to the base that I made. It came out awesome!
Read More... Jun 16, 2019
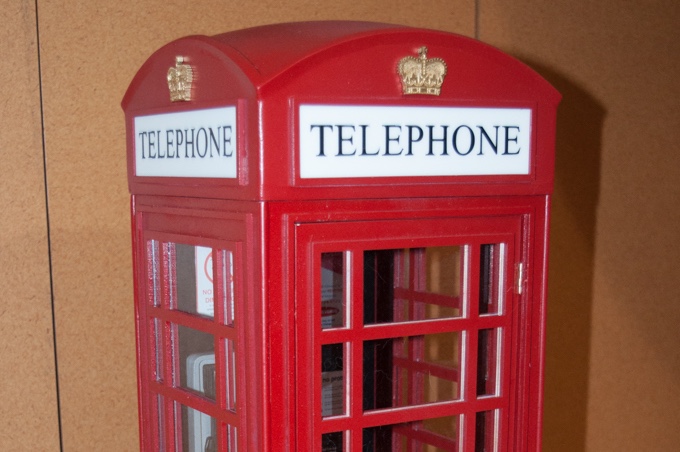
After three weeks of work, the Telephone Box is finally complete. Wow, I can't believe how nice it came out!
Read More...Jun 07, 2019
I couldn't wait to start painting, but it rained for two days. What a pain! It seems like every time I need to paint something outside, it rains!
Read More... May 26, 2019
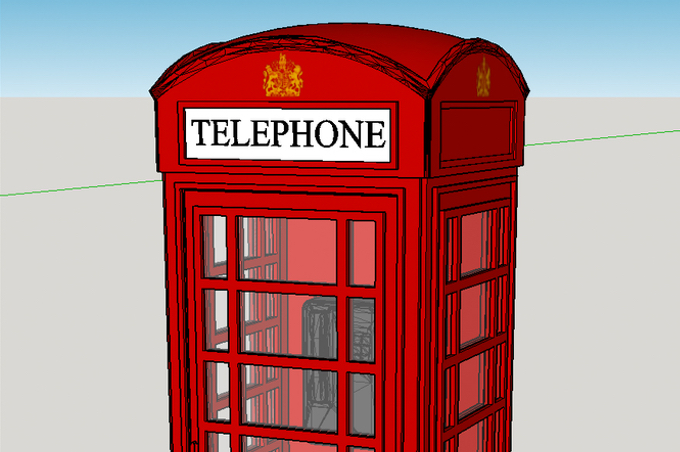
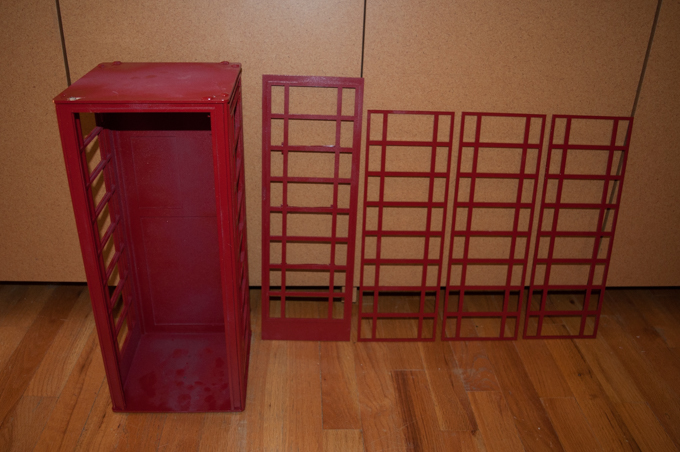
I saw this cool British Telephone Box model on Thingiverse and I thought it would be a really cool thing to make. However, once I got into it, I realized that I'd need to redesign the model from the ground up in order to laser cut one.
Read More...May 21, 2019
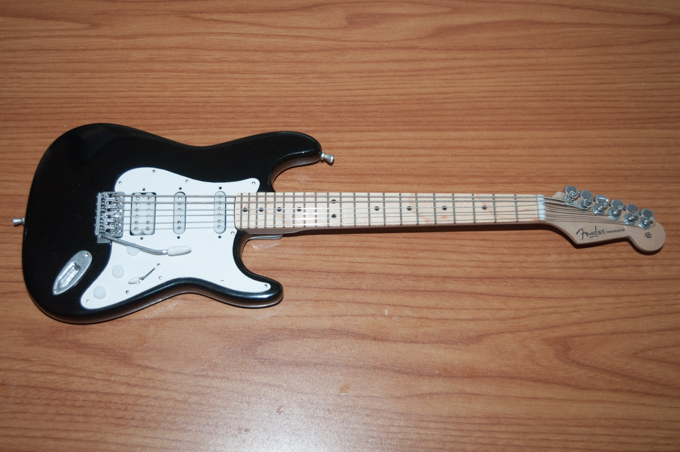
That's it! All done! Wow, this project took a log time to do, but if it's worth doing, it's worth overdoing. I spared no expensive nor detail in making sure that the Footlong Fender looked as real as possible. I think it came out amazing and I learned a lot of new things with this project.
Read More...Apr 21, 2019
I can't believe it's been over two months since I started this project. It's taking so long because it has to be perfect. There's been a lot of sanding, painting, sanding, and painting. A lot of trial and error, and some do overs.
Read More...Mar 27, 2019
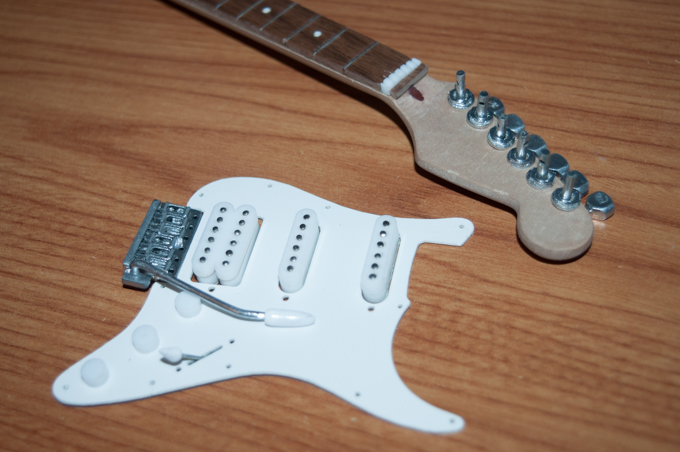
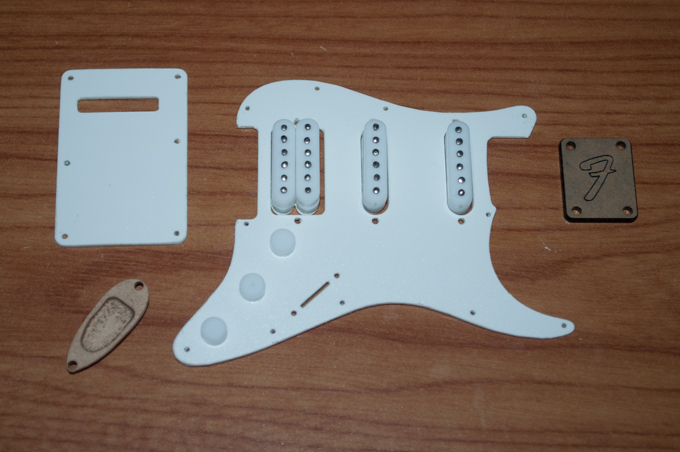
Such tiny parts! I've made a lot of progress on the Footlong Fender. It's been a lot of fun figuring out how to make such small parts. Each piece comes with its own challenges.
Read More... Mar 16, 2019
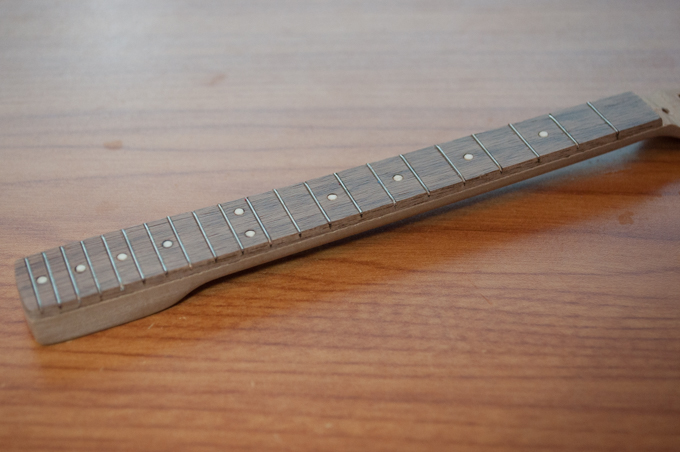
Work continues on the Footlong Fender. As far as the neck goes, I left off with having to make a new one. I over sanded the last one and it ended up being a do-over.
Read More...Mar 10, 2019
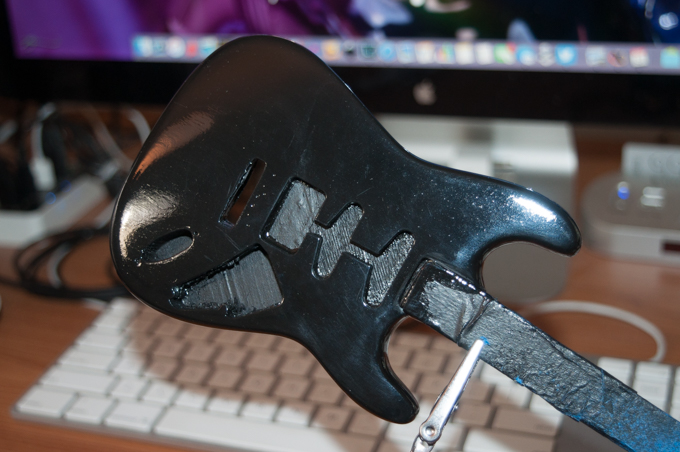
The Footlong Fender is coming along well. The body has been sanded, primed, and painted. I have a lot of the small parts made already and the neck is well underway.
Read More...Feb 12, 2019
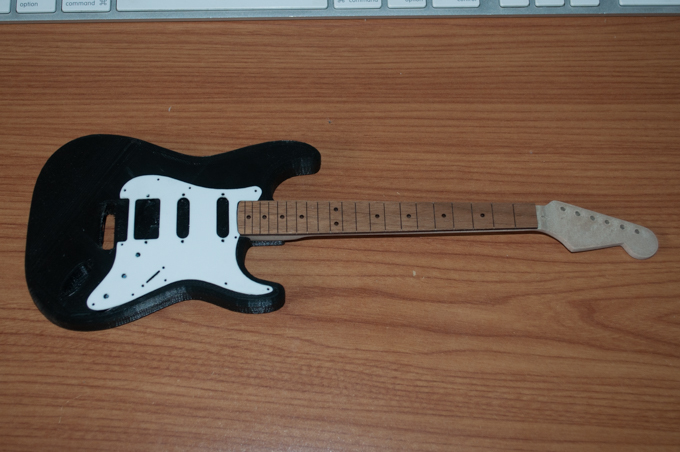
My Dad recently got into guitar so I picked him up a Fender Strat for Christmas. He's really happy with it. It got me thinking about what it would take to build my own guitar. Not a full-size Fender, but a mini one. A footlong Fender!
Read More...Sep 15, 2018
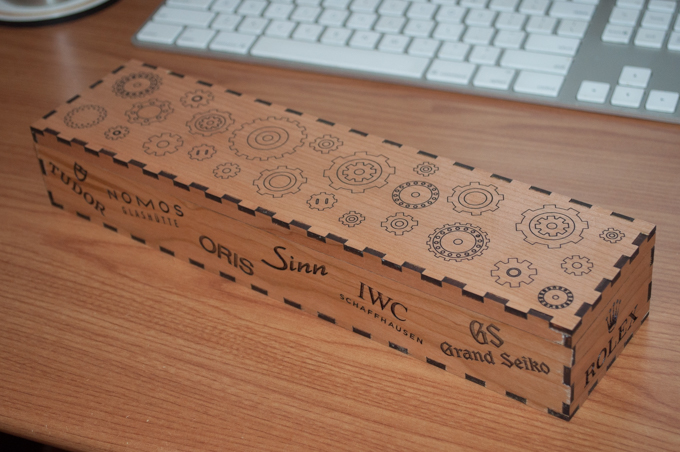
My collection of watch straps is starting to grow. I need a place to store them, but all the boxes that I see on Amazon just aren't fitting the bill. I love making things that you just cannot buy in stores.
Read More...Apr 29, 2018
I can't believe it took four months to complete. It came out awesome. It was well worth it to be patient and do everything right.
Read More...Apr 28, 2018
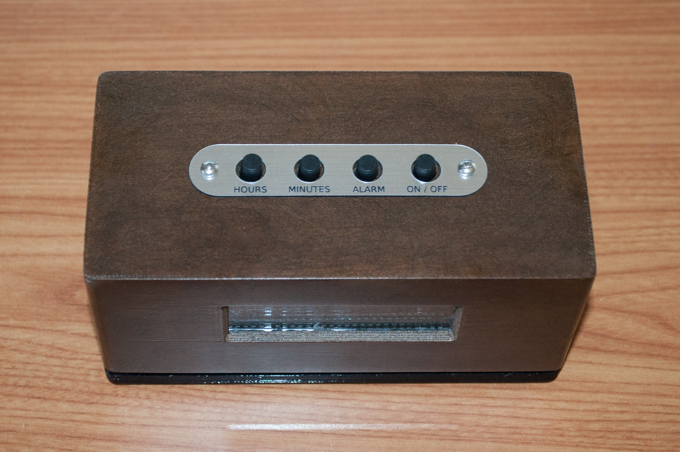
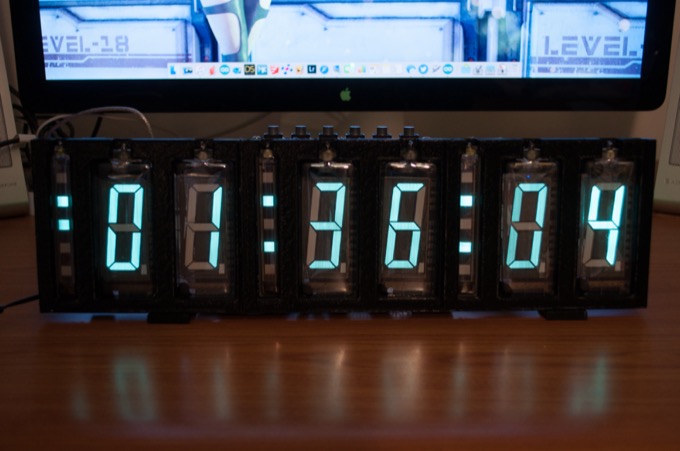
Woo hoo! My controller board works. All the hardware is complete. I just need to add the audio code and make a case for it. This clock is coming together pretty quickly!
Read More... Apr 08, 2018
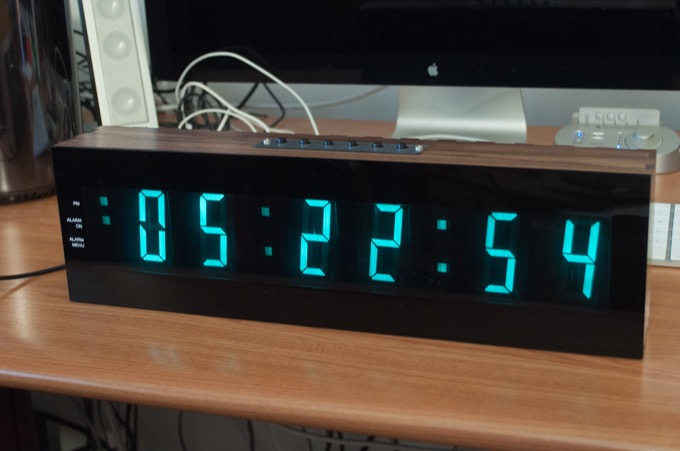
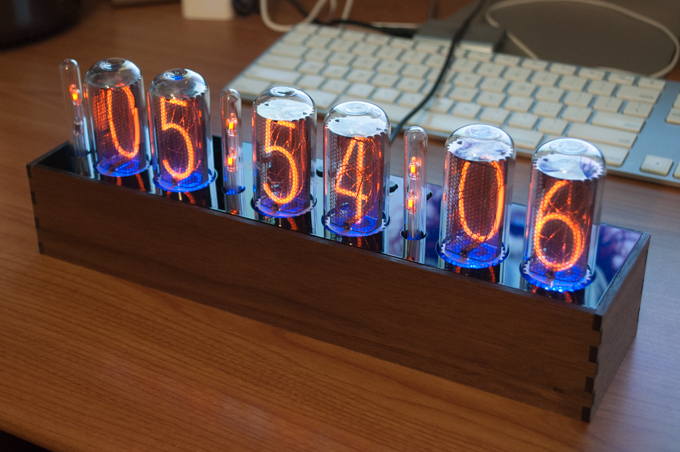
I left off six months ago with the completion of all the electronics for the new VFD clock. I was really happy with the way that it came out. All that I needed to do was make a case for it. However, I needed to wait until I had my Glowforge.
Read More... Mar 31, 2018
When I made the button boards for my VFD Clock, IN-12 and IN-14 nixies clocks, the plan was to have panels laser cut from Ponoko. They did not have the right material that I wanted. I figured I'd wait until I had a Glowforge and do it myself.
Read More...Mar 25, 2018
What a great weekend! Major progress has been made! All I need to do is finish the last two colons, design the controller board, and make a case for it.
Read More...Mar 24, 2018
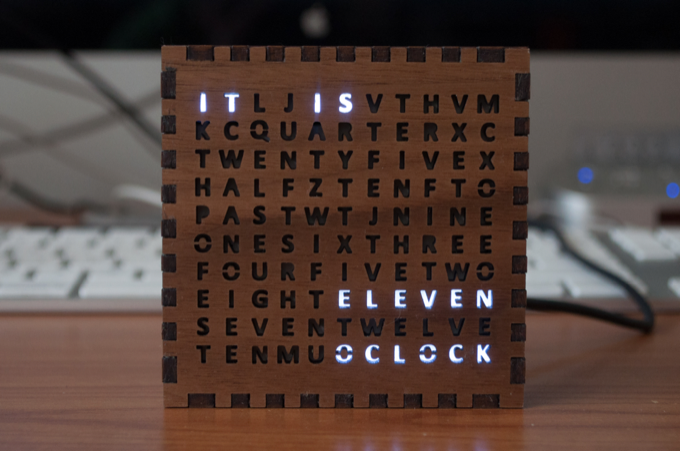
When I first designed the Word Clock 2, the plan was to laser cut the enclosure for it. However, it was going to cost too much to have it cut. It was too risky just in case the case didn't fit, or the holes in the back for the buttons weren't quite right. I decided to just 3D-print a case for it. Now that I have my own Glowforge, I can cut my own case for it!
Read More...Mar 18, 2018
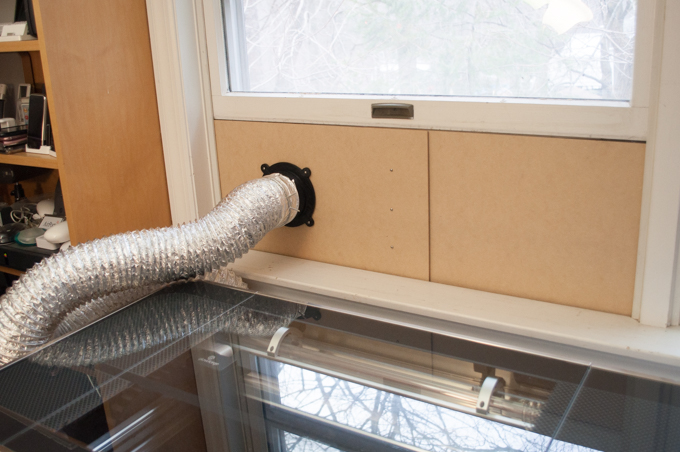
It's been a week and I'm having a blast playing around with the Glowforge. It's so easy to use. Although I haven't done much since it's been a busy week. It's been mostly tests and experiments. The first thing I really wanted to do was to come up with a better solution for the exhaust hose. It's not very practical just hanging the hose out the window. That, and it's a real pain to reach up to the top of the window behind the Glowforge.
Read More...Mar 12, 2018
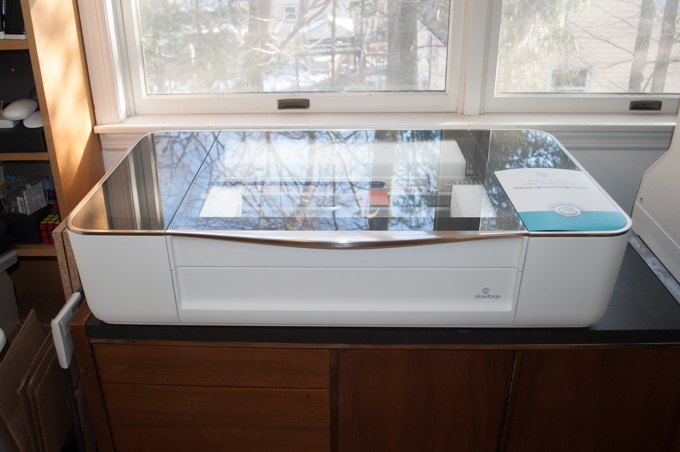
I can't believe after all these years I finally own a laser cutter. I have wanted a laser cutter as long as I can remember. The Glowforge is such a game changer. Before the Glowforge, laser cutters were unjustifiably expensive, clunky, complicated machines to use. The Glowforge is as easy to use as a 3D printer.
Read More...Oct 10, 2017
I got my PCBs in, assembled everything, and uploaded my code. Everything works as it should. I just need to design a case and it's a wrap!
Read More...Aug 30, 2017
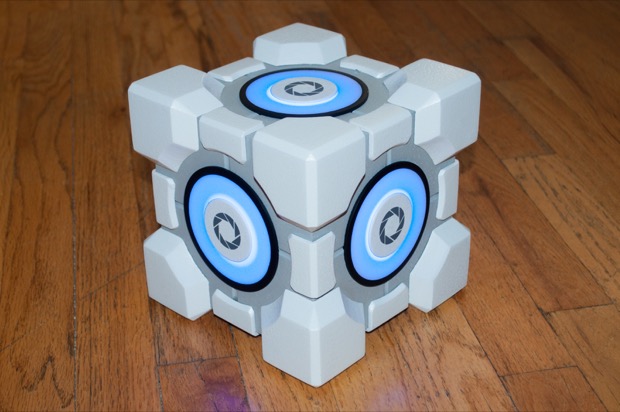
After a month of hard work my Portal Weighted Storage Cube is complete! This was such a great project because it had a little bit of everything: 3D modeling, 3D printing, laser cutting, painting, electronics, and coding. I got to do things that I'm really good and l try a few new things too.
Read More...Mar 01, 2017
What a long two weeks it's been! I was dying to get my hands on the boards! The assembly was a snap and I think it came out way better than I had imagined.
Read More...Feb 21, 2017
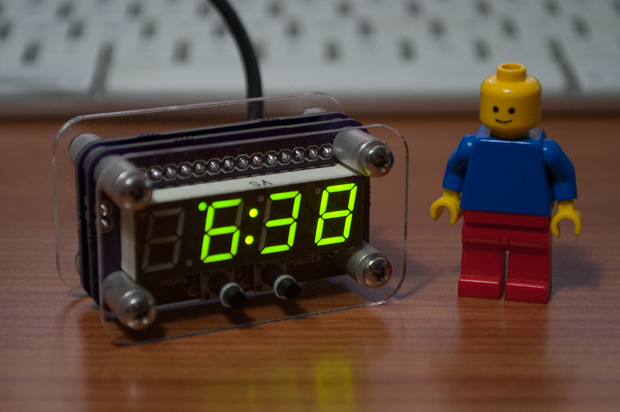
A friend of mine at work cut the cord on his cable TV. Needless to say, the cable box had to be returned. Unfortunately, he relies on that little clock under the TV all the time. He asked if it was possible to basically take my Mini 7-segment Clock V2 and cut it in half. Challenge accepted!
Read More...Aug 29, 2016
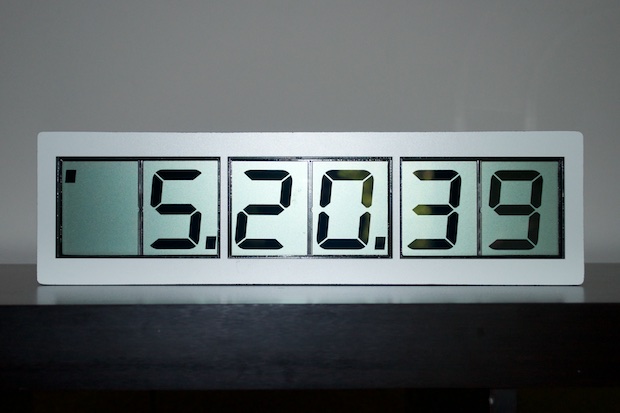
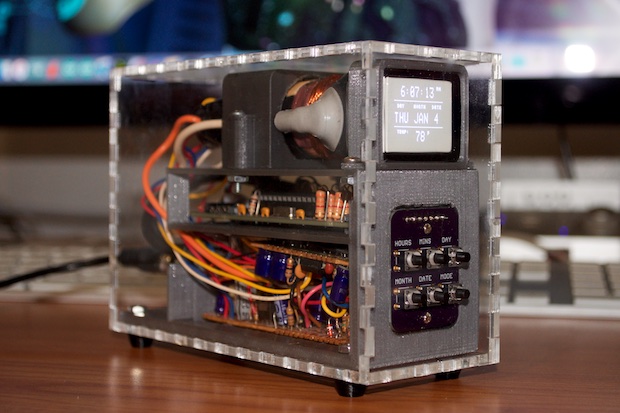
I’m so thrilled that I finally completed my 15” LCD clock. It was so much work and it took a long time to complete, but it came out awesome. It's like they say... if it's worth doing, it's worth over-doing.
Read More... Jul 22, 2016
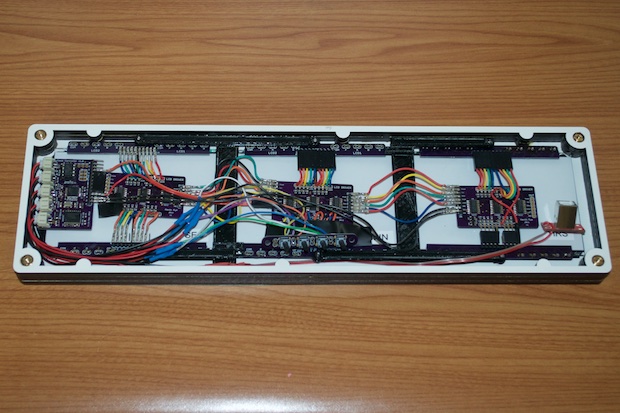
After some delays, I finally got the panels for the clock laser-cut. I thought I was going to just drop the electronics in and screw the back on, but I ended up having to redo a lot of the wiring to get things to fit. I’m still not done. As it turns out, I need to reorder some more panels to make the enclosure a little thicker. The wiring for the set buttons takes up more space that I had anticipated. So the clock’s not compete yet, but much progress has been made.
Read More...Jul 07, 2016
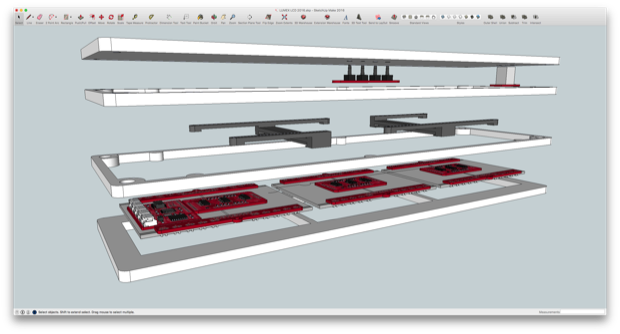
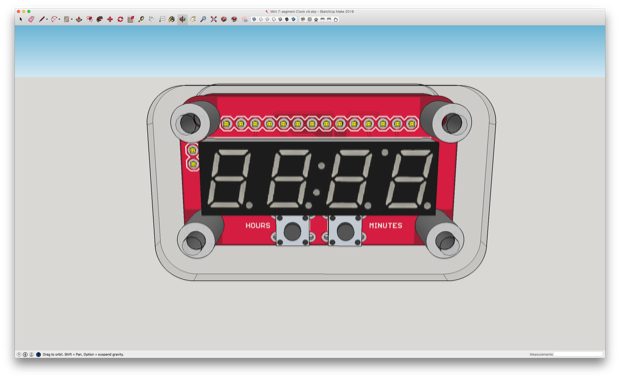
With all the PCBs assembled, it was time to get to work on the 3D model and the laser-cut enclosure.
Read More...Aug 22, 2015
I'm really proud of this one. I learned a lot from this project, and it was a lot of fun. It has a little bit of everything: PCBs, coding, 3D-printing, laser cutting. I put a lot of work into it, and I think it came out great. It's probably my most unique clock yet.
Read More... Jan 10, 2015
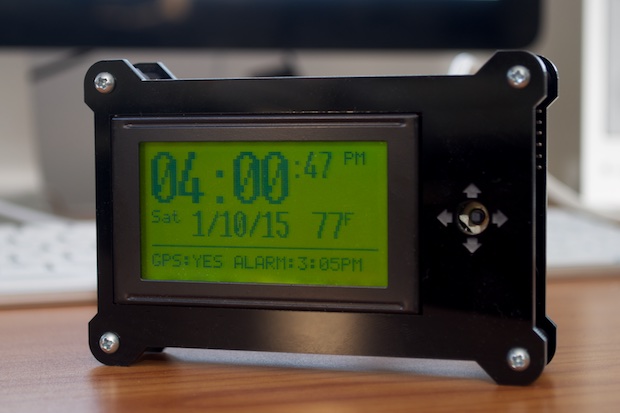
I've been working on this clock for a long time, and a lot of effort has been put into it. I've learned so much from this project. I do have to admit some parts of the code aren't as elegant as they should be, but it works. With the code complete, all that's left to do is try my hand at designing a 3D printed joystick for the 5-way switch.
Read More... Nov 08, 2014
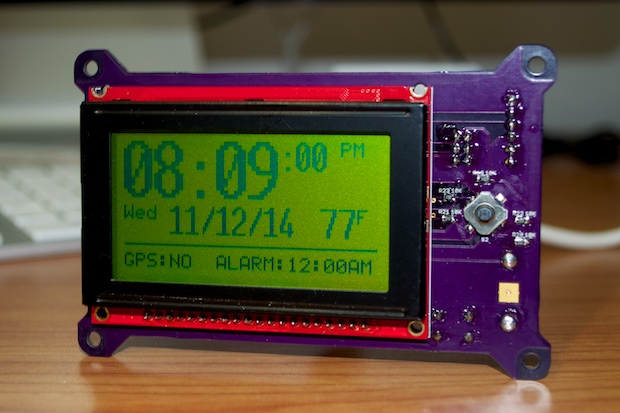
If you’re following along, you know that version 1.0 of my GPS clock was a total bust. I somehow managed to screw up the PCB. I had the FTDI RX and TX lines tied to the wrong port on the ATmega2560. There was just no way to rework the board. Besides, I like to keep my final projects looking neat and clean. Rework wires are just a big no-no in my book. That meant that I had to fix the error on the PCB and place another order. I got my boards and most of my parts. I soldered together what I could. So far, it looks like it’s going to work!
Read More... Jun 15, 2014

Since I wasn’t happy with the engraving on the first spin, as well as totally forgetting to make a cut out for the display, I revised my SVG file and resubmitted it to Ponoko. As far as the color, I think it’s going to look pretty good. I might lower the value of the resistors in order to brighten up the digits. I’ll have to see what it looks like when it’s all put together.
Read More... May 29, 2014
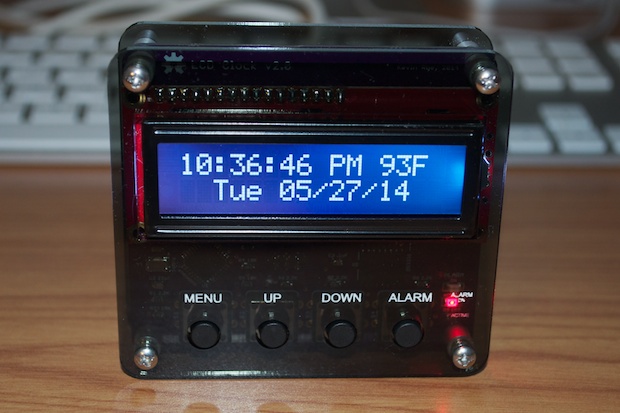
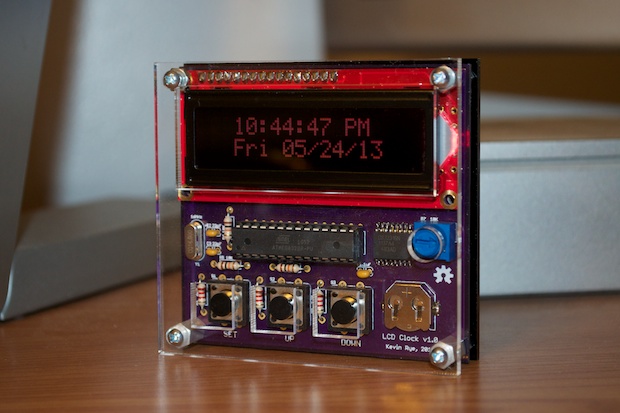
With my PCBs and the laser cut acrylic in hand, it was time to wrap this guy up. I think this clock came out so much better than version 1. I can’t think of a reason to do a version 3. With this, I think I’ve done all I can do with a 16x2 LCD clock.
Read More... May 25, 2014
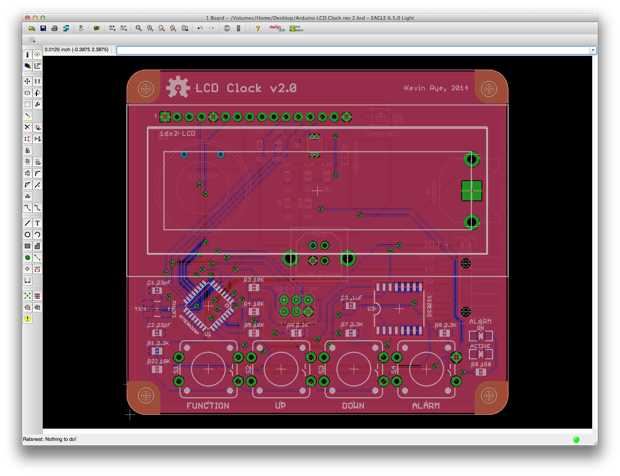
When I had shelved this clock a year ago, I had gotten pretty far with the PCB. Although I still had some design decisions to make, as well as a ton of code to write, it was pretty much complete. Now that I’ve spent some time working with SMD Atmegas, I decided to redo the PCB to make it all SMD.
Read More... May 21, 2014
While the PCBs for the new daughterboard were being fabbed, I took the time to design a new laser-cut acrylic enclosure. It needs a few tweaks, but overall it came out awesome... and the PCB fits like a glove!
Read More... Jan 14, 2014
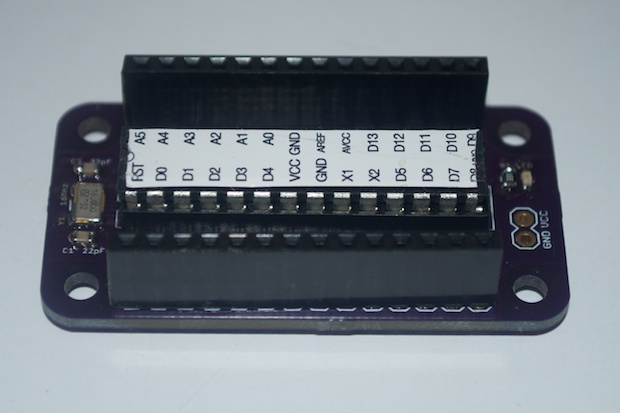
It’s only been 12 days and already I have my PCBs in-hand. This was such an easy build, and they work great. Now I just have to wait for my Temperature Shield to come in and I can complete my first project with one of these.
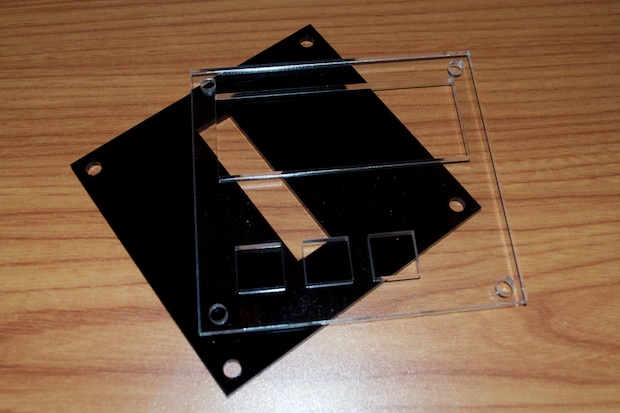
Read More... May 26, 2013
If you remember, the first attempt at getting a front panel laser cut for my LCD clock didn’t work out so well. I don’t think it was a tolerancing issue. I think I just screwed it up.
Read More... May 17, 2013
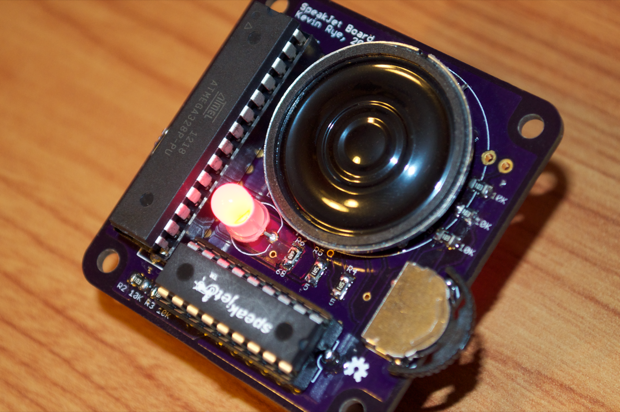
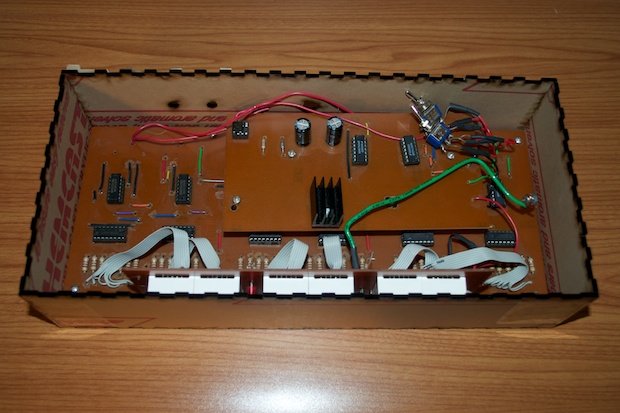
If you’ve been following along, you know that I picked up a SpeakJet chip about a month ago. It’s a pretty cool chip. It didn’t take long to realize that it would make for a pretty cool R2-D2 project.
Read More...Apr 25, 2013
Although I was pretty happy with the wooden DIY stands that I made for my Arduino LCD Clock, I thought they looked a little too homebrew. I was looking for more of a “finished product” kind of look. I imagined something fashioned out of acrylic. That didn’t work. I threw around the idea of getting some acrylic laser cut, but I didn’t know the first thing about doing it.
Read More... 
