My Mini 7-Segment Clock has to be one of my favorite projects to-date. I really like the way that it came out. It's so tiny!
I’ve had a lot of people ask me if I plan on selling a kit for it. I even received an email from a reader who sent off to have some boards fabbed. He put one together himself and reported that it worked out great. When someone else builds one of your designs, it's a nice little pat on the back.
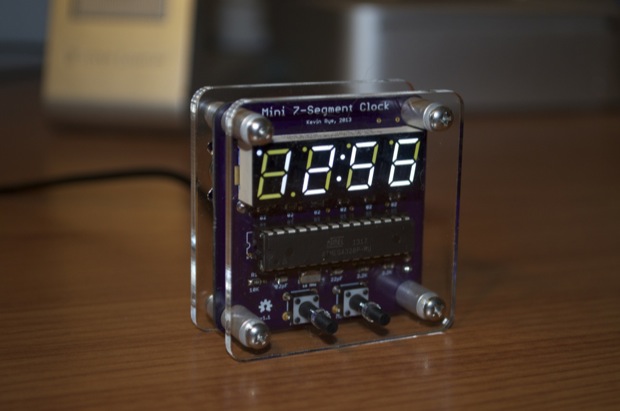
I’d love to sell a kit, but it’s just not cost effective. From the ATmega, to the PCB, to the power supply, it all adds up to a good $25 bucks at cost. I made this as a novelty for myself, so cost wasn’t a concern. However, I can’t sell it at cost, and I can't see anyone paying $50 bucks for one either. So what am I to do?
Sounds like a Version 2 is in order.
The first order of business is getting the bill of materials down to where I can sell a kit for about $25 bucks and not lose my shirt in the process. All the caps, resistors, switches, etc are pennies, so there's nothing more I can do there to lower the cost. I need to shrink it down a bit to save money on the PCB, and swap out the 28-pin DIP version of the ATmega328 for the SMD version that's a $1.25 cheaper.
I love using OSH Park for my PCBs. Their order process is painless, the quality is amazing, and boards are in your hands in about 2 weeks. They’re great if you just need a few boards to crank out a project, but they are a little expense if you want to start doing larger batches. They're also only available in purple. If you want your PCBs done in red, blue, or black, you're out of luck.
The clock PCBs cost $6.45 from OSH Park. That’s pretty cheap, all things considered. However, say I wanted to sell 50 kits, that would cost me $322 bucks just for the PCBs! That’s a lot of money.
I searched around and found a few sites that can do small batches of PCBs. If your PCB fits within 5cm x 5cm, you can get 50 PCBs made for about $1 a board. Granted, they come from China, so the wait will be a lot longer. (4 weeks!) I checked a few sites and although the quality isn’t as good as OSH Park, it’s not terrible either. As with everything, you get what you pay for. However, I’ve Googled for a ton of images for Seeed Studio and iTead PCBs and they looked pretty darn good. I was still kind of on the fence until I saw some black PCBs from iTead. They looked awesome. So it's definitely worth getting 10 or so boards made just to check them out.
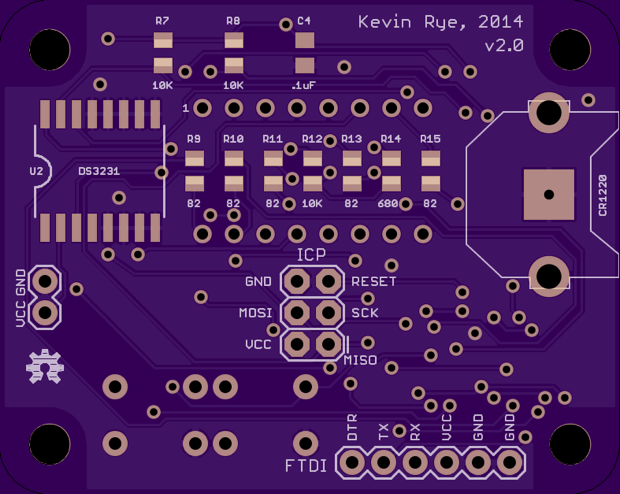
Since I'm changing the ATmega to a SMD version, I'll also need to include ICP and FTDI headers. This will also make the clock a little more hackable. You'll be able to load your own bootloader as well as upload a modified sketch with ease. Maybe you'll want the display to toggle the time and date. It'll be easy to do.
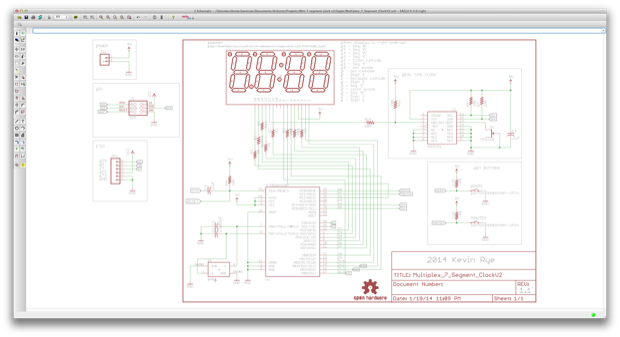
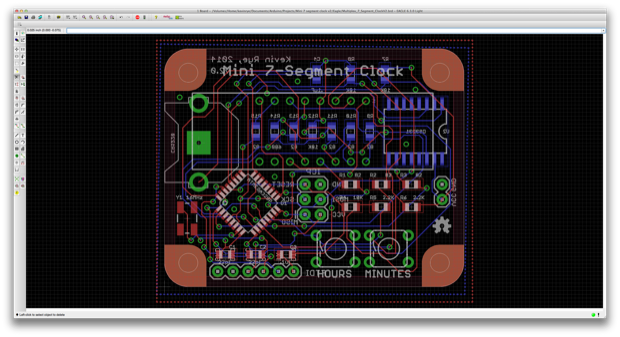
With that, I redesigned the clock with the new ATmega and added the two new headers.
Even though I added two new headers, I was still able to shave 10mm off the height of the board. It now measures 50mm x 40mm. Those SMD ATmegas are tiny!
In order to validate the design, I still want to have them made by OSH Park first. It's quick and easy. Once I put one together and verify that the design is solid, I can go ahead and order a bunch more from the likes of Seeed Studio or iTead.
Here's the OSH Park render:
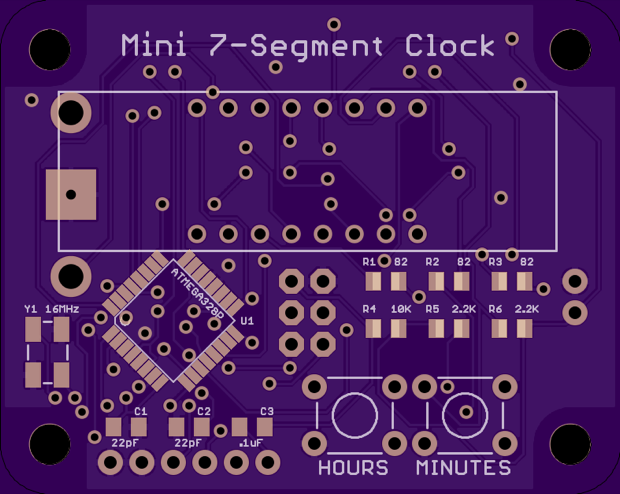
I moved the switches a little off-center to the right and shuffled everything else around in order to fit the SMD ATmega. I rotated the ATmega 45 degrees. I think chips look cooler when they're rotated, but in all seriousness, it is easier to run a trace from one side of the board to the far side of the chip when it's rotated.
I moved most of the text from the front to the back just to help keep the front a little cleaner. My name on the back is more of a signature now than the heading that it was on the front. With the exception of the ICP and FTDI headers, everything else pretty much stayed the same.
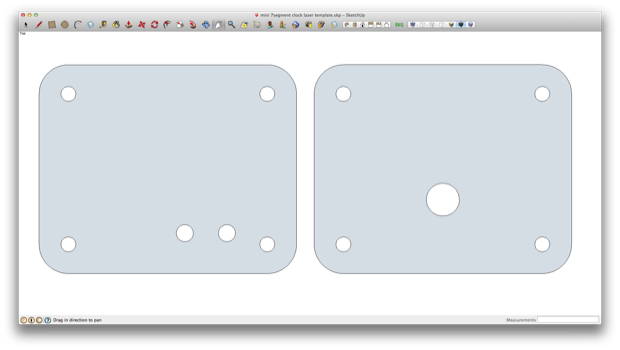
Since the footprint has changed, I can't just fire off another batch of laser cut acrylic panels from Ponoko. I'll have to design a new one from scratch and submit a new file.
I'm not going to bother making cut-outs for the ICP and FTDI headers. I think that'll make the enclosure a little too ugly. Realistically, how many times does the bootloader get written? Once? So there doesn’t need to be a full-time hole in the enclosure for it. Same goes for the FTDI header. Once you've settled on your code and you've uploaded your sketch, you should be done. At that point, it's safe to button it all up and put it on display. I don't think anyone's going to be routinely uploading new sketches to it. So again, there's no need to keep a hole in the enclosure to get to the header. This is supposed to be a finished product and not a development platform.
I jumped into SketchUp and created a new panel and moved the holes for the buttons over.
I uploaded it to Ponoko and paid a little extra to rush the order. It’ll only cost $9.67 to get 3 sets made. Hopefully they arrive around the same time as my parts and PCBs do.
As far as power, I haven't decided what I'm going to do yet. I like the adapters from SparkFun, but at $5.95 a pop, they're a little expensive. Ideally, I'd like to use a USB cable. This way, it can be plugged into your desktop, your monitor, or even a small, inexpensive USB adapter. (Like the $5 iPhone knock-offs you find at gas stations checkout counters.) SparkFun even sells a USB version of their 5V adapter for $3.95. It's just a matter of finding a USB cable for a buck or two that I can solder a 2-pin plug to.
We'll see. It all depends on what I can get my hands on without breaking the bank, or driving the price up.
See this project from start to finish: Mini 7-Segment Clock V2, Part I
Mini 7-Segment Clock V2, Part II
