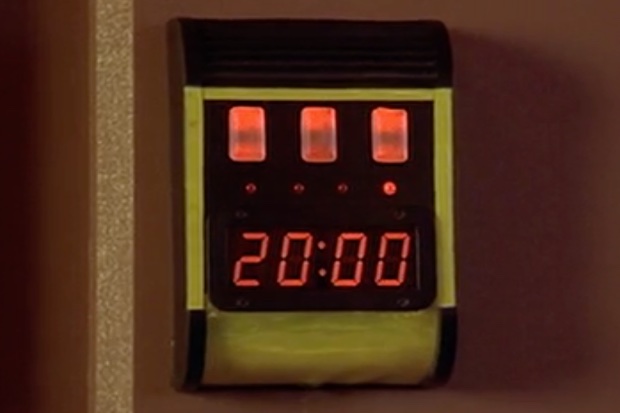
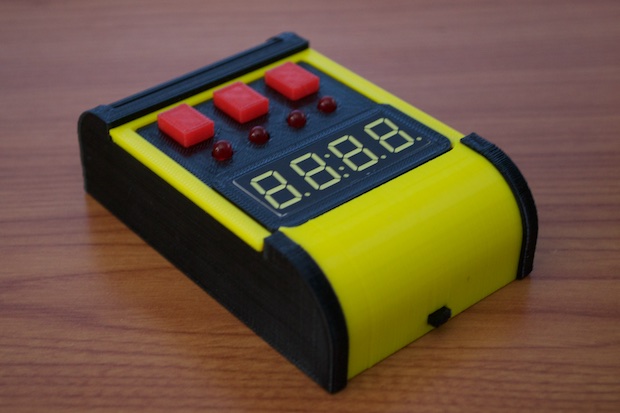
It’s the Zorg Door Bomb!
The Fifth Element is one of my all-time favorite movies. I watched it again the other day and as soon as I saw Zorg’s Door bomb, I said to myself, “I’m so building that!”
One of the hardest parts will be designing it so that I can slide a PCB into a slot on the top to deactivate the alarm.
It’s hard to figure out the exact size, but I think it’s about 4” tall; about hand-held size.

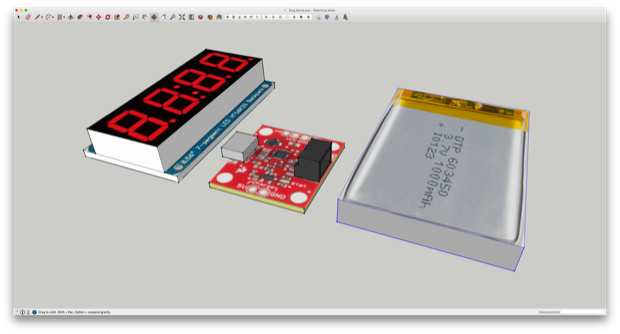
I have a few 50mm wide 4-digit 7-segment displays. So I think I’ll try and get as close to the right size as I can with one of these displays. Looking at some of my reference images, they definitely didn’t use 1” digits. I’m just hoping that the .56” digits in my display aren’t too small.
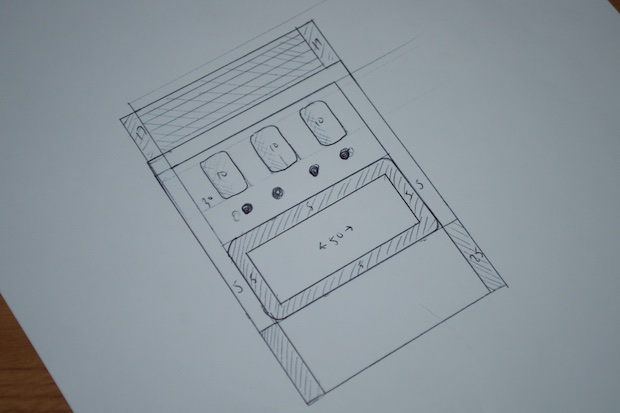
I first started by roughing out on paper a few approximate dimensions from what I could make out on screen.
From there, I jumped into SketchUp and started to rough out a model.
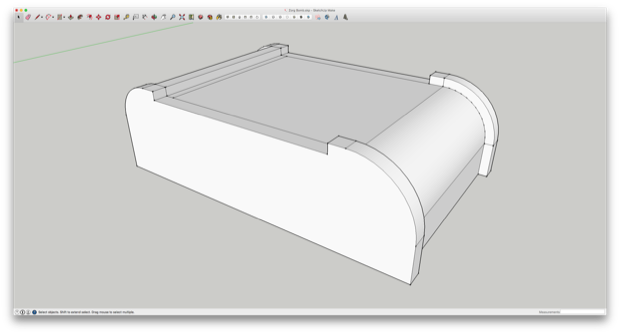
Not bad.
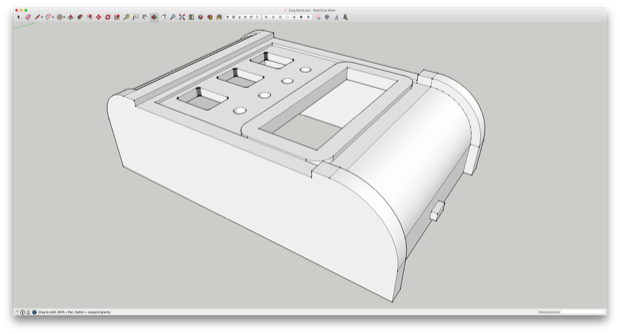
I gave it a print and fitted it with one of my 50mm displays and some 5mm LEDs. I nailed the hole sizes. They’re perfect. The whole thing measures about 4.25” x 2.75”
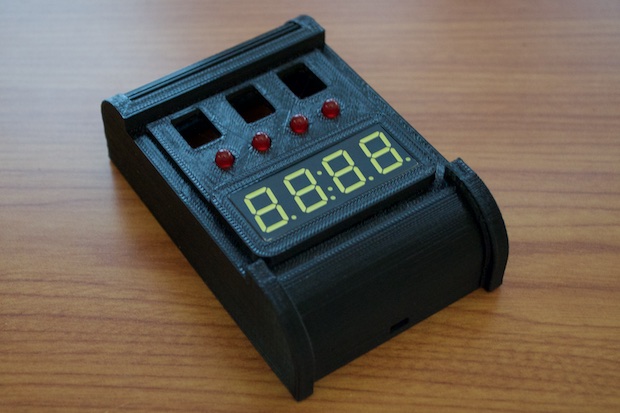
Happy with the results, I went ahead and started to work on the details.
The completed model looks pretty damn close.
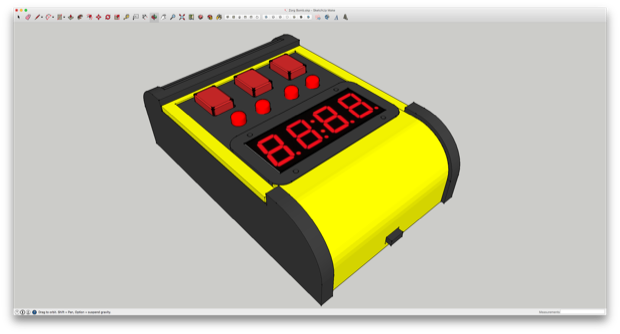
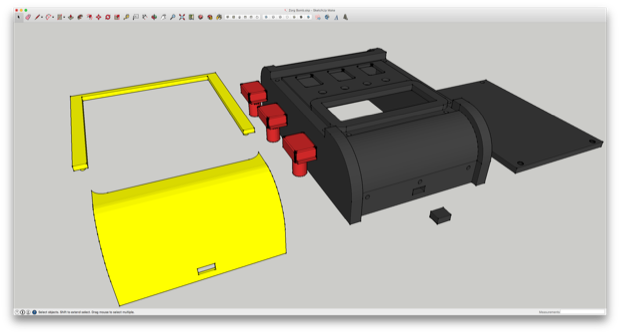
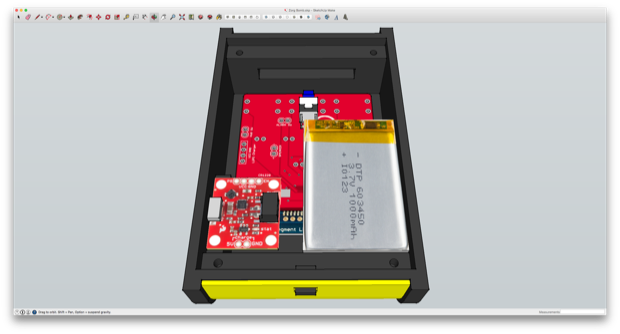
I then printed out the red and yellow parts and fitted them to the main housing. I’m eventually going to glue the yellow parts on, but I’m going to hold off on that until I can test that the electronics will fit. If I have to tweak the model, I don’t want to have to reprint the yellow parts too. I’ll also need to give the buttons a light sanding to smooth out some of the rough edges.
I mocked up models of the display with an I2C backpack, a LiPo battery, and a SparkFun LiPo charger.
I then played around with the placement so that everything would fit along with a PCB.
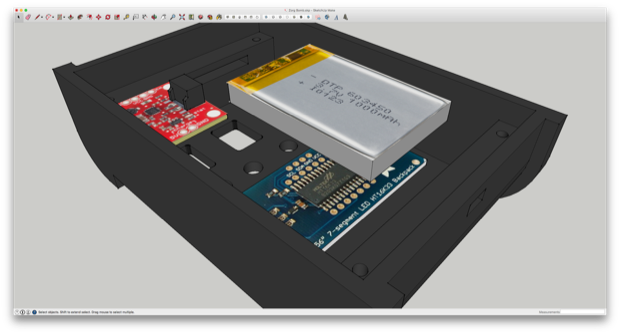
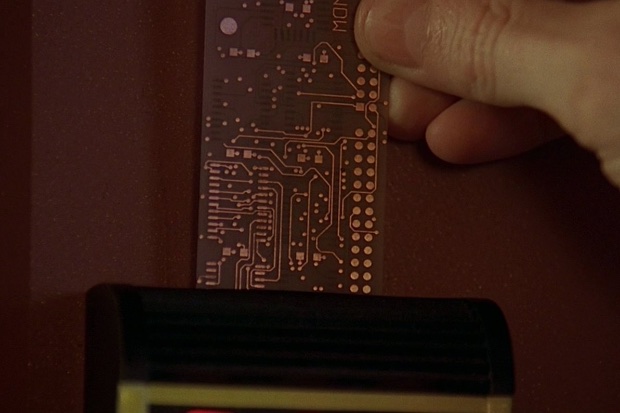
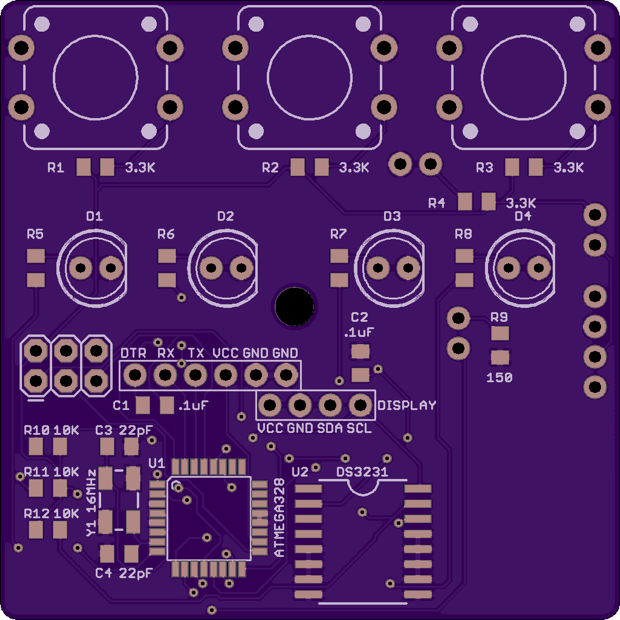
Knowing what kind of space I had to work with, I went ahead and designed a PCB.
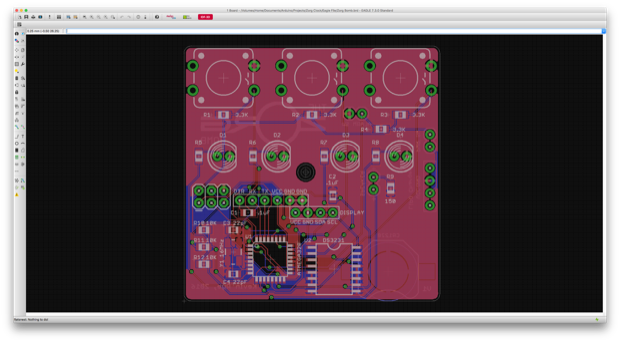
I will have to mount a push button on the back of the PCB that will be pressed when the PCB card-key slides in from the top. I just hope that there’s enough clearance there to pull it off. If not, I’ll have to add a few millimeters to the model.
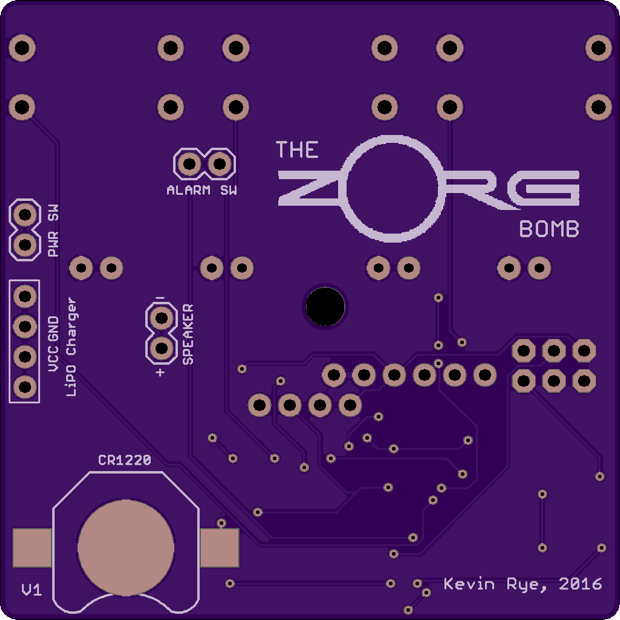
I’m also not sure if the speaker is going to be audible through the back either. I might have to do away with soldering it to the board and mount it on the side and make a hole. I’ll then just run wires from the speaker to the PCB. I won’t be sure until I have everything in my hands.
With everything looking pretty good, I went ahead and ordered my board from OSH Park.
I even threw a little flare on the back in the ways on an imported bitmap of the Zorg logo.
The wait is going to be a killer. I’m dying to put this together and write some code!
See this project from start to finish:
The “Zorg Door Bomb”…Clock - Part I
The “Zorg Door Bomb”…Clock - Part II The “Zorg Door Bomb”…Clock - Part III
